Managing the Virtual Card Module
The Expensya virtual card is a digital card that can be loaded with a predefined amount and activated for a specific period.
This card has the same features as a traditional card, including a card number, a CVV code, and an expiration date.
It can be used just like a regular credit or debit card.
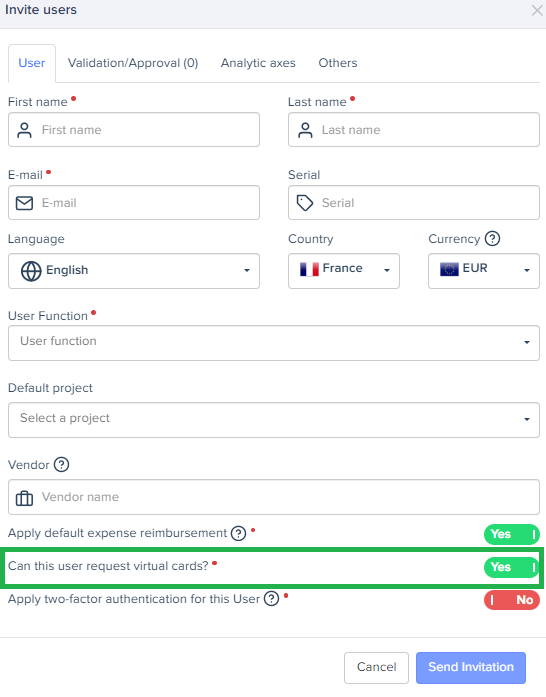
Authorization for Virtual Card Requests for Employees:
Once virtual payments are enabled for a tenant, a new setting on the employee profile becomes available, allowing you to specify whether the employee can request virtual cards. This setting empowers you to manage and control which employees have the ability to request and use virtual cards within your organization.
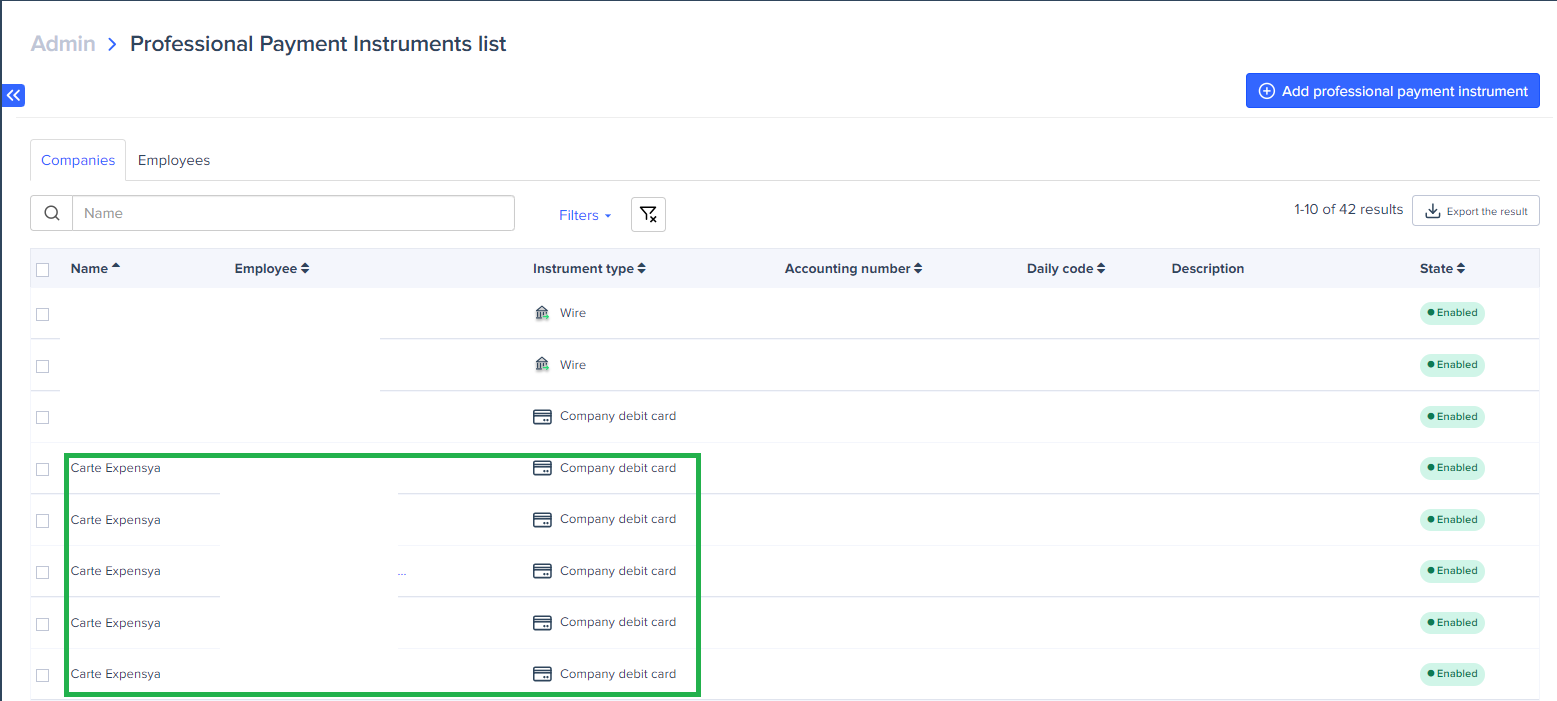
The "Expensya Card" Payment Method
Upon activation of virtual payments for a user, a new payment method called "Expensya Card" is automatically created and assigned to that user. The Expensya virtual card is a corporate debit card used for expenses paid via the Expensya virtual card. This card serves as the designated payment method for managing and tracking expenses within the Expensya system.
Creating a Project Related to Virtual Cards
Creating a project or cost center allows you to group expenses by categories or services. Here are the steps to create one:
- Log in to the Admin interface.
- Click on Projects or Cost Centers, depending on the terminology used in your system.
- Select Add a Project or Add a Cost Center, depending on the option provided in your system.
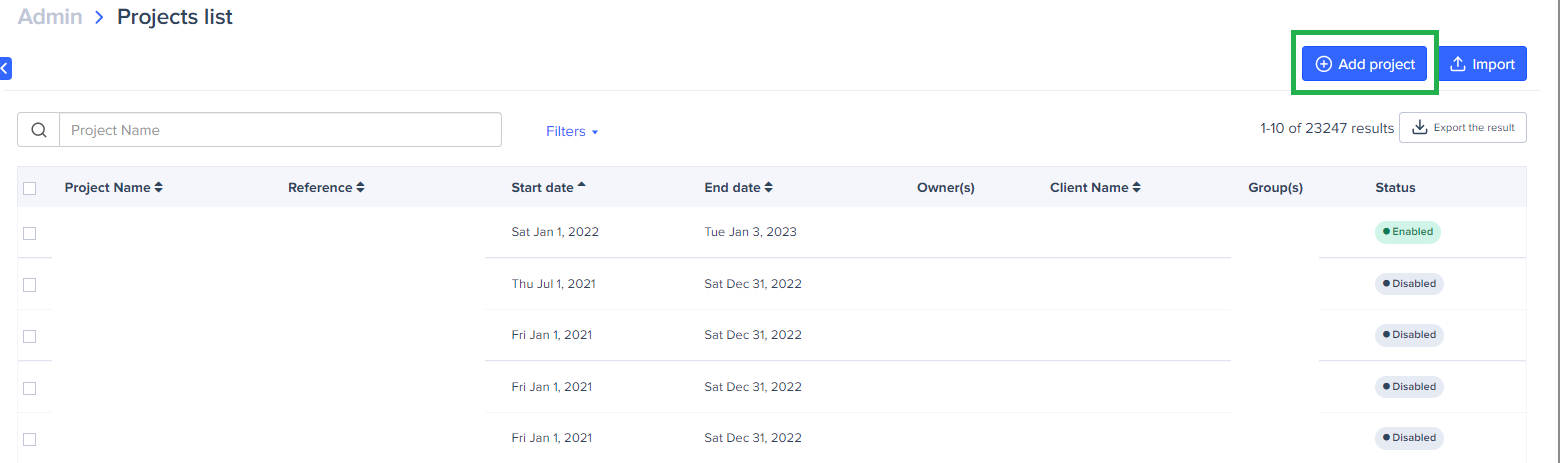
- Fill in the necessary fields to identify the project while ensuring to check the Virtual Card option in the expense type field. This will allow you to categorize and link the project to virtual card expenses for accurate tracking and management.
- Click on the Approval tab.
- Designate the approver for the project if you require a specific approval process for virtual card expenses. After making any relevant selections.
- Remember to save your changes.
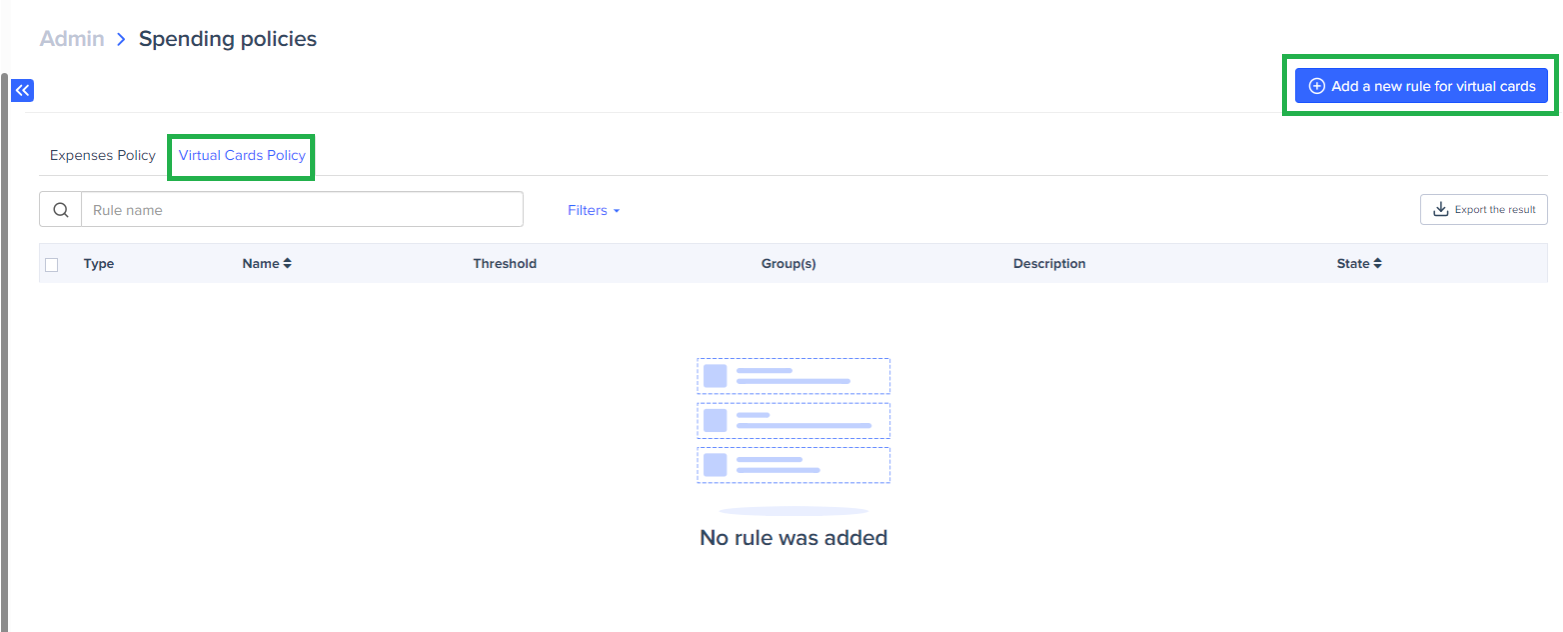
Setting Up a Rule for Virtual Cards
Here's how you can configure a rule for virtual cards within the administrative interface:
- Log in to the Admin interface.
- Click on Spending Policies.
- Select Virtual Cards Policy.
- Click on Add a New Virtual Card Rule.
This allows you to create and customize specific rules and guidelines for the use of virtual cards within your organization.
- Click on "Automatically Allow Certain Virtual Card Requests" or "Automatically Prevent Requests for Certain Virtual Cards." This step allows you to define automatic approval or rejection criteria for specific virtual card requests, providing greater control and efficiency in the virtual card management process.
- Fill in the authorization or rejection threshold as needed.
- Click Next to continue the rule configuration process.
- Fill in the Rule Name field with the desired name for the rule.
- Confirm the creation of the rule by clicking on Add Rule.
Viewing Virtual Card Requests
As an administrator, you have access to view various virtual card requests.
From the Admin tab:
- Open the Payment menu.
- Click on Virtual Cards.
To deactivate a virtual card, you can follow either of these two methods:
- Open the specific card you want to deactivate.
- Click on Deactivate.
Or:
- From the list of virtual cards, select the card you wish to deactivate.
- Click on Deactivate.