Tags in Expensya
In addition to dimensions, you have the possibility to create tags on Expensya. As an administrator, manager or accountant, tags allow you to create groups, filter the display of a list, mark processed expenses and much more!
The creation of tags is done through the support team, by communicating:
• The name of the tag
• A description of the tag (optional)
• Type of use (for expenses, users, notes, etc.)
• Who can assign the tags, except the administrator (approver and/or accountant)
• Who can see the tags (all collaborators and/or approver)
• The name of the tag
• A description of the tag (optional)
• Type of use (for expenses, users, notes, etc.)
• Who can assign the tags, except the administrator (approver and/or accountant)
• Who can see the tags (all collaborators and/or approver)
Assign a tag to an expense
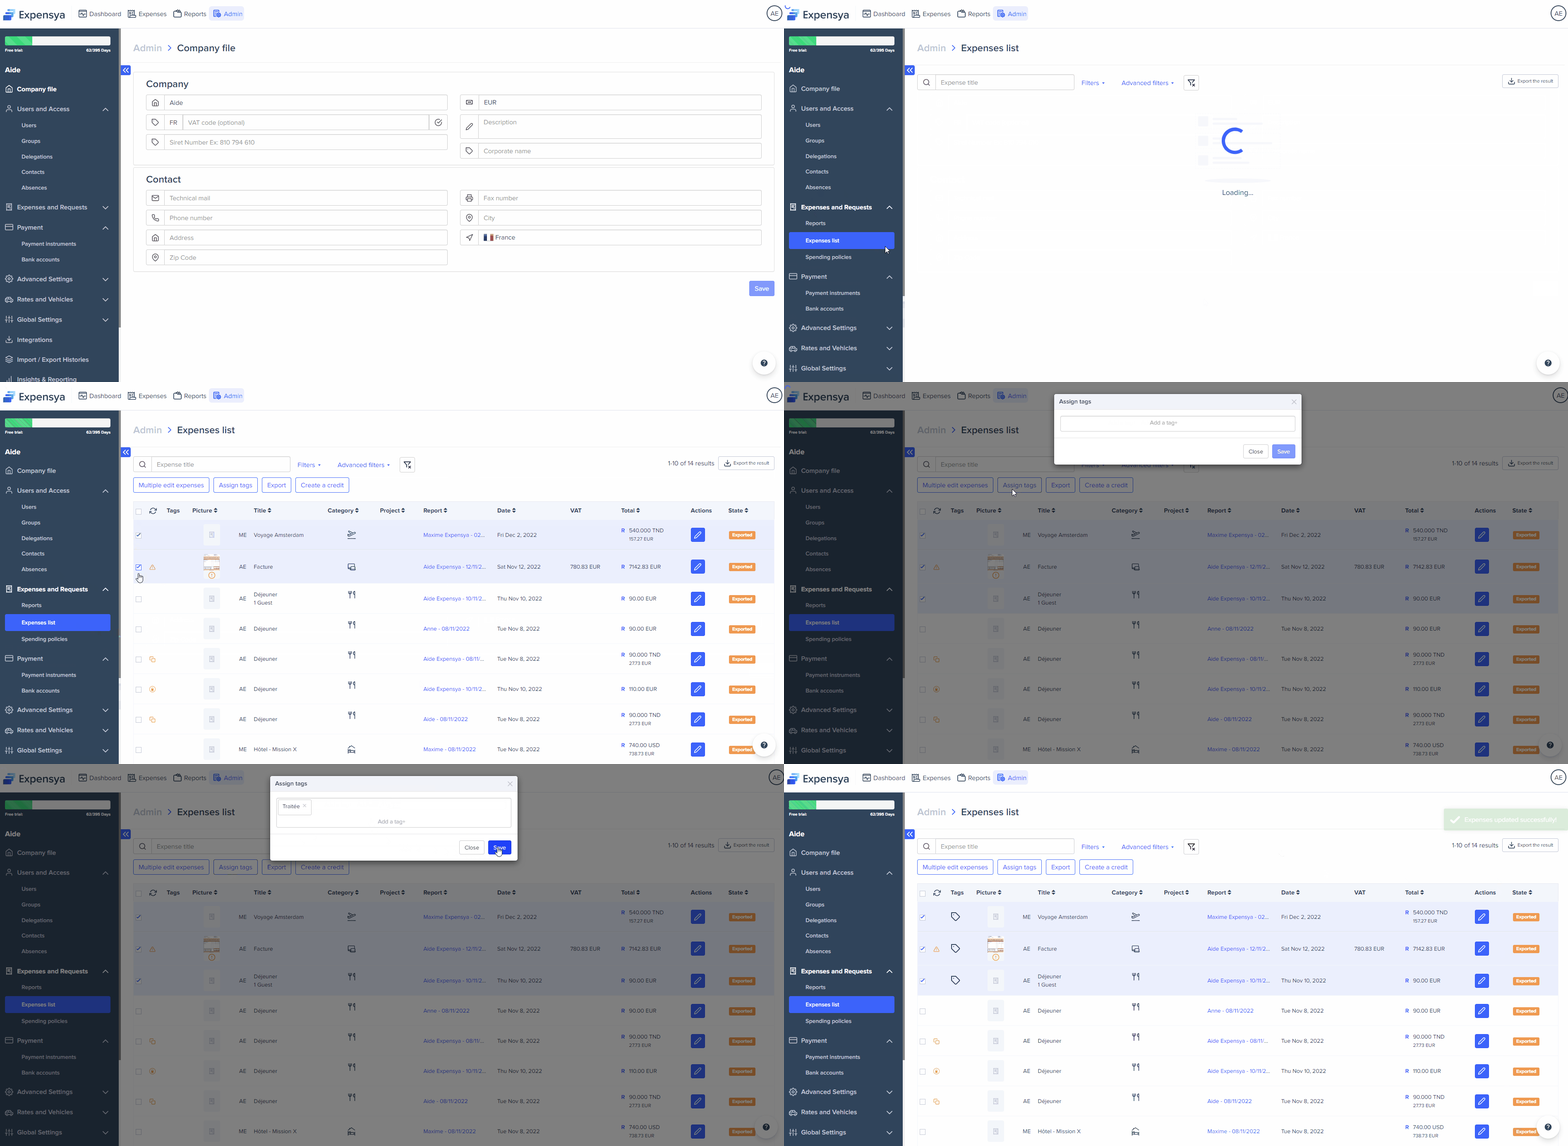
Let's take the example of an administrator who wants to mark reimbursed expenses with a "Reimbursed" tag. After contacting the support team to create the "Reimbursed" tag for expenses, he would simply
- Go to the Admin tab, then the Expenses and Requests menu
- Go to the Expense List submenu
- Check the expenses processed
- Click on the Assign tags button
- Choose the Processed tag
- Finalize the assignment via the "Save" button

To view the tags assigned to an element, simply place the mouse cursor over the tag icon.
Several tags can be assigned to the same element.
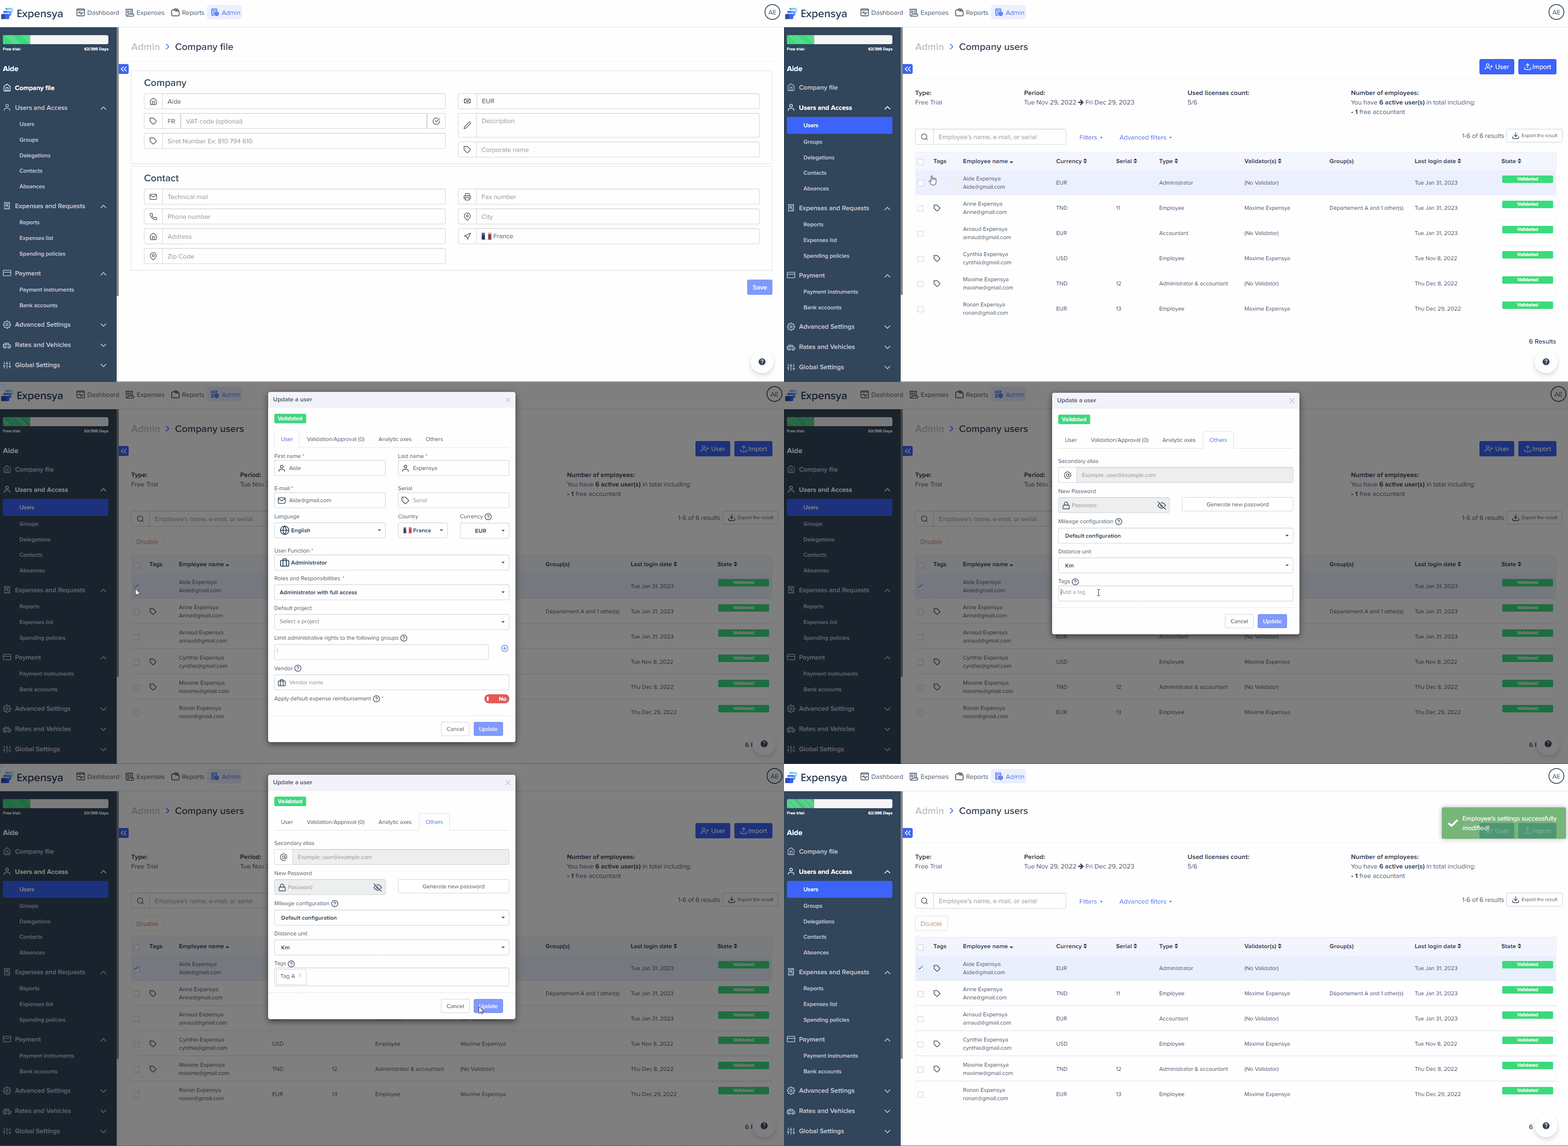
Assign a tag to a user
- Go to the Administration tab, then the Users and Access menu
- Go to the Users submenu
- Click on the user to whom you want to assign the tag(s)
- Go to the Others tab
- In the Tags field, choose the tag(s) you want to assign to the user
- Finalize the assignment via the Update button

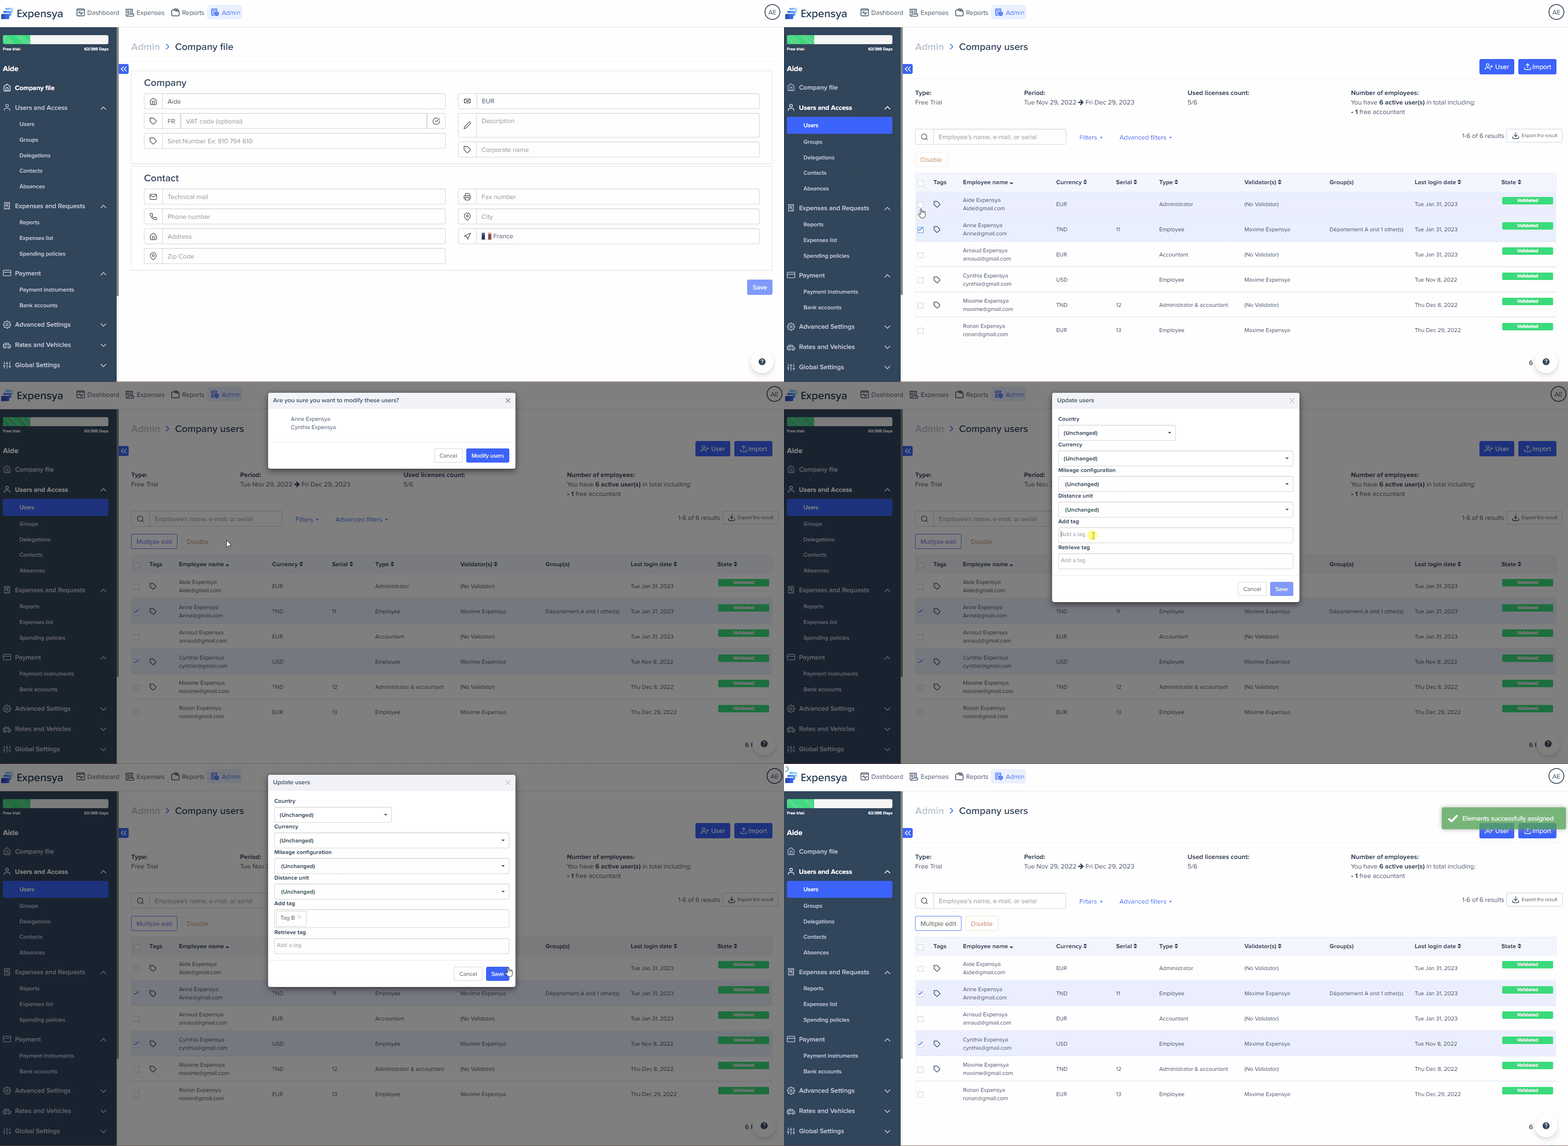
Assign a tag to several users
- Go to the Admin tab, then the Users and Access menu
- Go to the Users submenu
- Select the users to whom you want to assign the tag(s)
- Click on the Multiple modification button, then on Modify users.
- In the Add a tag field, choose the tag(s) you want to assign to users
- Finalize the assignment via the Save button

