Configuring the Expensya-QuickBooks Integration
 Updated
QuickBooks is no longer available in France.
The configuration of Expensya-Quickbooks integration can anly be performed by the account administrator and it concerns the following two parameters:
- Linking Expensya and Quickbooks categories
- Choosing the accountable accounts for reimbursable expenses.
Link the categories of Expensya and Quickbooks
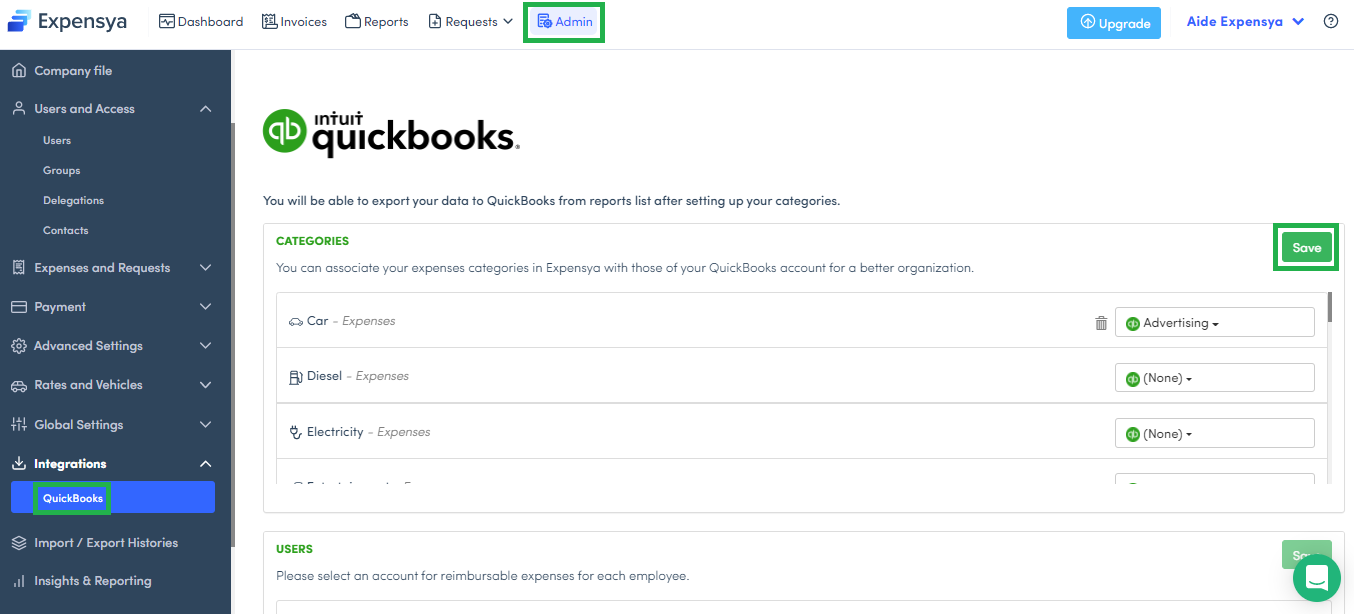
The admin can link the categories on Expensya to Quickbooks from the web.
- Go to the Administration tab, under Integration -> Payment Quickbooks
- Link the categories of Expensya (left) to those of Quickbooks (right),
- Save.
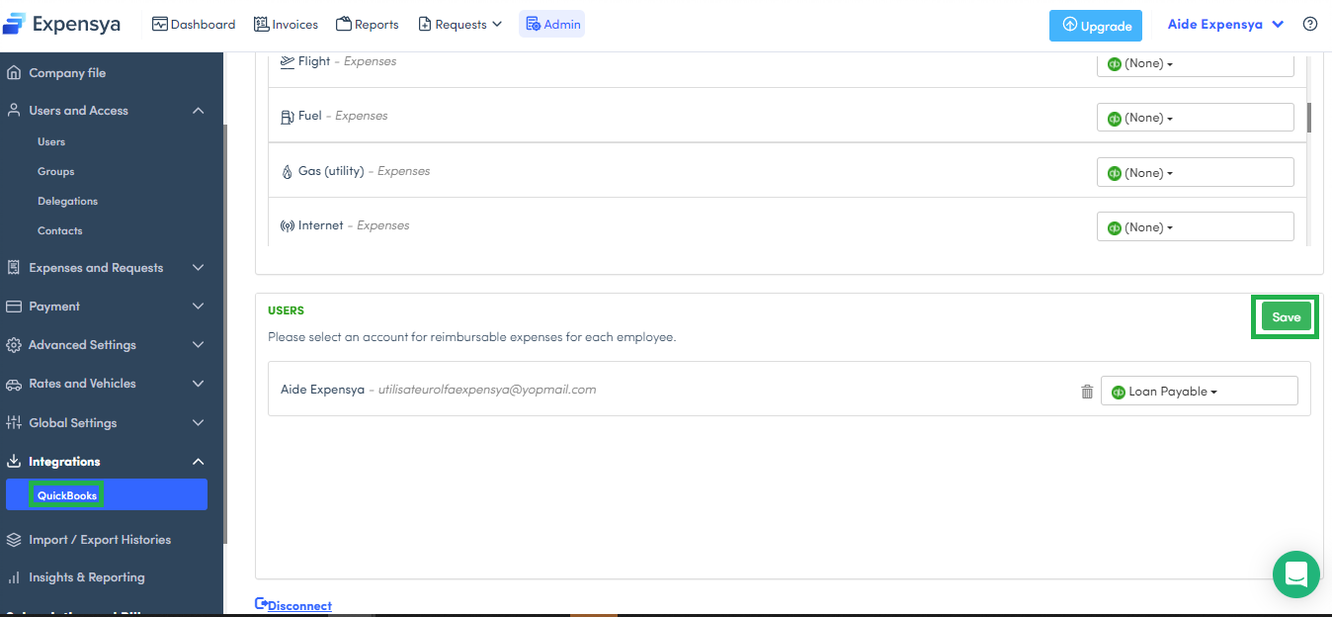
Choose an accountable account for reimbursable expenses:
As an administrator, you can choose an accounting account for reimbursable expenses for every employee on Expensya when logging into your Quickbooks account from the website
- Go to the Administration tab, under Integration -> Payment Quickbooks menu.
- Set an account for each employee
- Save
Connect Quickbooks projects to Expensya
The class name on Quickbooks must have exactly the same name on Expensya.