Requesting Budgets
To utilize your Expensya card, it is imperative to request a budget and obtain approval before initiating any purchases.
Cardholders can request budgets in any currency, offering flexibility for managing professional payments effortlessly. Administrators as well have the ability to assign budgets in any currency, providing greater adaptability and accommodating diverse needs seamlessly.
You can easily select any currency by clicking the drop down menu in front of the amount requested / assigned.

To request a budget, you may choose either of the two methods outlined below.
Option 1: Request a budget from My Cards page.
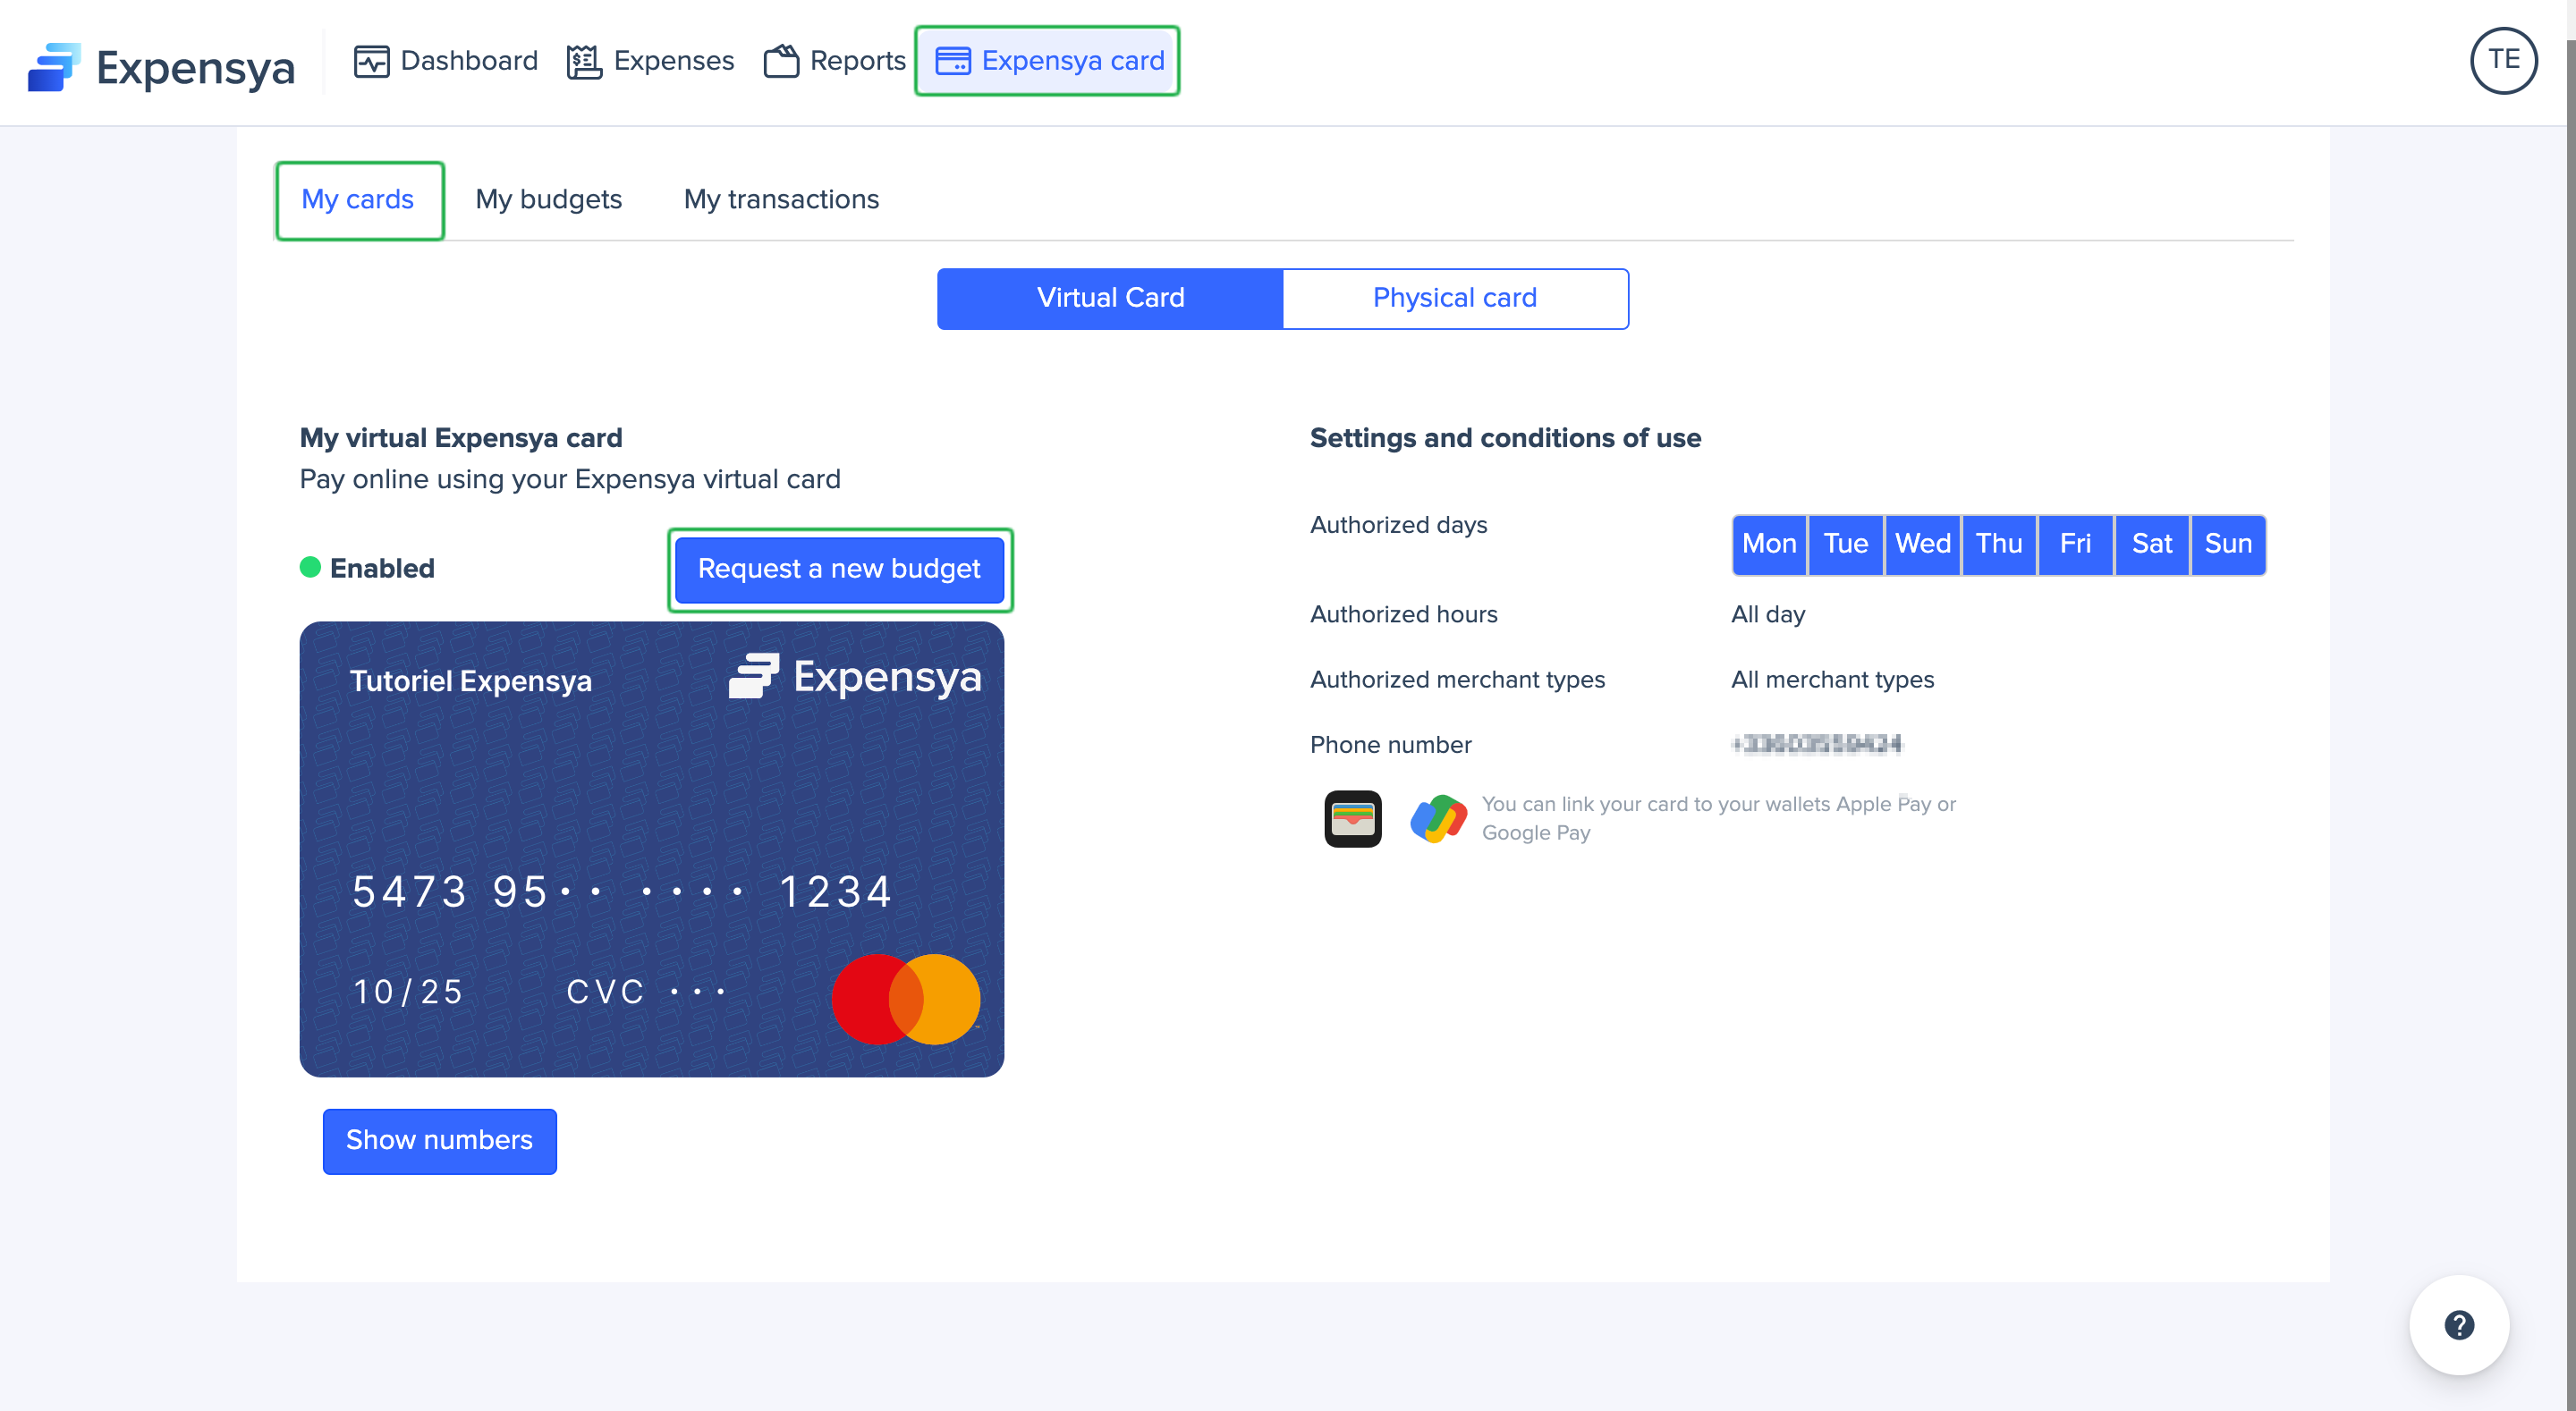
You can request a budget directly from My Cards page under Virtual Card and/or Physical Card sub-sections by following the below steps:
- Head over to Expensya Card menu.
- Go to sub-menu My cards.
- Choose Virtual Card or Physical Card
- Click on Request a new budget.
Option 2: Request a budget from My Budgets page.
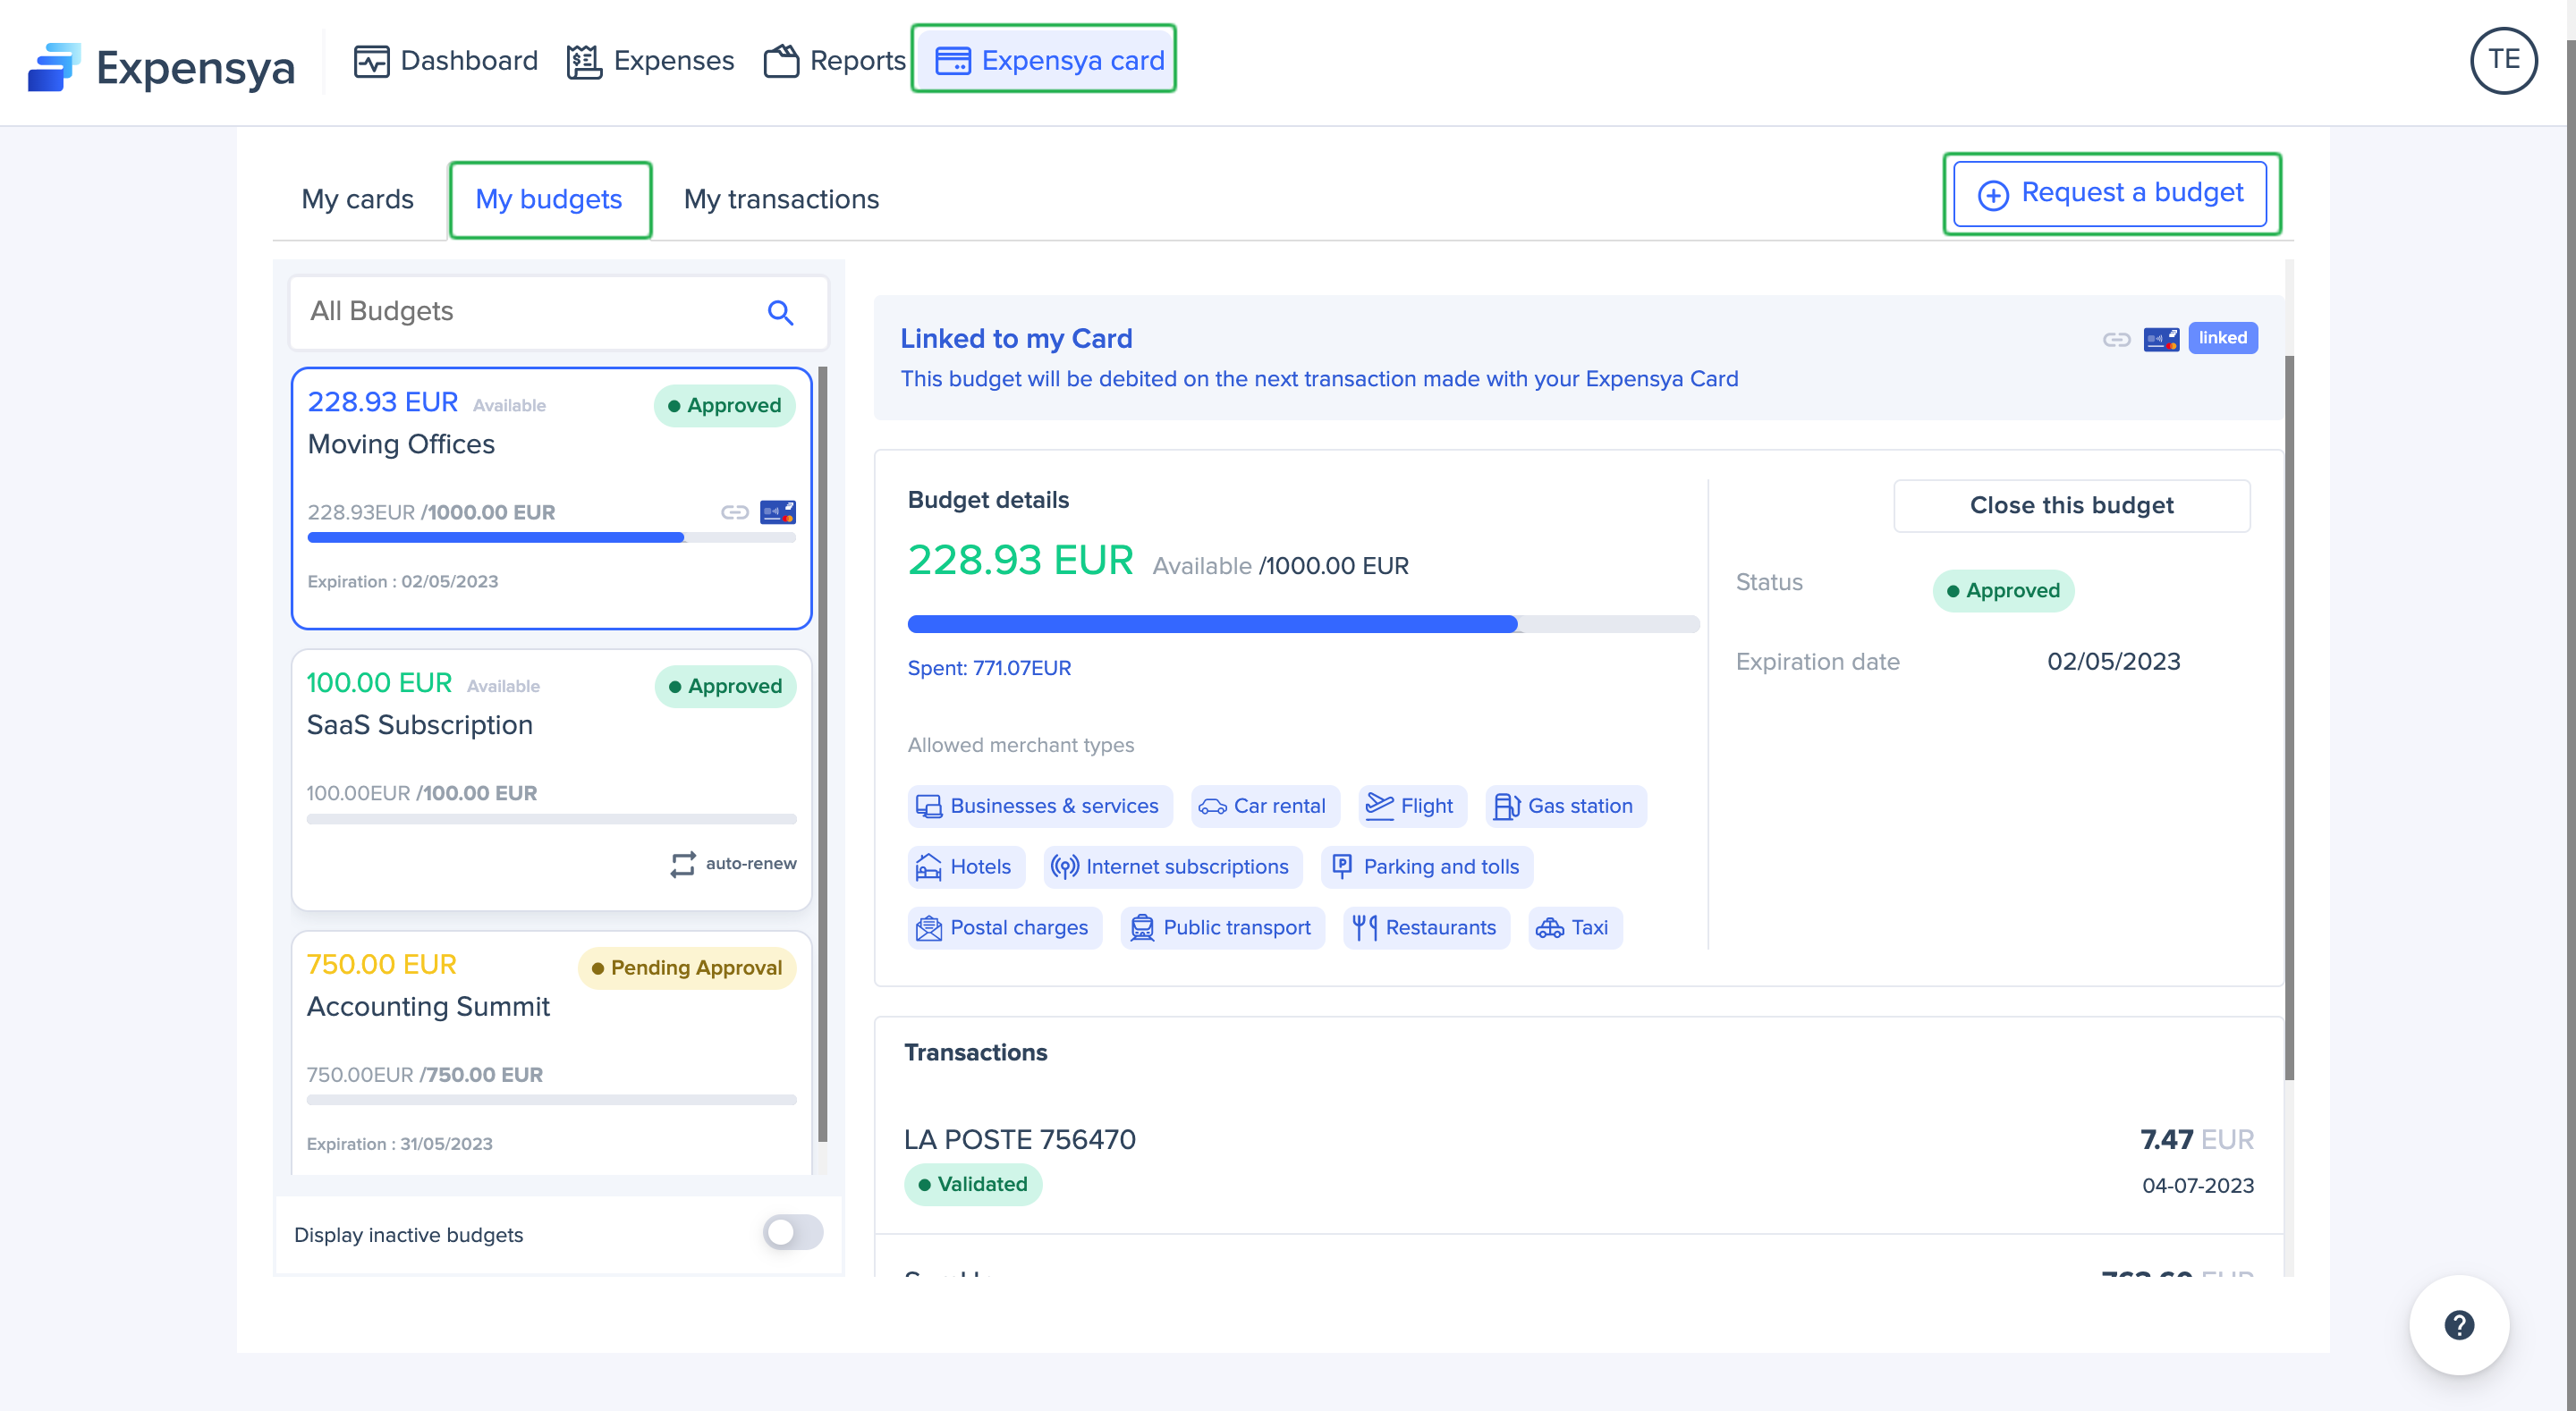
To request a budget directly from the My Budgets section, you can follow the steps outlined below:
- Head over to Expensya Card menu.
- Go to sub-menu My Budgets.
- Click on Request a budget
What do I need when requesting a budget?
When making a budget request, you should provide:
- Reason: Short text to describe the reason why you need this budget, i.e “LinkedIn Subscription” or “Business Trip to Madrid”. By filling in this field, the approver will be able to comprehend your request motive.
- Amount: EUR currency should be used for this field, even if your transaction has another currency. In such case, you must convert the expected amount to be spent and include a margin for currency exchange.
- Auto-renew frequency: two options are available for the budget frequency, if the budget is for a one-time expense, you should choose "One time." However, if the nature of the expense requires it to recur on a regular basis, you should select "Monthly."
- Expiration date: if you select the "One time" frequency for the budget, you must specify an expiration date for the requested budget. Once the specified date has passed, the budget will automatically expire.
- Project: you need to select the Project that matches the requested budget
- Details: you can provide additional information about the budget request in this field, which is optional. This will help the approver understand the reasoning behind the budget request.
- Categories: you will be able to view the merchant categories where you are permitted to spend.
- Attached files: if you have any file that can justify the budget request, you can upload it.
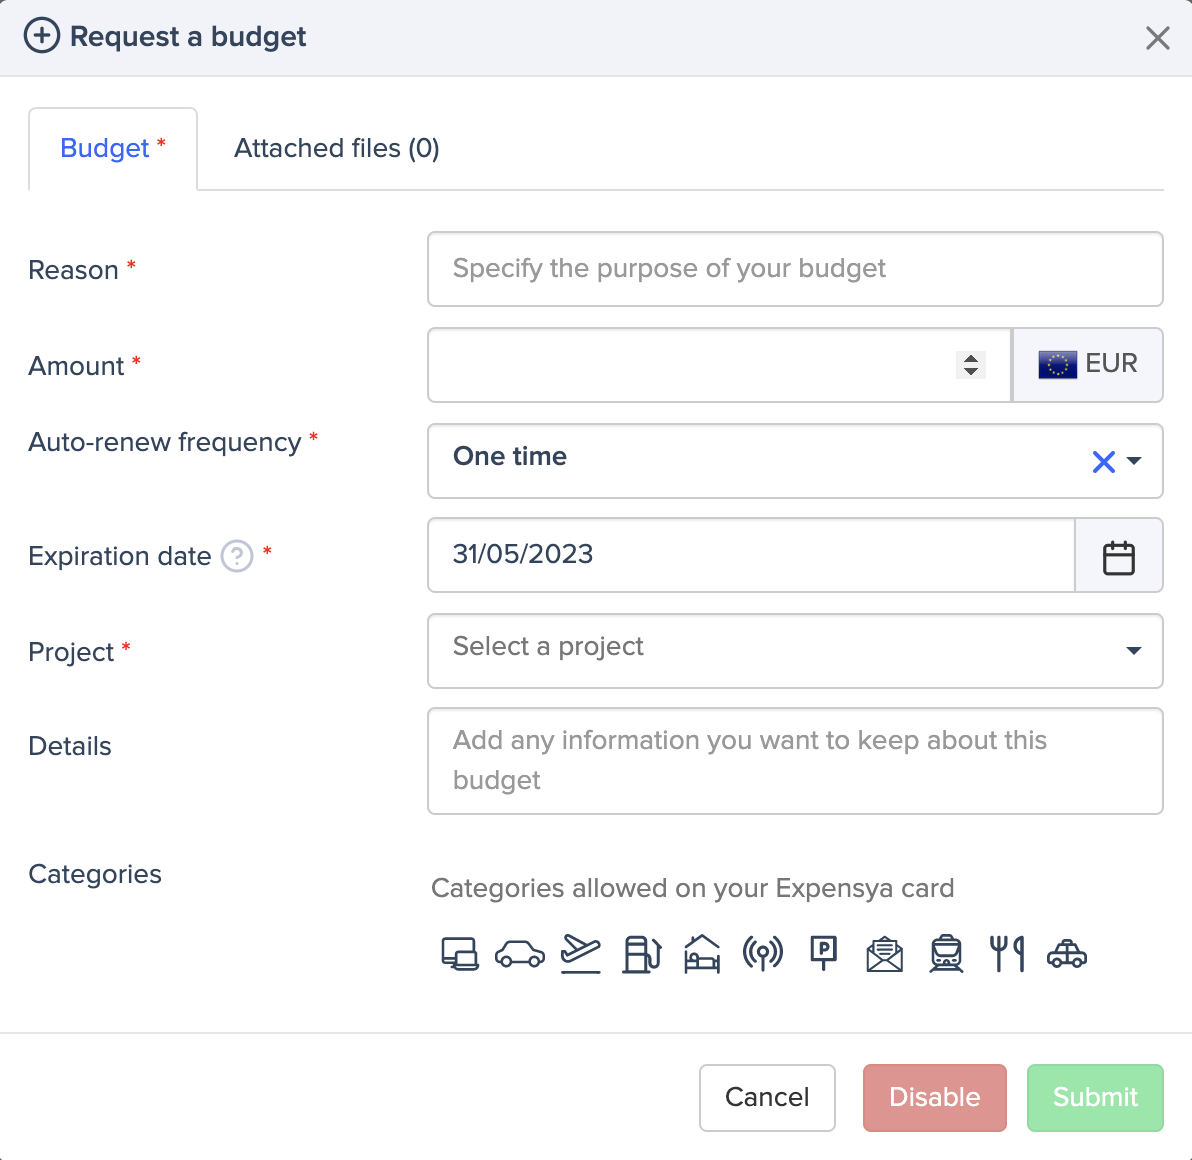
As soon as you have completed the required fields, you should click on Submit.
The budget request will be instantly sent to the approver for review and approval. As soon as the budget is approved, if you don’t have any other budgets approved, the system will automatically link your card to the newly approved budget.
An email confirmation will be sent to you as soon as the approver responds to the budget request.