Managing my Bank Accounts in Expensya
As an admin, Expensya enables you to add your tenant's bank accounts and your employees' bank accounts through the web version. Additionally, you can request assistance from our support team to configure your employees' access settings. This includes options to:
- Allow or prevent employees from making changes to their banking details.
- Restrict employees from submitting expenses if they don't have a linked bank account.
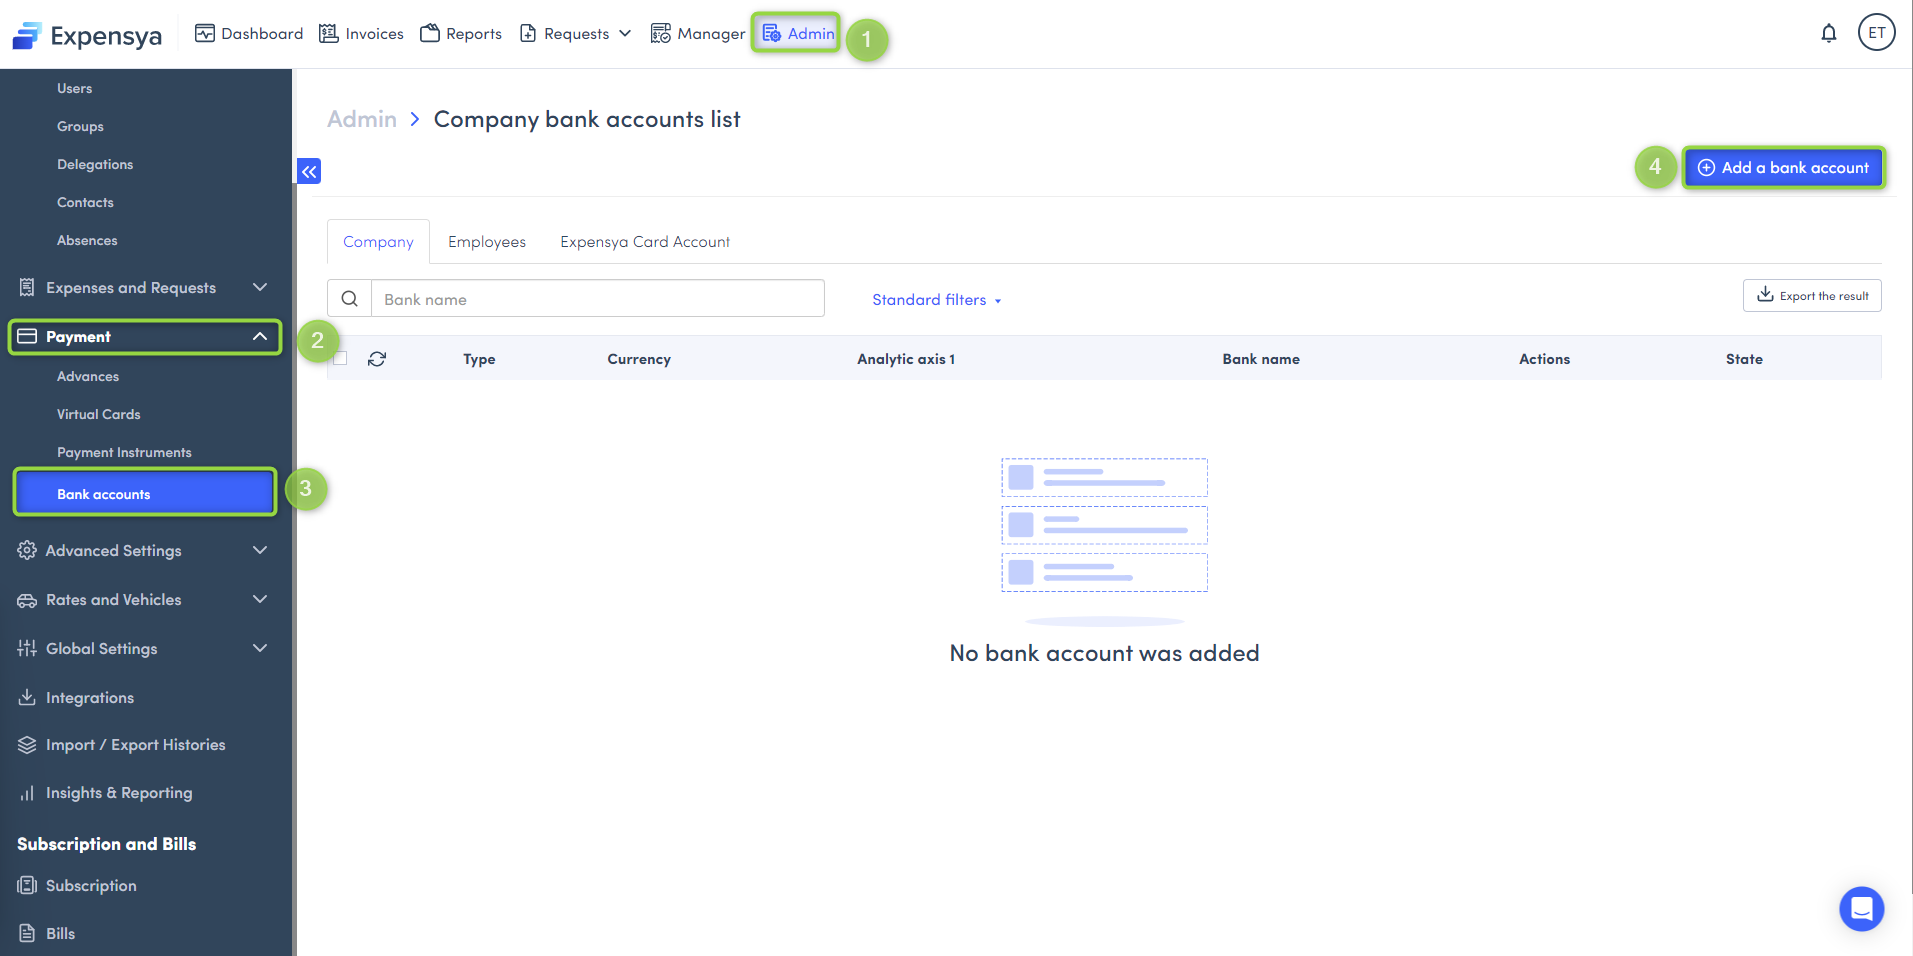
Add a tenant bank account
- Simply go to the Admin tab, under the Payment menu.
- click on Bank Accounts.
- Choose Tenant.
- Finally click on Add a bank account.
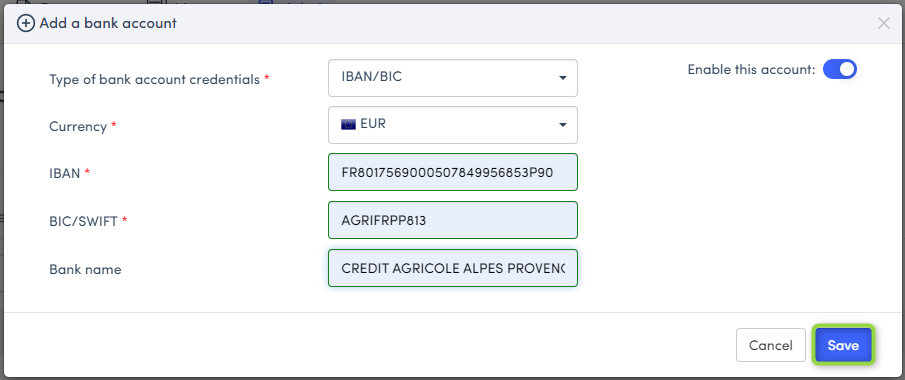
- Enter the bank account details.
- And save.
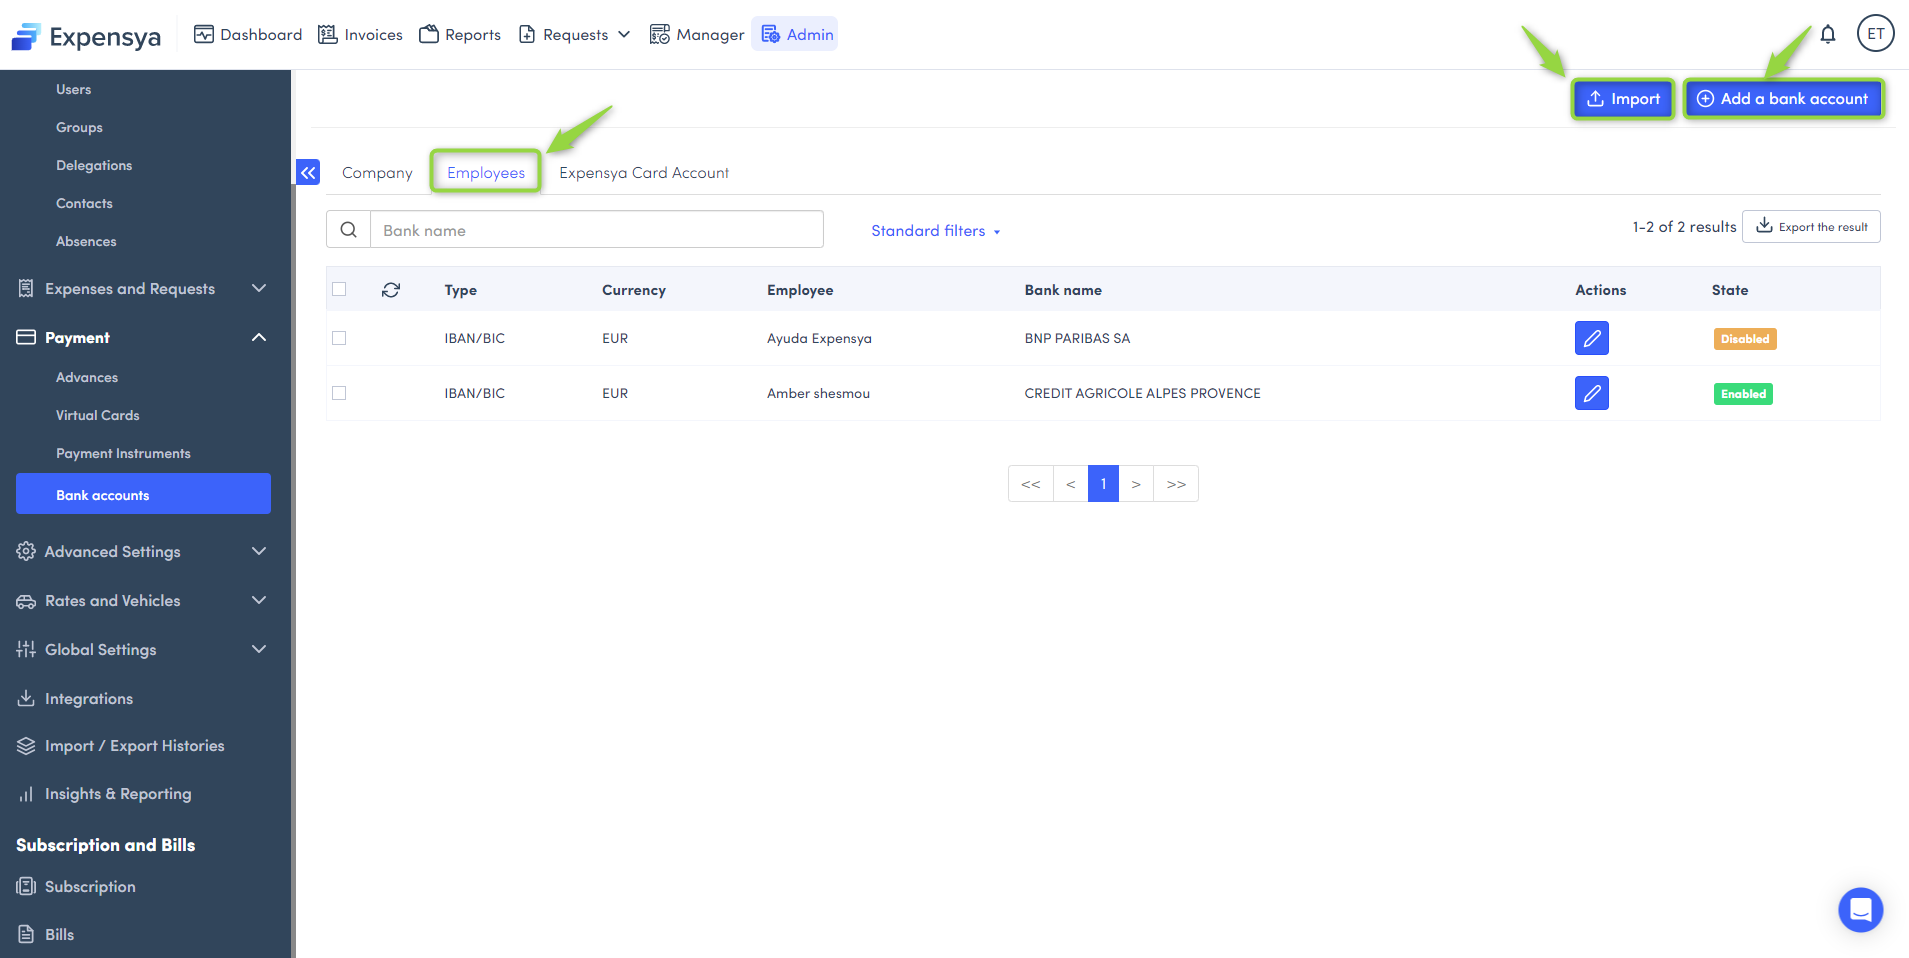
Add an employee bank account:
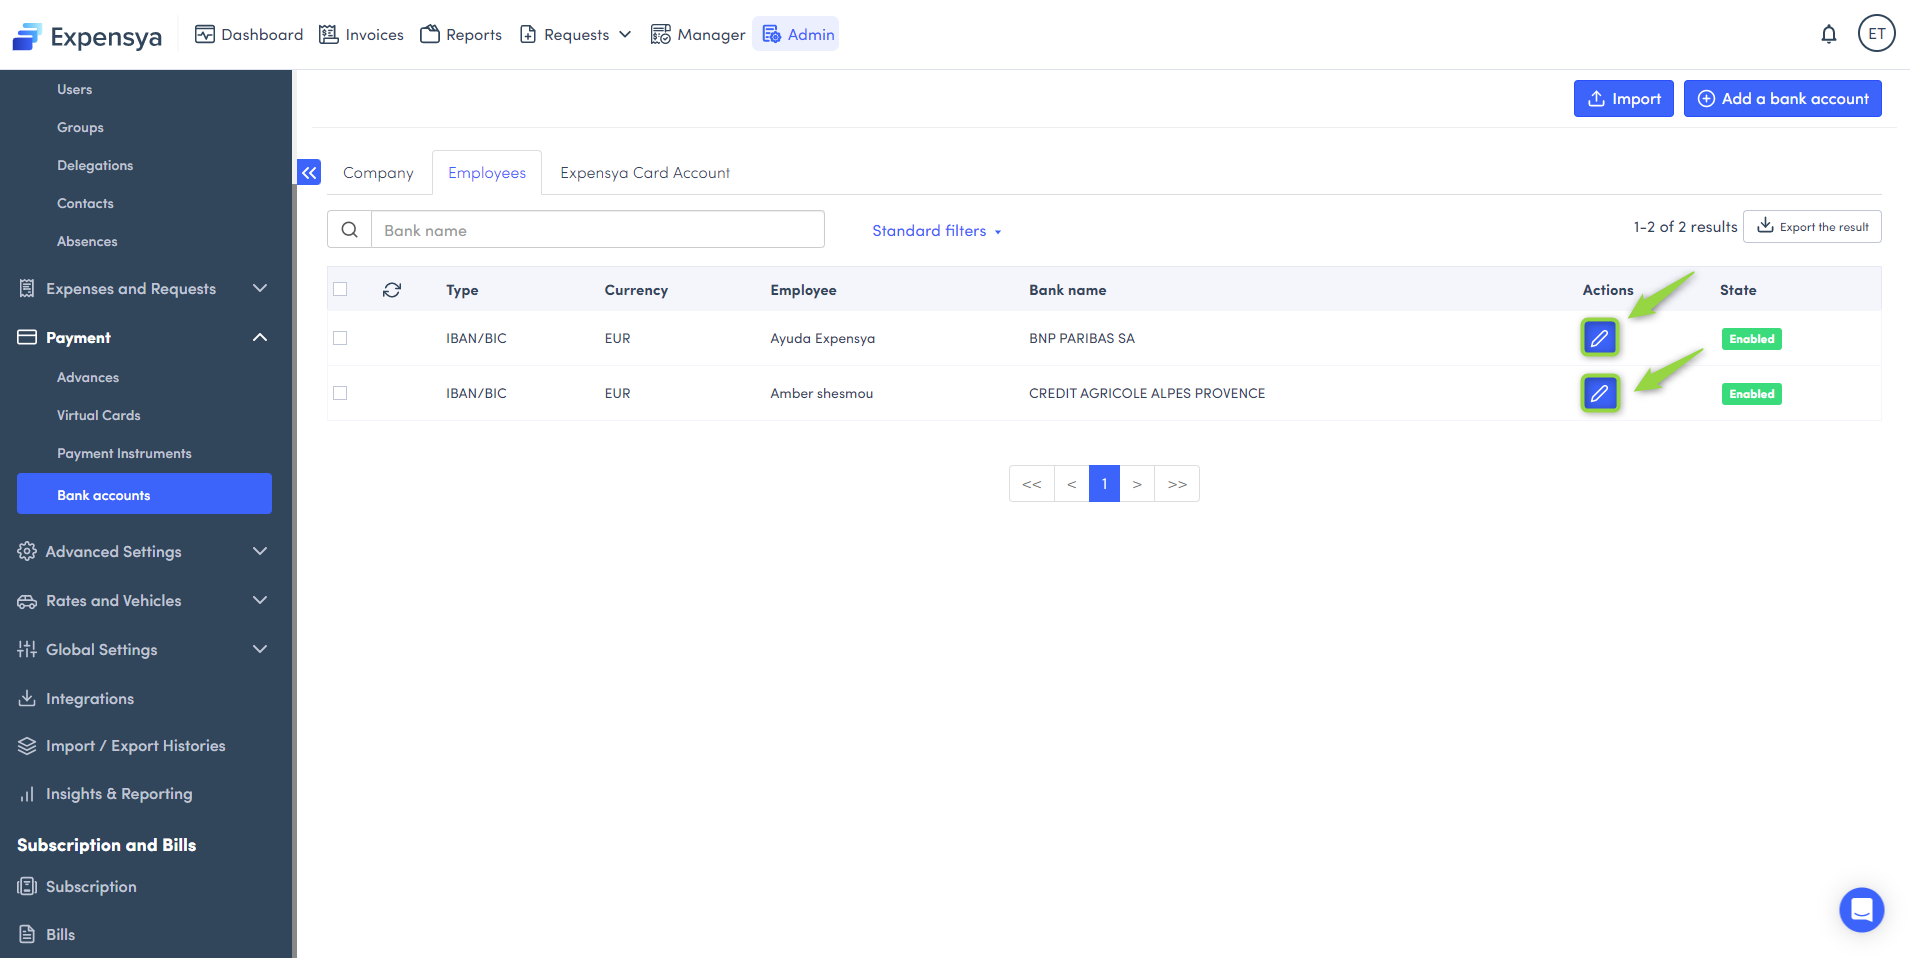
- Click on the Employees tab.
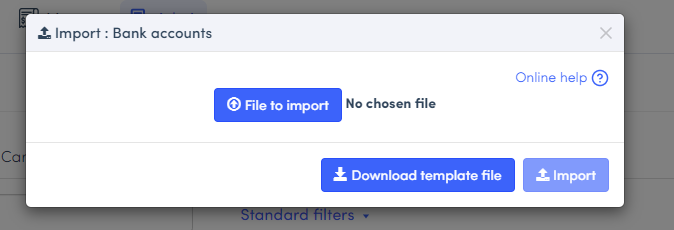
- Click on Add a bank account or import a CSV file (a downloadable template is available).
- Enter the bank account details
- From the Web:
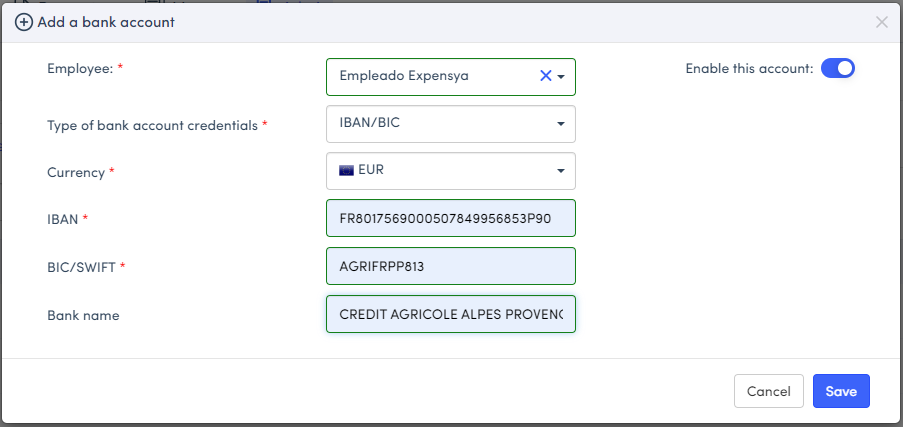
and save.
- By import:
- Fill in the downloaded template file following these instructions:

- PayID: Corresponds to the employee's number.
- Mail : Corresponds to the user's email address (This field is mandatory).
- BIC (or Swift code) : Corresponds to the international identifier of the bank (This field is mandatory in case of IBAN insertion).
- IBAN/ RIB: Bank account IBAN number (This field is mandatory).
- Bank name: The bank's name.
- Bank Account Type: Type of bank account (This field is mandatory)
- Currency: The currency ( This field is mandatory)
- Is Active: Put 0 to deactivate and 1 to activate the account (This field is mandatory)
Then import your file.
Editing a bank account:
You can make changes by clicking on the blue pen icon.
Deactivating a bank account:
You can deactivate a bank account by selecting it and then clicking on the Deactivate button.

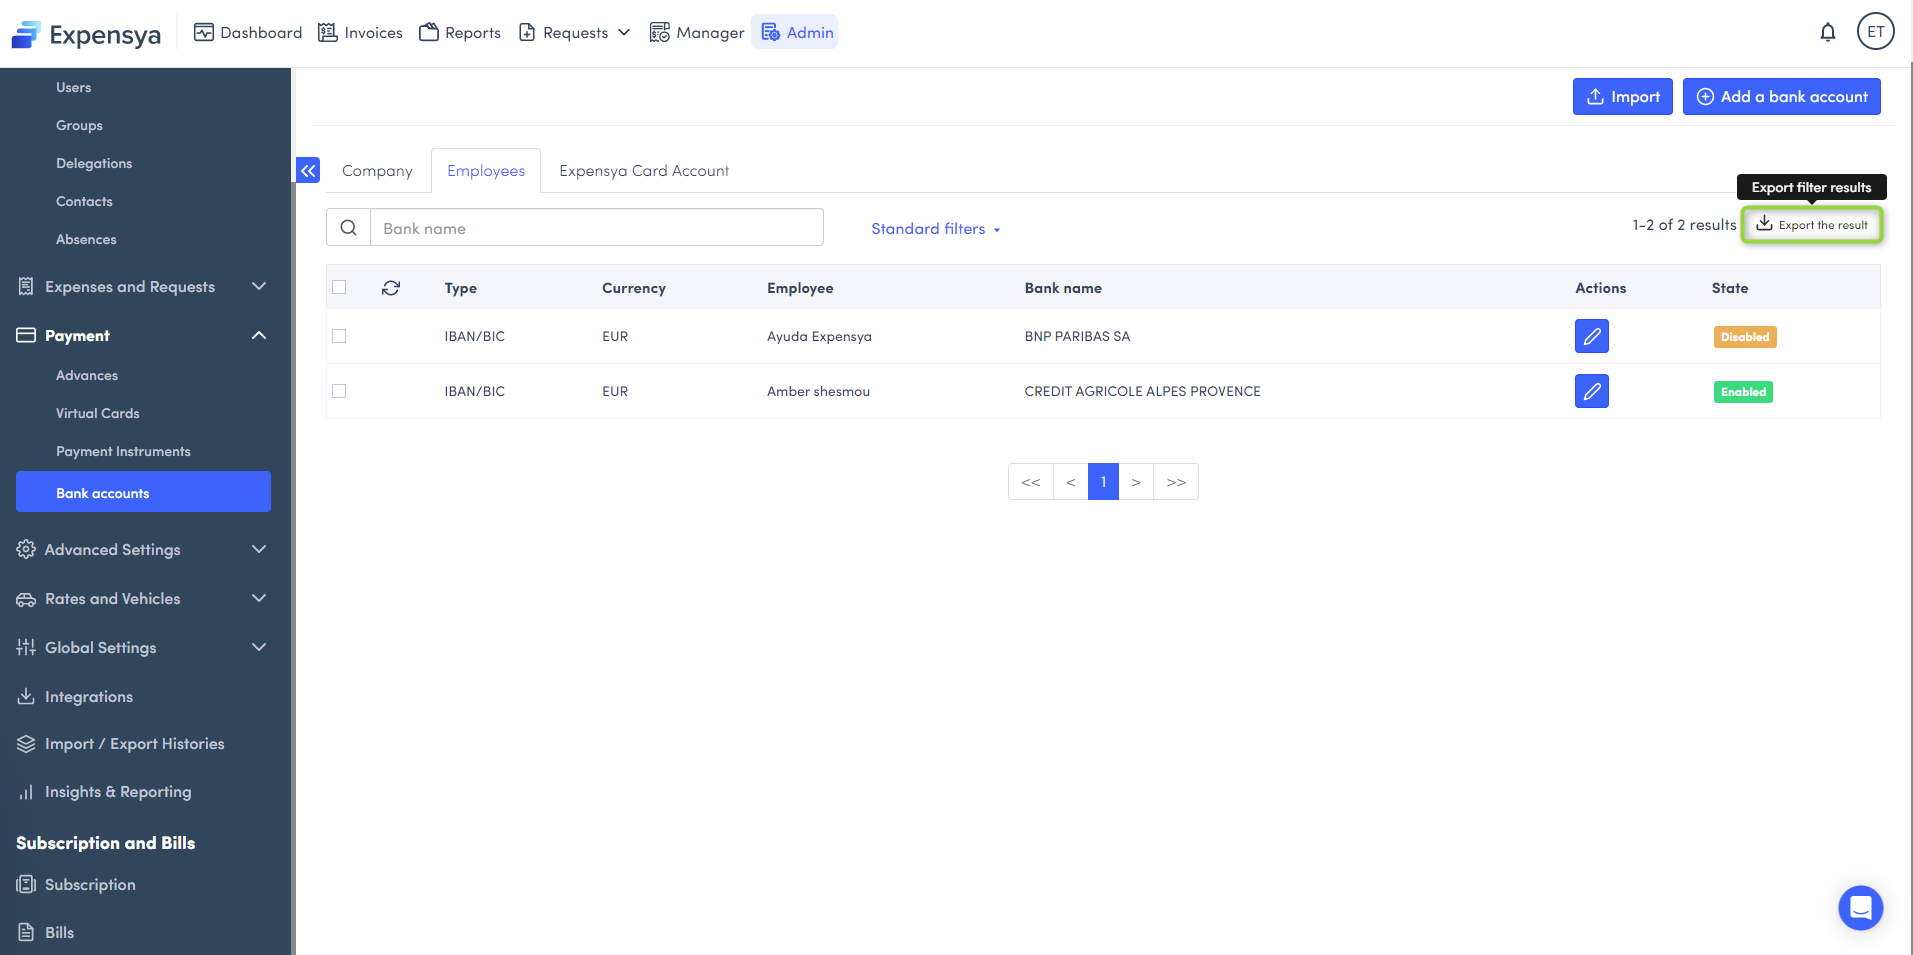
Exporting bank accounts:
- You can export all the bank accounts by clicking on the Export the result button.
- You can use the filters to create a selection of bank accounts to export.