Set up Bank Accounts in Expensya
As an administrator, you can add bank accounts for your tenant and your employees directly in the Expensya web app.
The support team can help you set up employee access options. With these settings, you can choose whether to:
- Allow or block employees from editing their bank account details.
Or
- Prevent employees from submitting expenses without a linked bank account.
You cannot activate both options at the same time.
Add a tenant bank account
- Go to the Admin tab and open the Payment menu.
- Click the Bank accounts sub-menu.
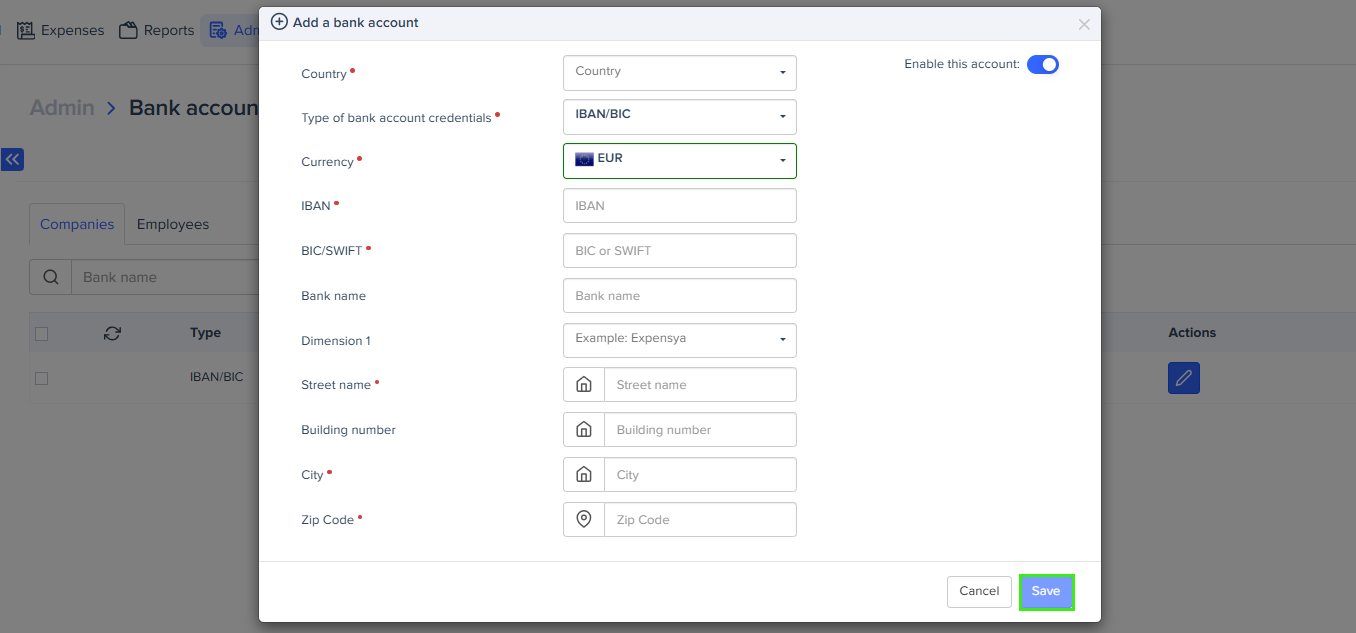
- On the Companies tab, click Add a bank account.
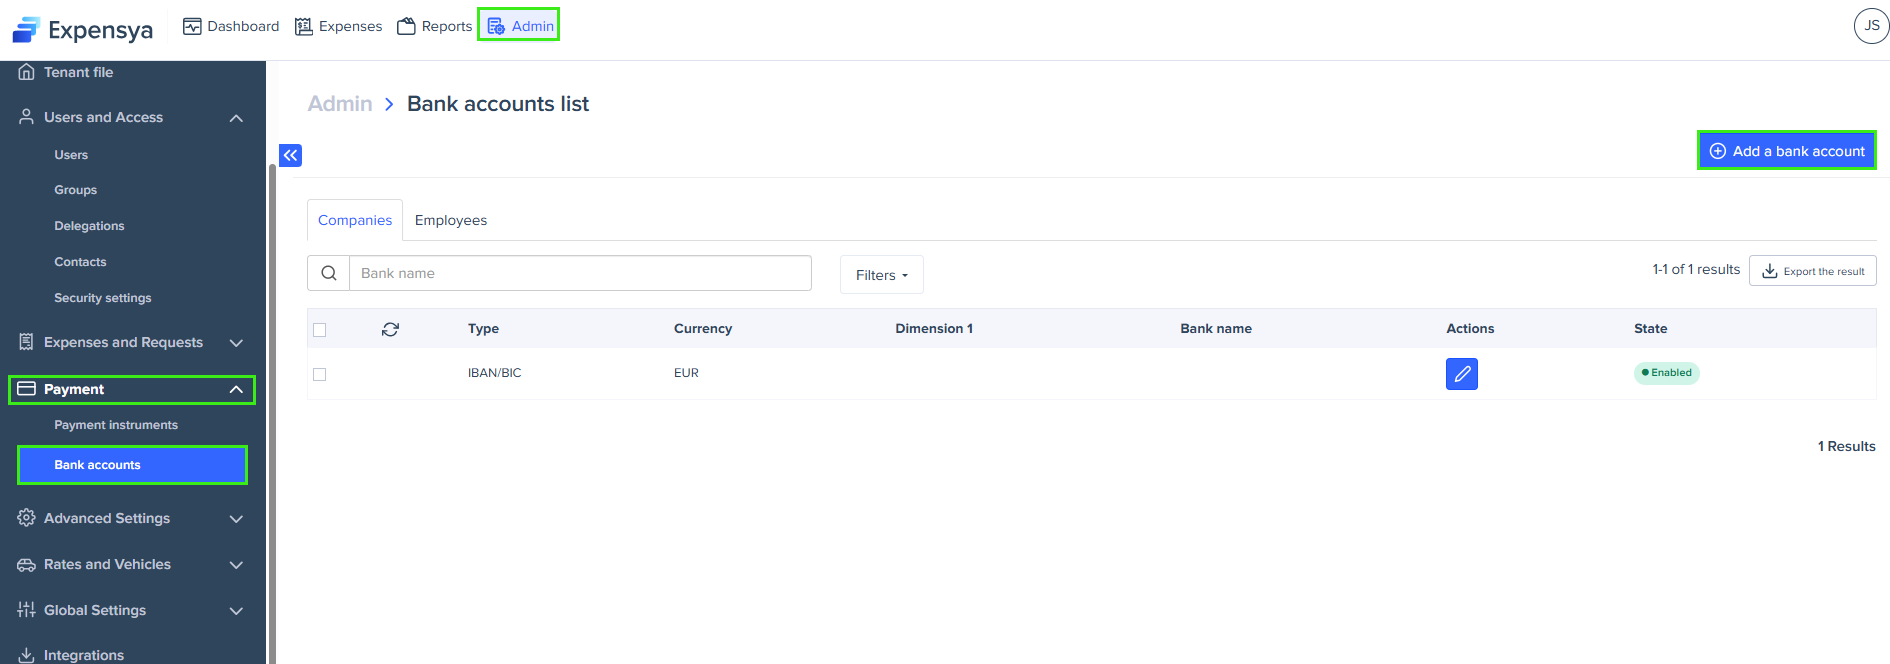
- Enter the bank account details, then click Save.
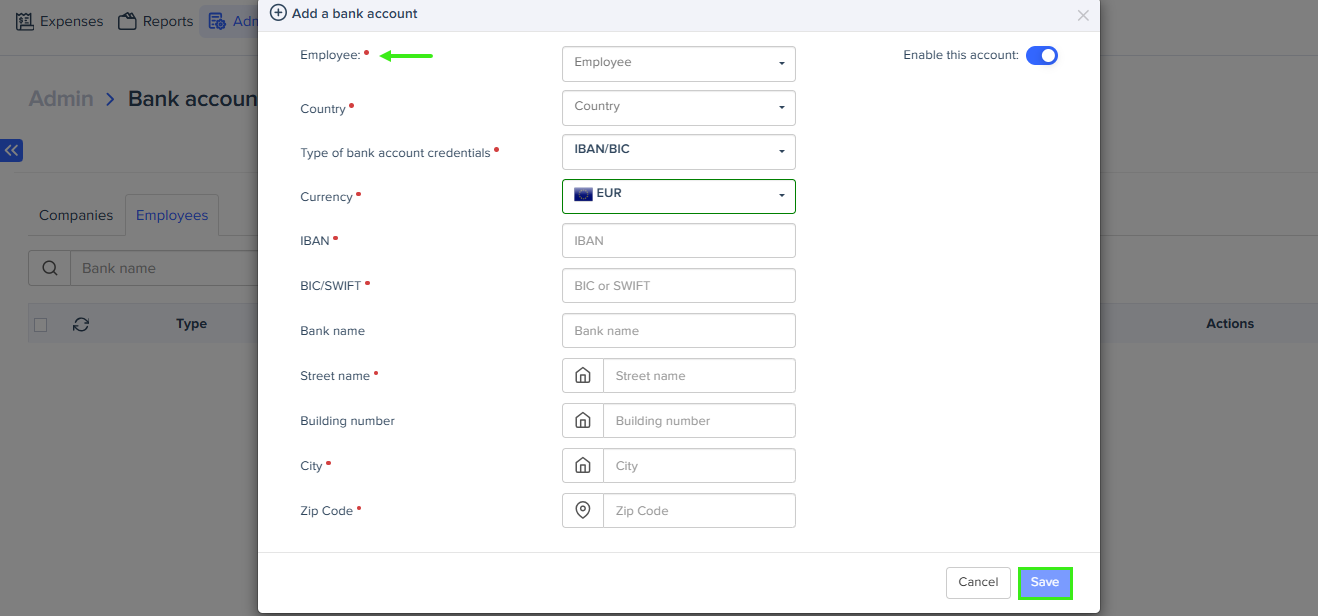
Add an employee bank account
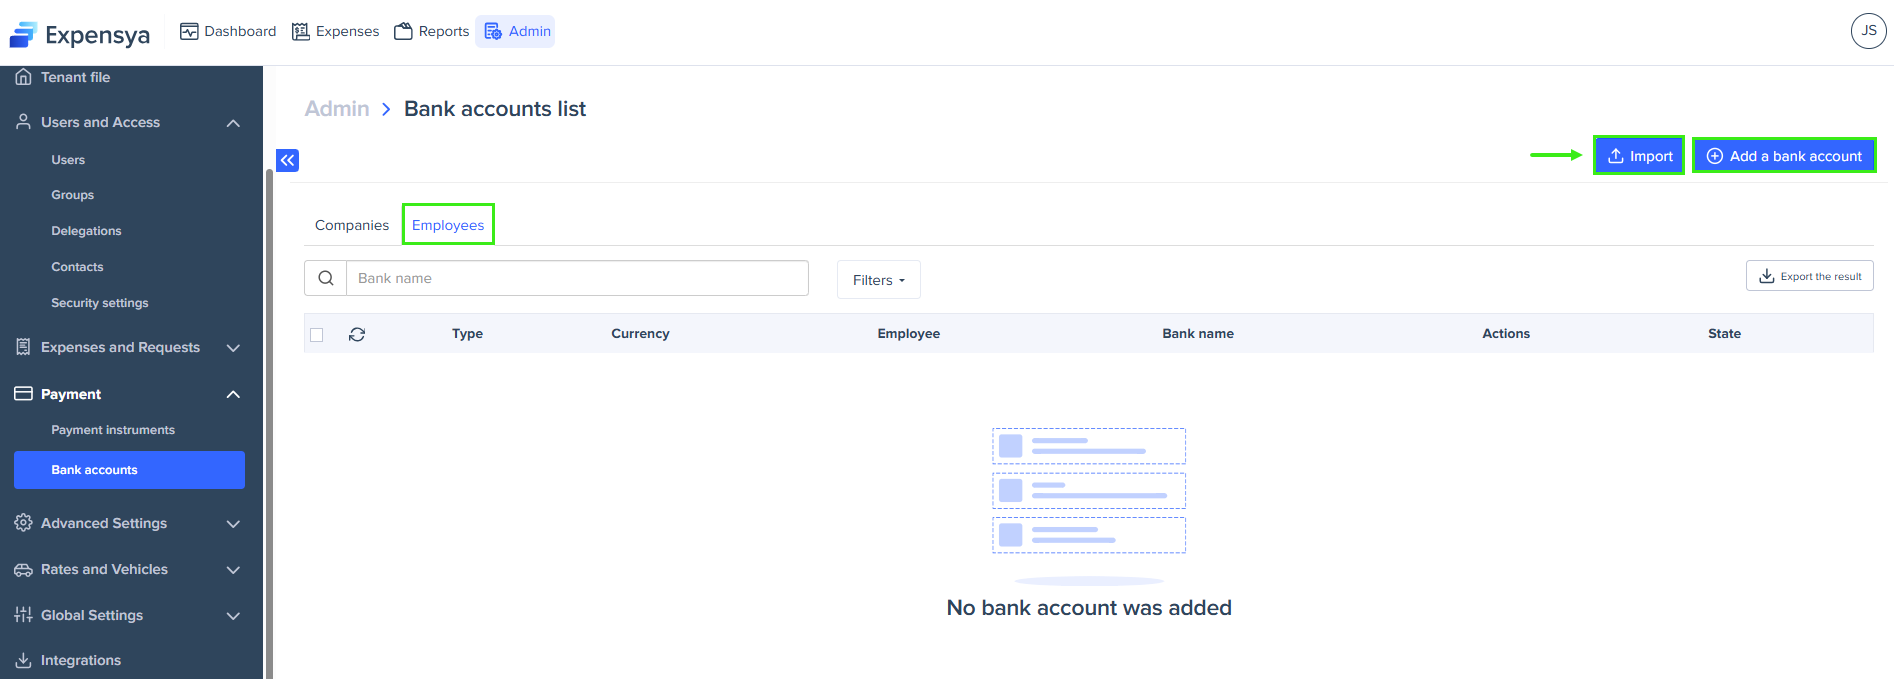
You can add employee bank accounts from the web or by importing a file.
- From the web:
- Go to the Employees tab.
- Click Add a bank account.

- Fill in the bank account form, then click Save.
- By import:
- Go to the Employees tab.
- Click Import. A downloadable template is available.
- Complete the file using the following fields:

- PayId – employee number.
- Mail – employee email address (mandatory).
- BIC (or Swift code) – international bank identifier (mandatory if IBAN is used).
- IBAN/RIB/BBAN – bank account IBAN (mandatory).
- Bank Name – the name of your bank.
- Bank Account Type – type of account (mandatory).
- Currency – currency used (mandatory).
- Is Active – enter 1 to activate, 0 to deactivate – (mandatory).
- Country code – mandatory.
- Street Name – mandatory.
- Building Number – optional.
- City – mandatory.
- Zip Code – mandatory.
- Upload the completed file.
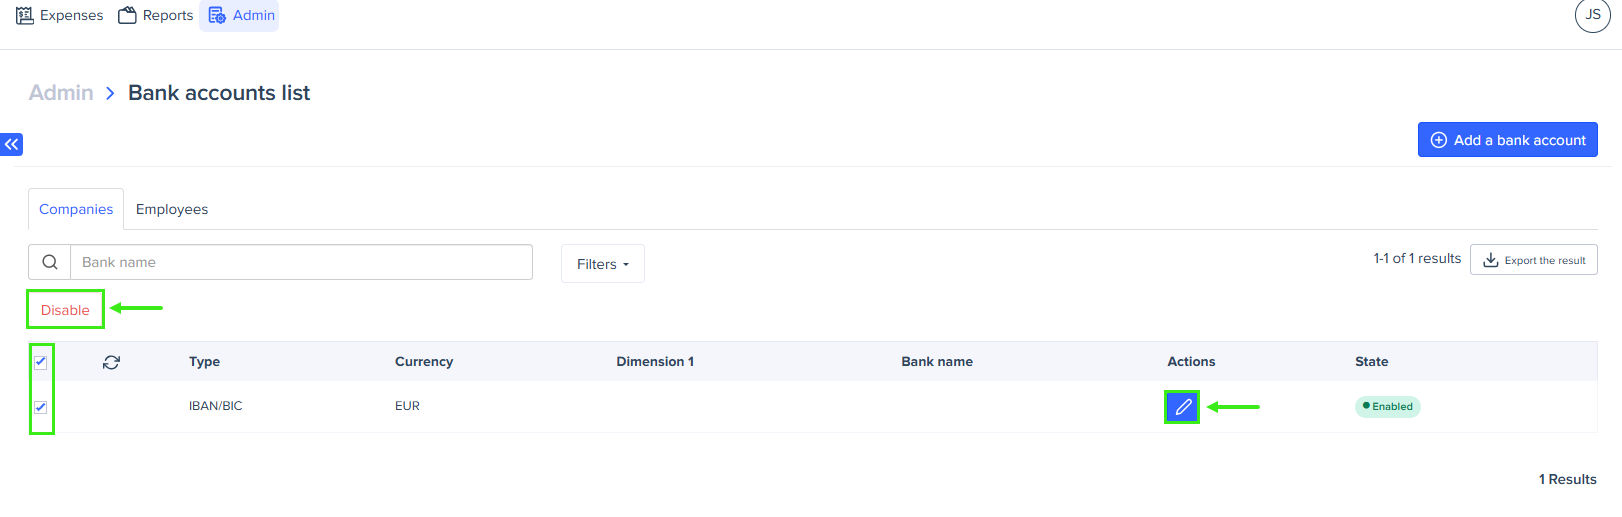
Edit or disable a bank account
You can easily make changes to your bank account or disable it with these simple steps:
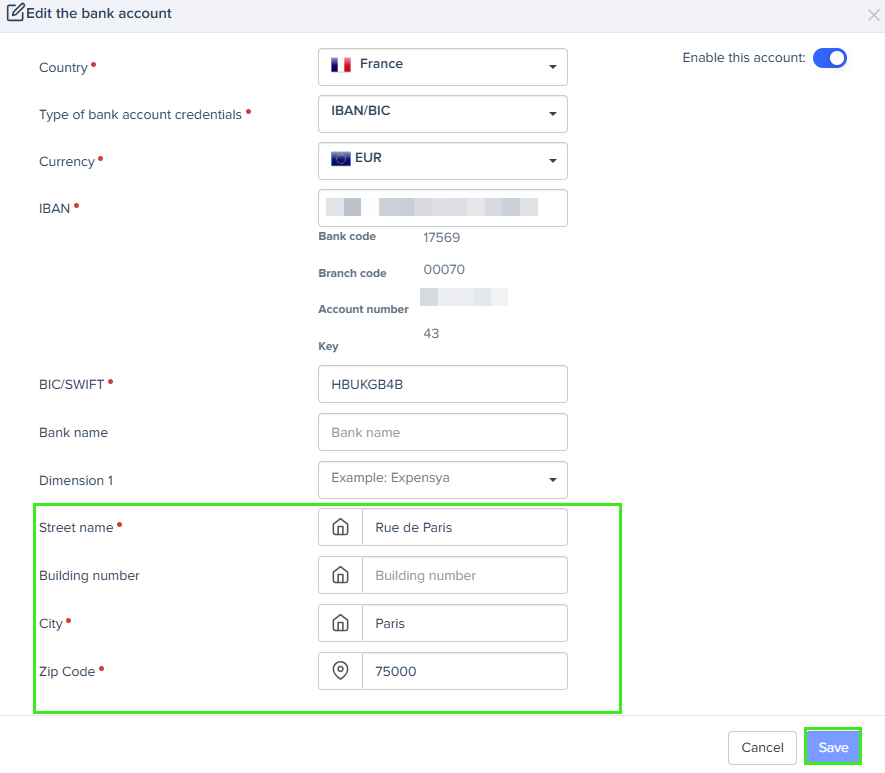
- To edit your account, click the account or the blue pen icon next to it. A pop-up window appears. Make your changes, then click Save.
- To disable your account, click the Disable button.
If your existing bank accounts do not include the new SEPA-required fields (Street name, Building number, City, and Zip code), you should update them to comply with the new regulations. You can edit each account individually or import the data to update all accounts at once.
Export bank accounts
- Click Export the result to download all bank accounts.
- A pop-up window appears. Click Next, and the download will start automatically.
You can use filters to select specific accounts before exporting.
