Using and Managing Saved Addresses
You can save addresses you use often to create entries faster and more accurately, such as when creating a mileage expense. Saved addresses are also visible and available in Per Diem and Authorization Request forms, so you can reuse them without entering the same information multiple times.
Add a Saved Address
You can save any address for future use. For example, when creating a mileage expense:
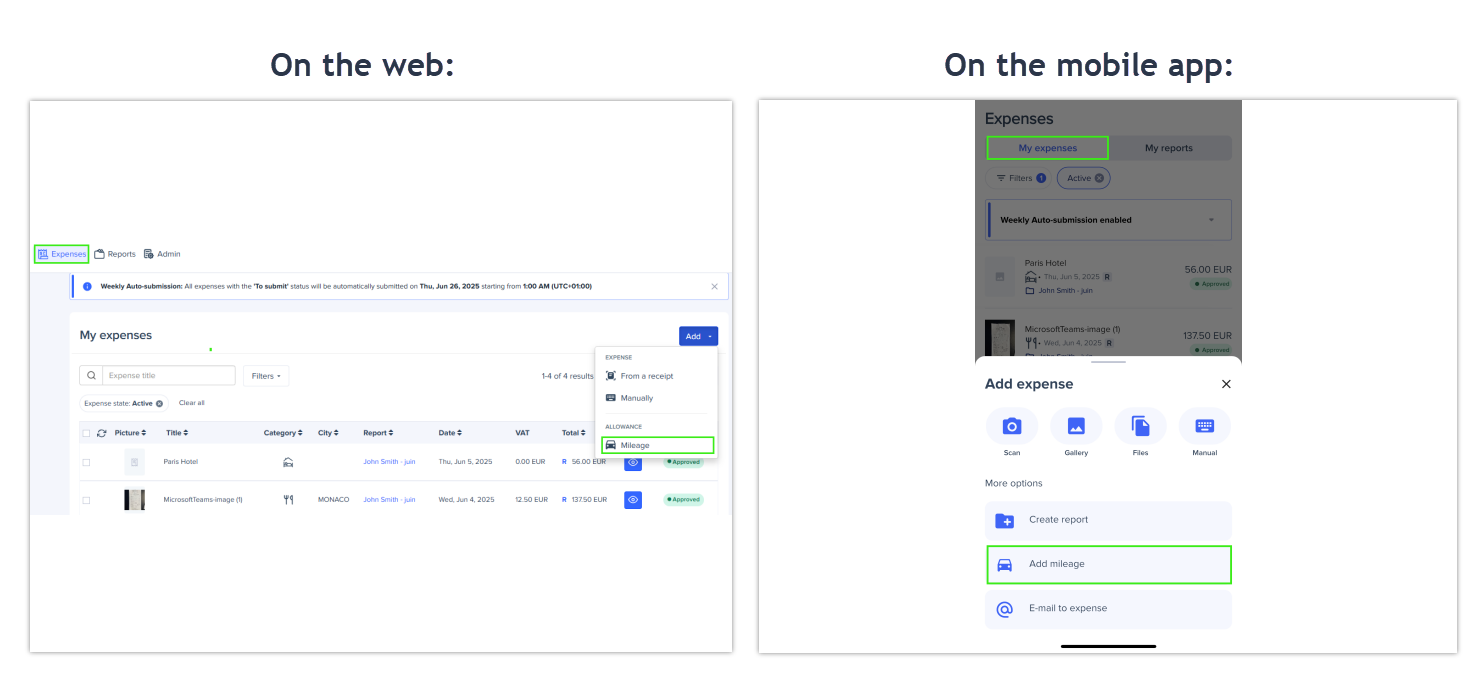
- Go to the Expenses tab.
- Click Add, then click Mileage.
- Fill in the mileage form.
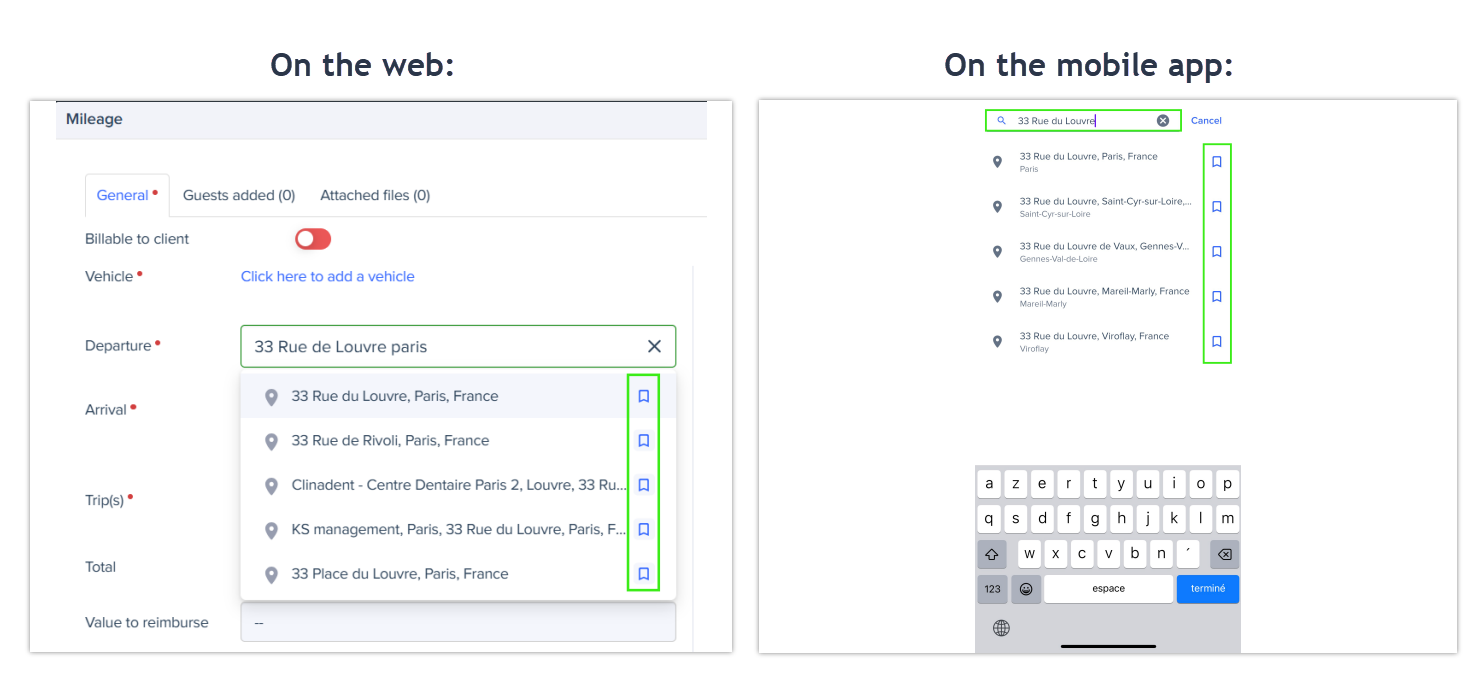
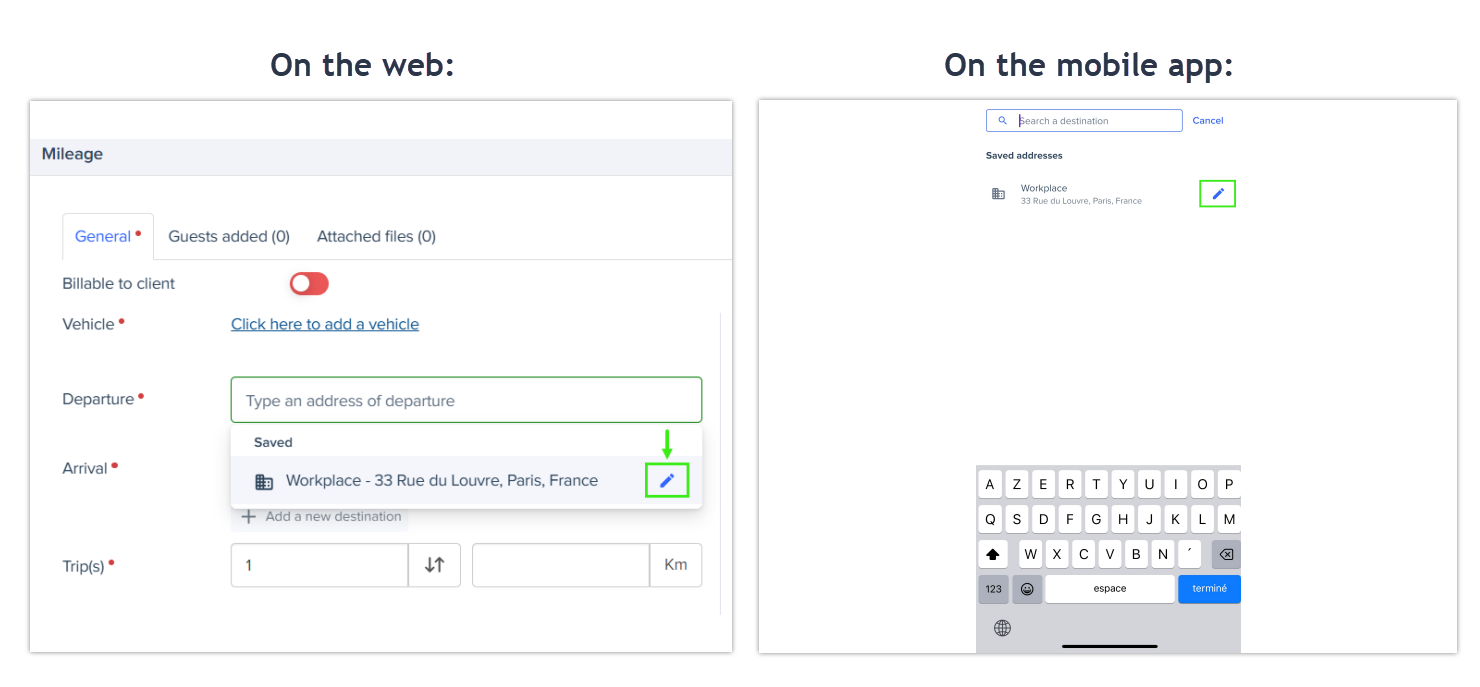
- In the Departure or Arrival field, type the address.
- Click the bookmark icon next to the address in the drop-down menu to save it.
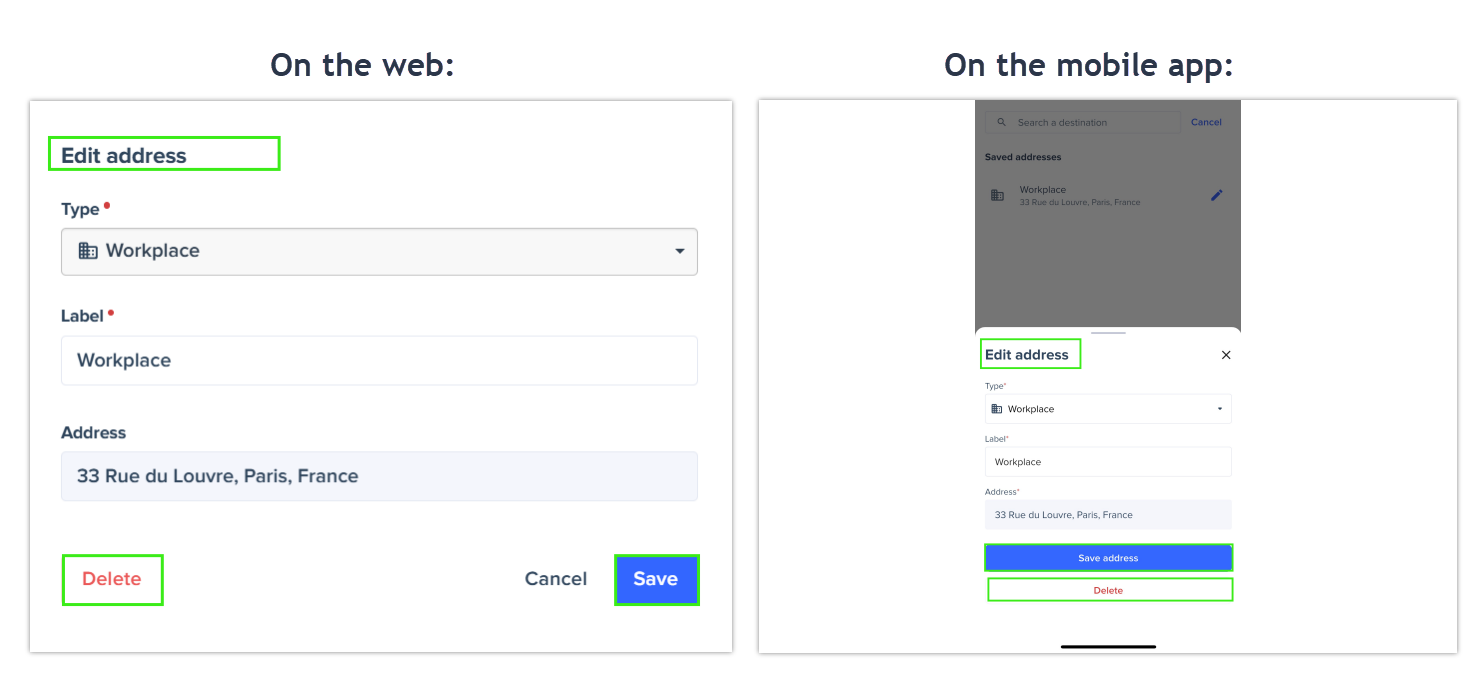
- A Save address pop-up window appears. Complete the required fields:
- Type: Choose from Home, Workplace, or Other.
- Label: The system fills this field automatically based on the selected Type. You can keep the suggested label or change it. If the label is already filled before selecting a type, the system will not overwrite it.
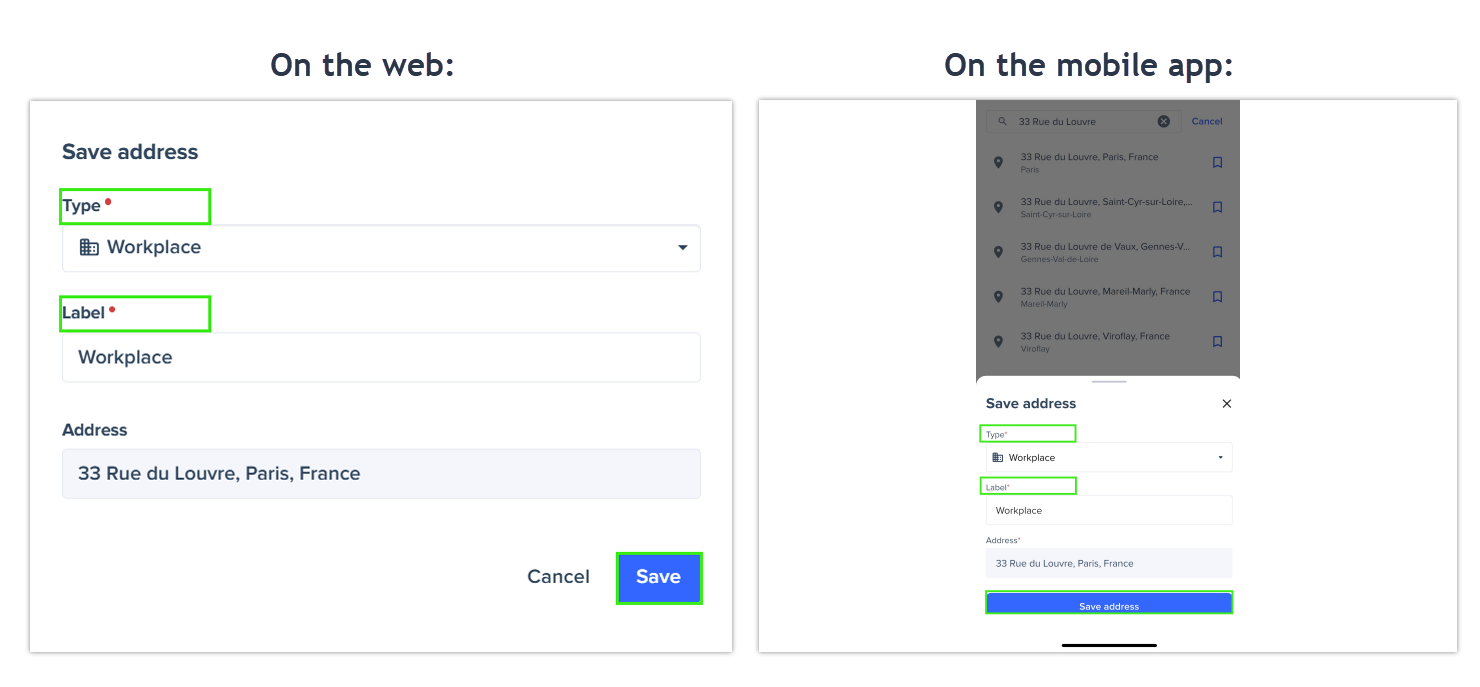
- Click Save. The address is saved and automatically selected in the address field.
- Complete the remaining fields in the mileage form, then click Save.
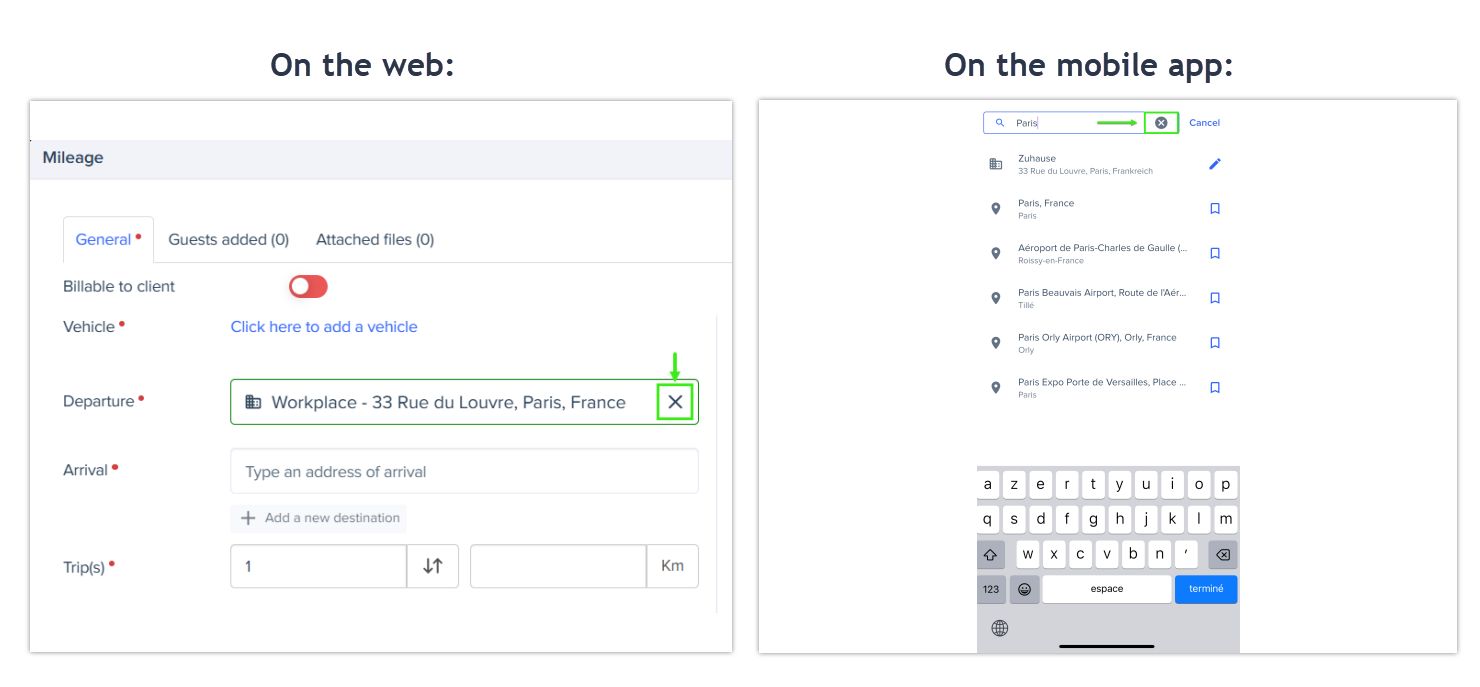
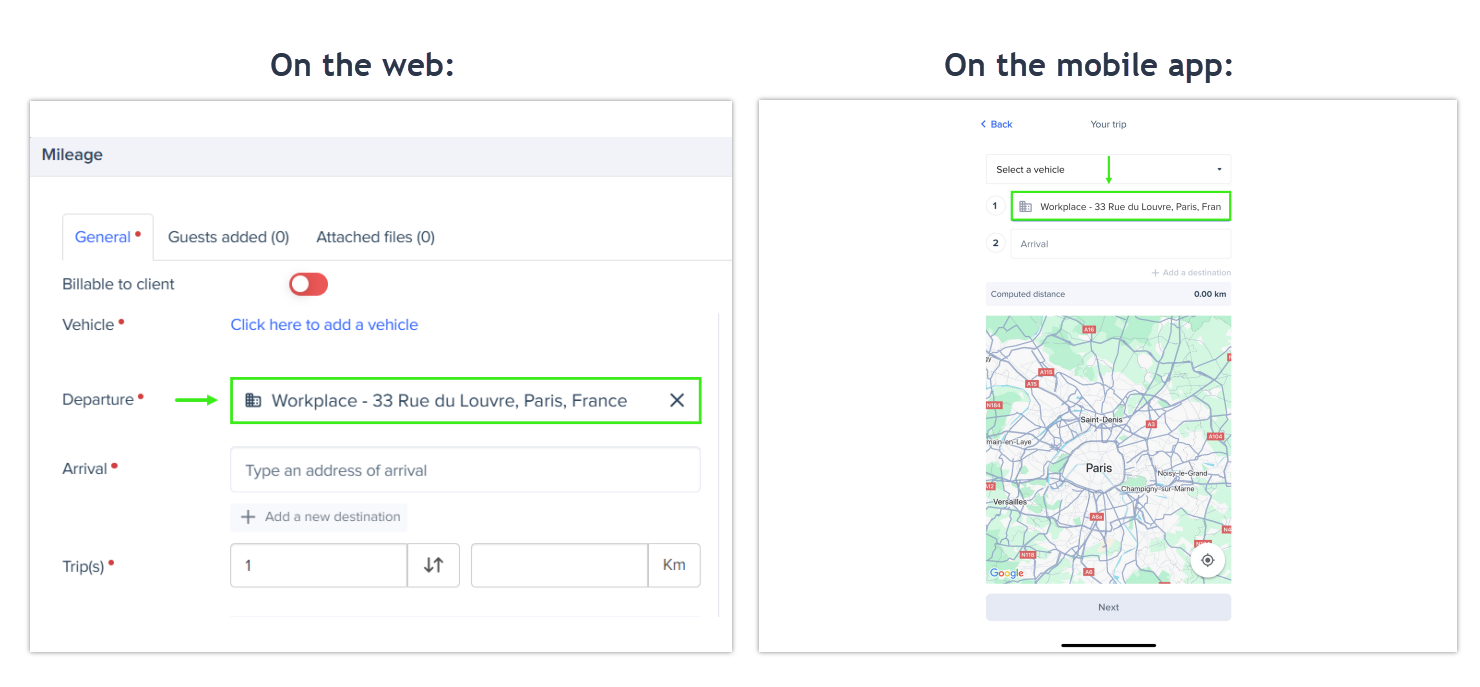
Once saved, the address appears with a bookmark icon in the field. You can select it anytime from the drop-down list when typing in the Departure or Arrival fields.
Edit or Delete a Saved Address
To manage your saved addresses:
- Click the 🖉 icon next to a saved address to edit it.
- The Edit address pop-up window opens. Make your changes and click Save. To delete an address, click Delete in the same window.
- To remove an address from a field, click the X icon.