Configuring Spending Policies
 Updated
As an administrator, you have the authority to implement expense policy rules on the Expensya platform, enabling you to notify your colleagues in real time about exceedances, while also gaining an immediate overview of the situation.
To create an expense policy rule:
- Go to the Admin tab, Spending policies sub-menu,
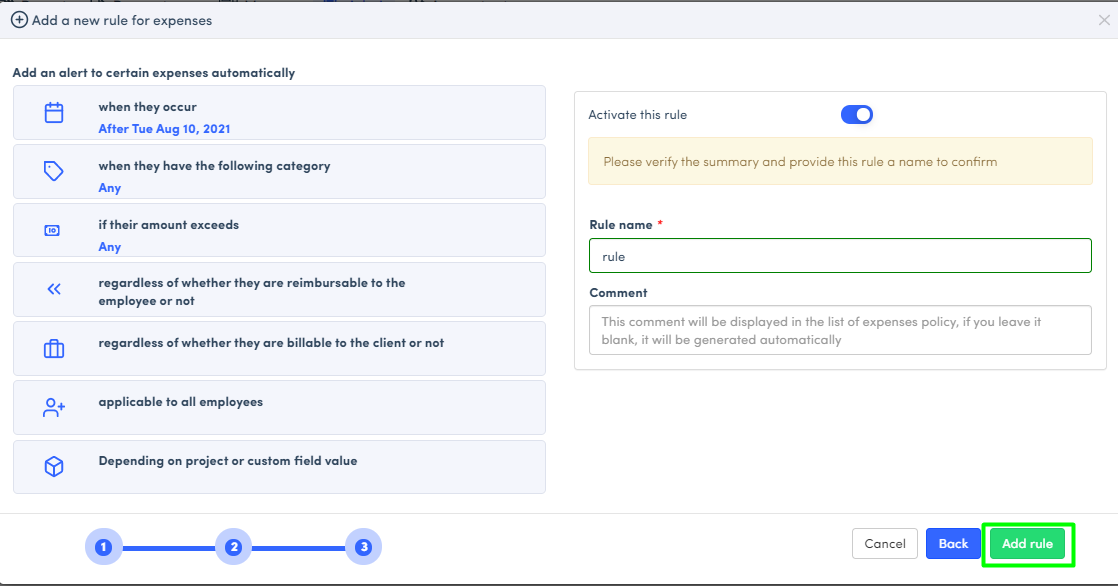
- Click on Add a new rule for expenses

- Choose one of the 4 rules to configure, whichever suits you best.
- Click on Next
- Choose the settings to configure the rule
- Click on Next

You will then see a summary of your settings. You can name the rule and enable authorization of exceptions,
- Click on Add rule
Users with professional payment methods, as well as managers and administrators, will now be able to easily consult the expense policy rules associated with their transactions. This will ensure consistency with tenant spending policies.
When an expense is made with a professional payment method, users will see a specific icon and the content of the rule associated with their transaction as well as alerts in case of policy overrun. This feature is accessible at all levels of the tenant for more efficient expense management.
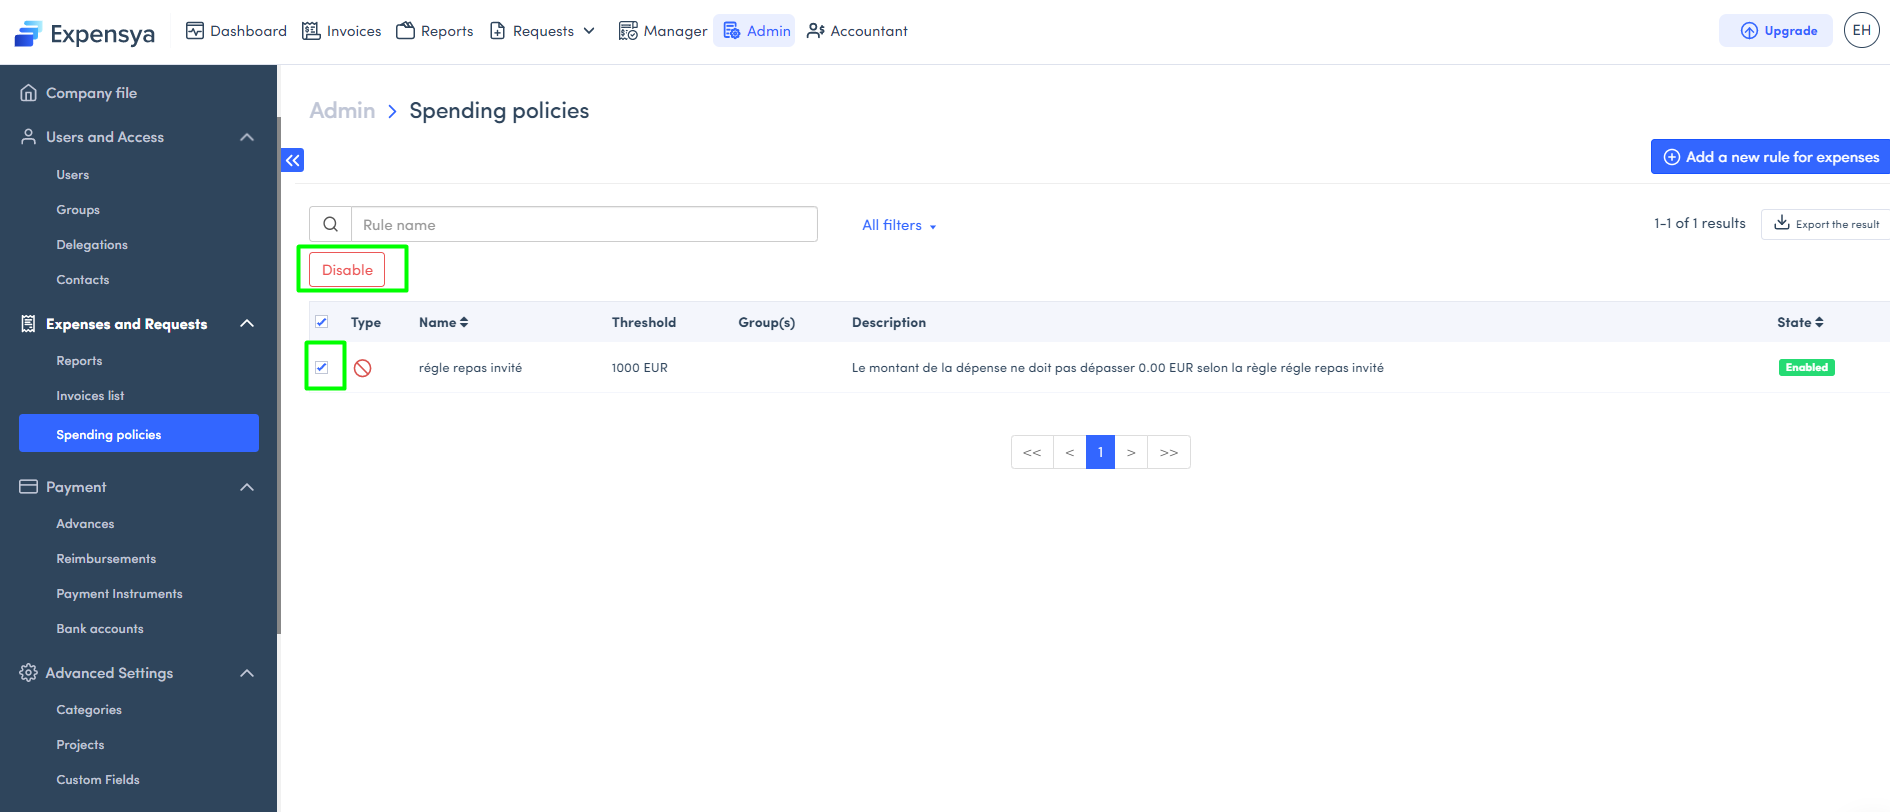
To disable an expense policy rule:
- Go to the Admin tab, Spending policies sub-menu.
- Select the rule to disable then click on Disable.