Meal Voucher Export
If your employees have meal vouchers and lunch expenses are permitted, your accounting teams will want to monitor the lunch expenses made in order to calculate the number of meal vouchers to deduct.
To facilitate this tracking, Expensya provides you with the Meal Voucher export format in its integration list starting from the Gold subscription.
This export helps calculate the number of meal vouchers to deduct based on the number of lunch expenses incurred during a working day and recorded over the chosen period, for the expense owners as well as their guests.
Activation of Meal Voucher Export Integration: To activate the meal voucher export, follow these steps:
- Go to the Admin tab.
- Access the Integrations menu.
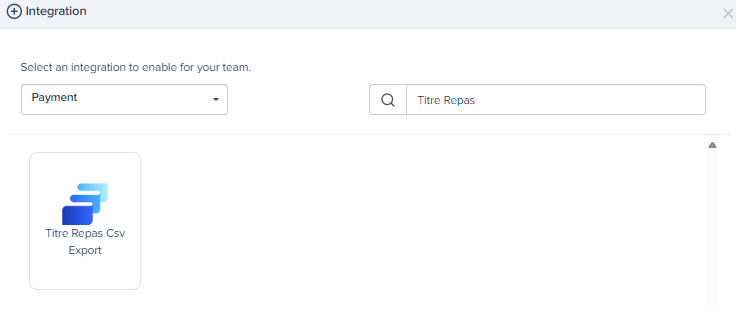
- Click the +Integration button.
- Select the integration type as Payment.
- Choose Titre Repas
- Configure the integration:
- Choose the label to display during export.
- Define the type of user authorized to generate this export format.
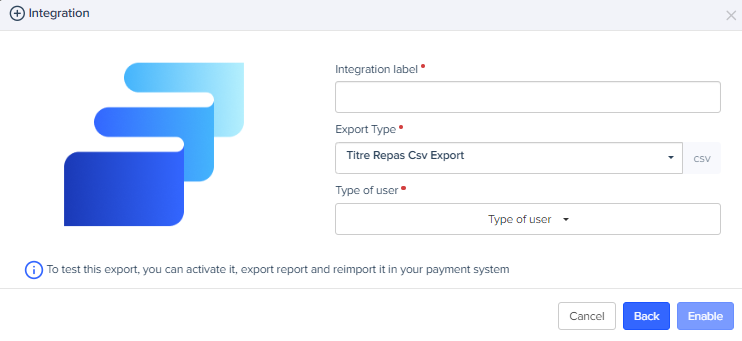
- Click on Enable
Configuring Categories for Meal Voucher Export:
To identify the expense categories that should be counted in the meal voucher export, Expensya relies on two configuration factors:
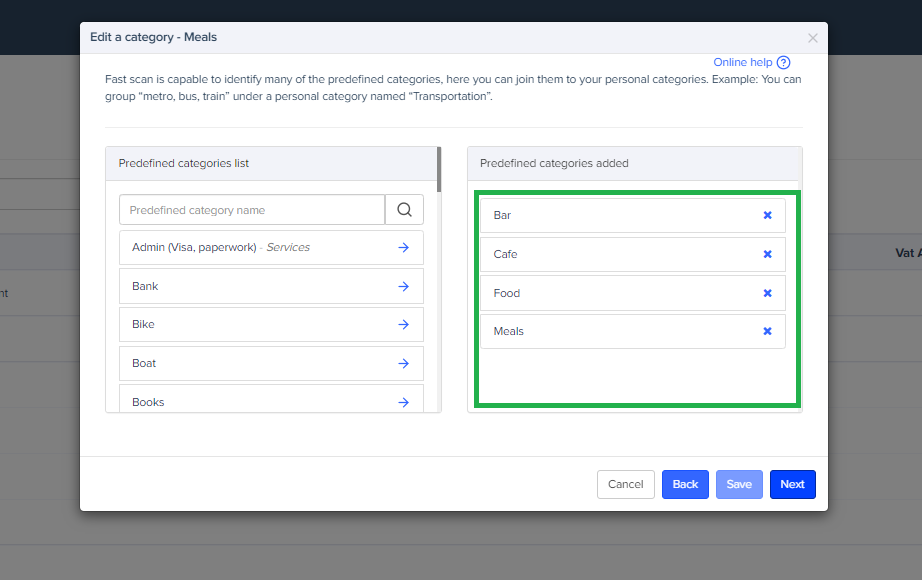
A- Configuration of Meal-Related Primitives on the Category:
For an expense category to be counted in the meal voucher export, the account administrator must assign the "Food," "Bar," "Café," and "Restaurant" primitives to it.
To configure the primitives of a category:
- Go to the Admin tab.
- Access the Advanced Settings menu, then the Categories section.
- Navigate to the category you want to configure.
- Click on Next at the bottom of the window on the right.
- Add the primitives.
- Save the changes.
B- Configuration of a Time Slot Including Noon (12:00) on the Category:
For an expense category to be counted in the meal voucher export, the account administrator must configure an authorized time slot that includes noon.
To configure the time range for a category:
- Go to the Admin tab.
- Access the Advanced Settings menu, then the Categories section.
- Navigate to the category you want to configure.
- Click twice on Next at the bottom of the window on the right.
- Set a Start Time and an End Time covering the Noon (12:00) period.
- Save the changes.

Exporting Meal Vouchers:
To generate a meal voucher export:
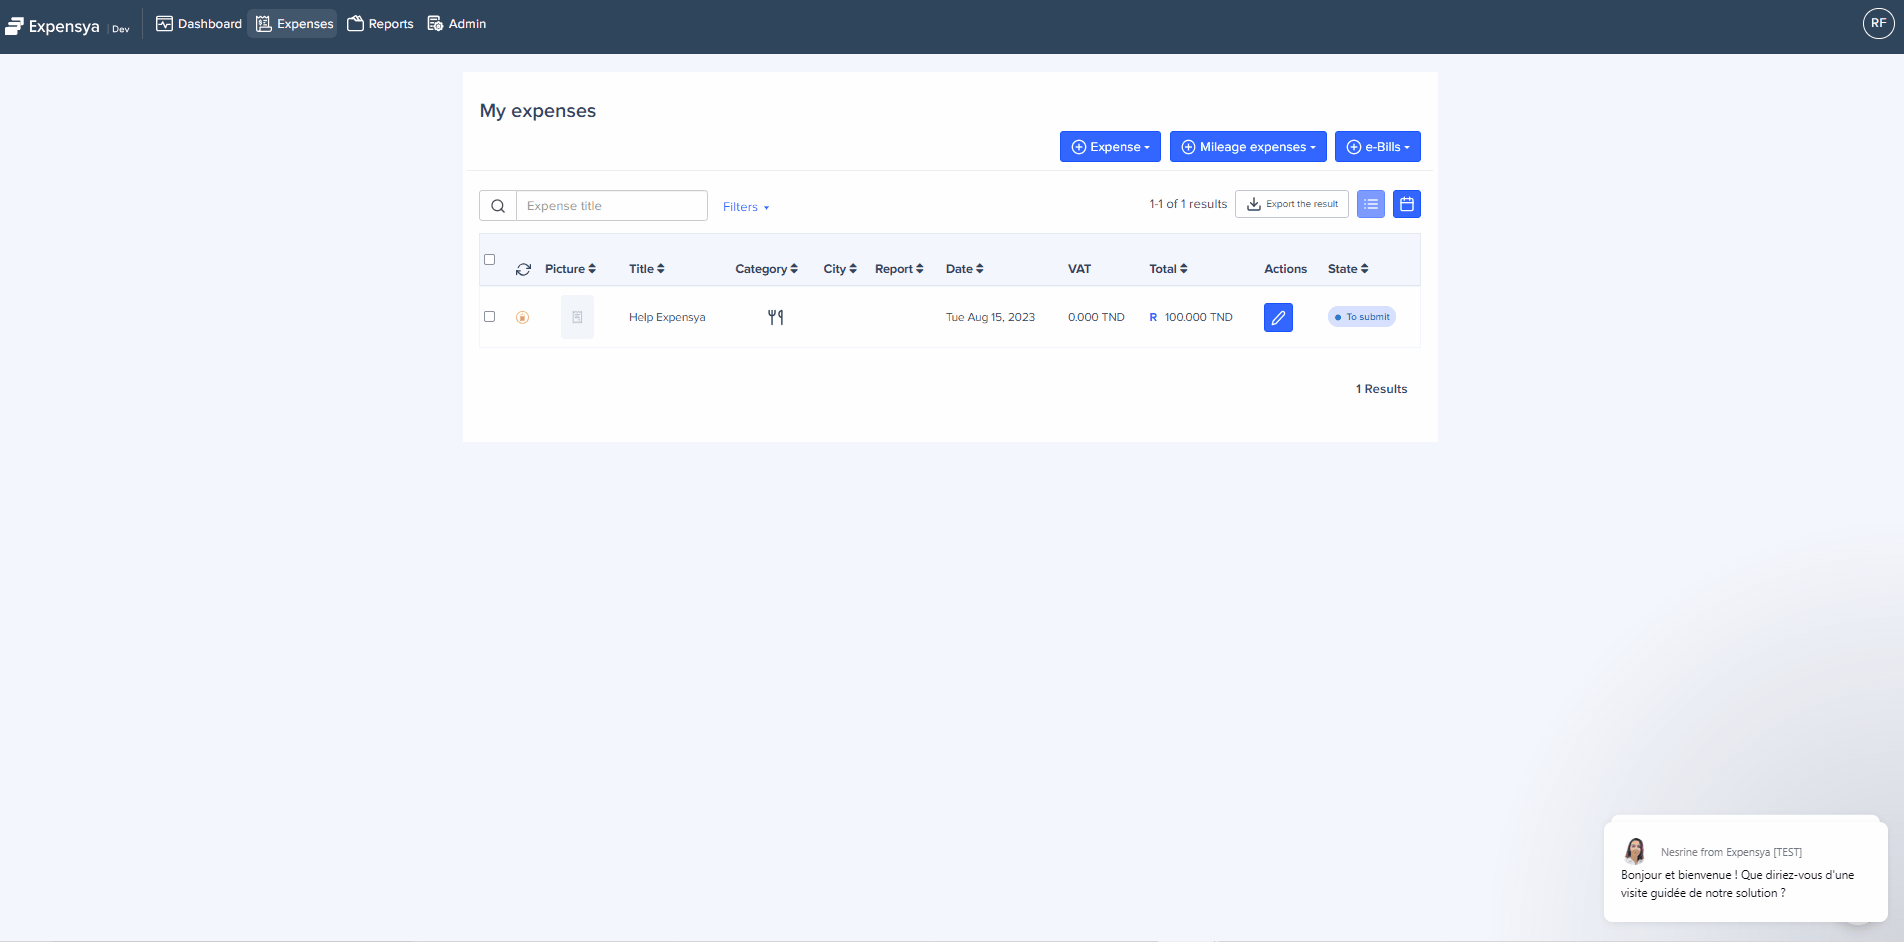
- Go to the Expenses List menu under Expenses and Requests.
- Select the relevant expenses.
- Click on Export the result.
- Click on Include expense receipts and download the file.
The exported file is in CSV format and consists of 3 sections:
Section 1: Period covered by the oldest and newest exported expense.
Section 2: List of exported lunch expenses, including:
- Expense date
- Expense day
- First name and last name of the expense owner
- Expense reason (specific field in the expense form, disabled by default)
- List of internal guests
- List of external guests
- Indication of whether the expense should lead to a meal voucher deduction (Yes if incurred on a working day, otherwise No)
- Category containing the configured category name in Expensya
Section 3: Summary of employees and external guests with the total number of meal vouchers to deduct.