Managing Contacts on Expensya
As an admin or employee, you can manage your contact list directly through the web application.
Types of contacts
On Expensya there are two types of contacts:
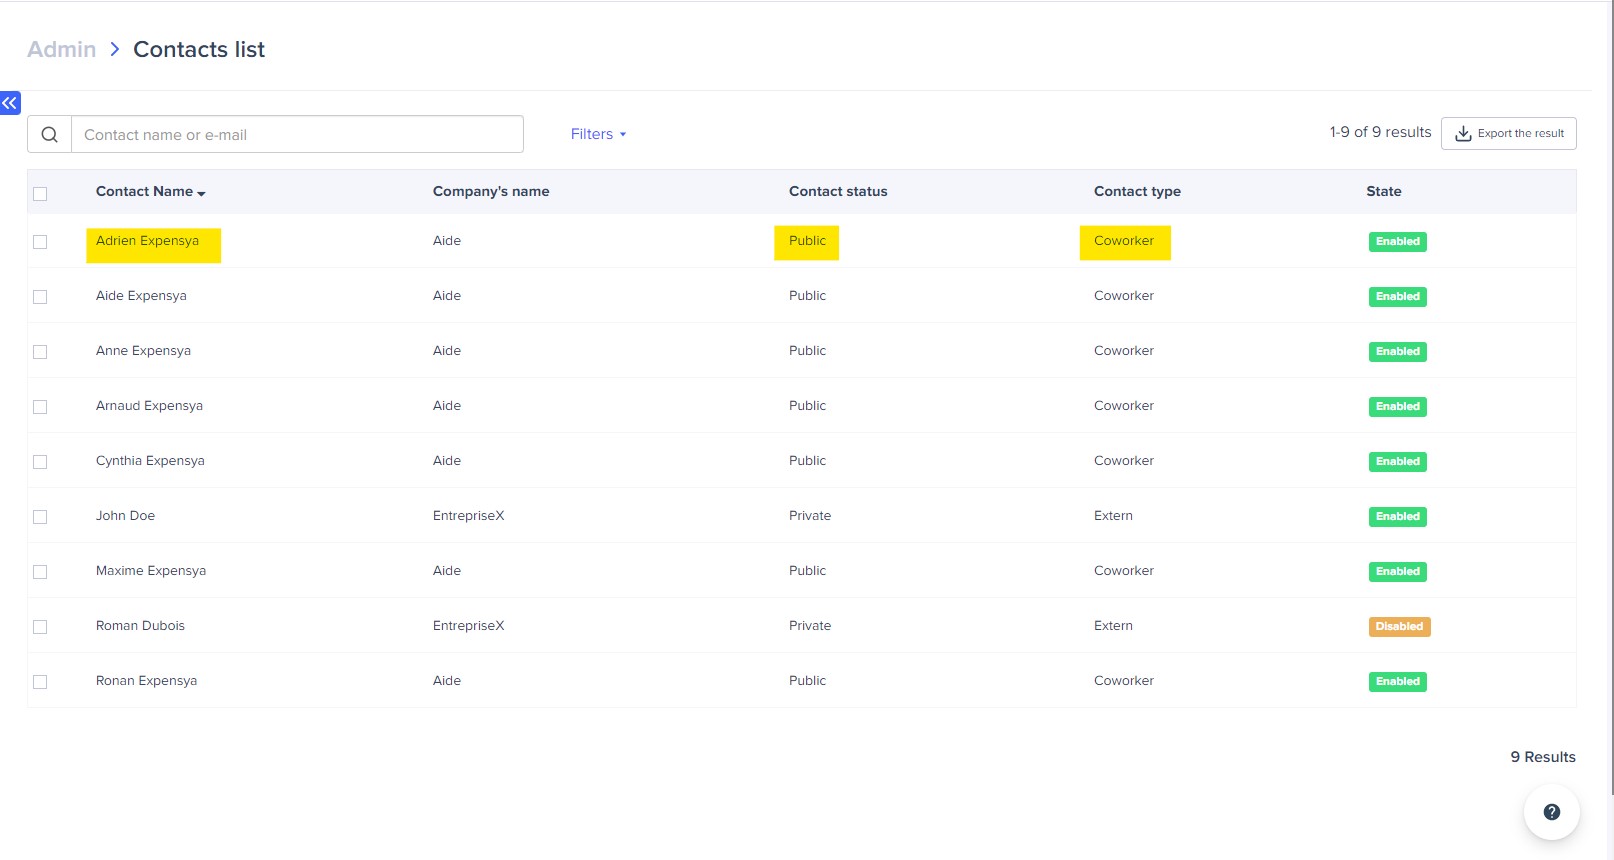
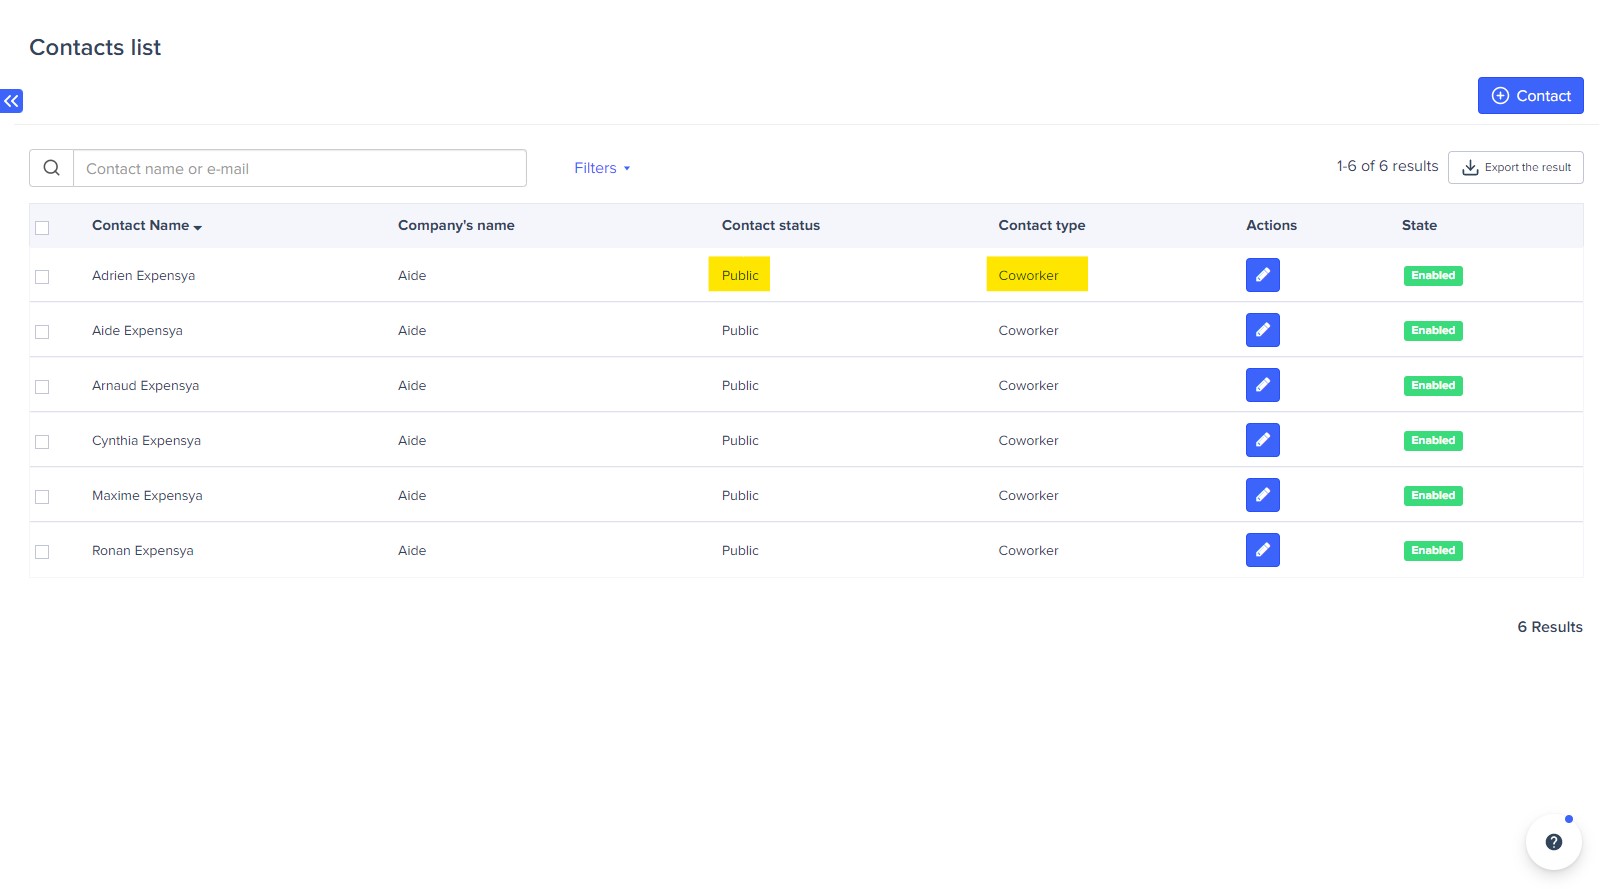
Internal contacts: these are the coworker type contacts with the status public.
External contacts: these are the External contacts with a status of either public or private.
The choice of status is to be defined when creating the external contact.
List of contacts on the admin tab | List of contacts in the employee's personal settings |
 |  |
Contact management by the employee:
It is possible for all the employees to:
- Add external contacts to the tenant.
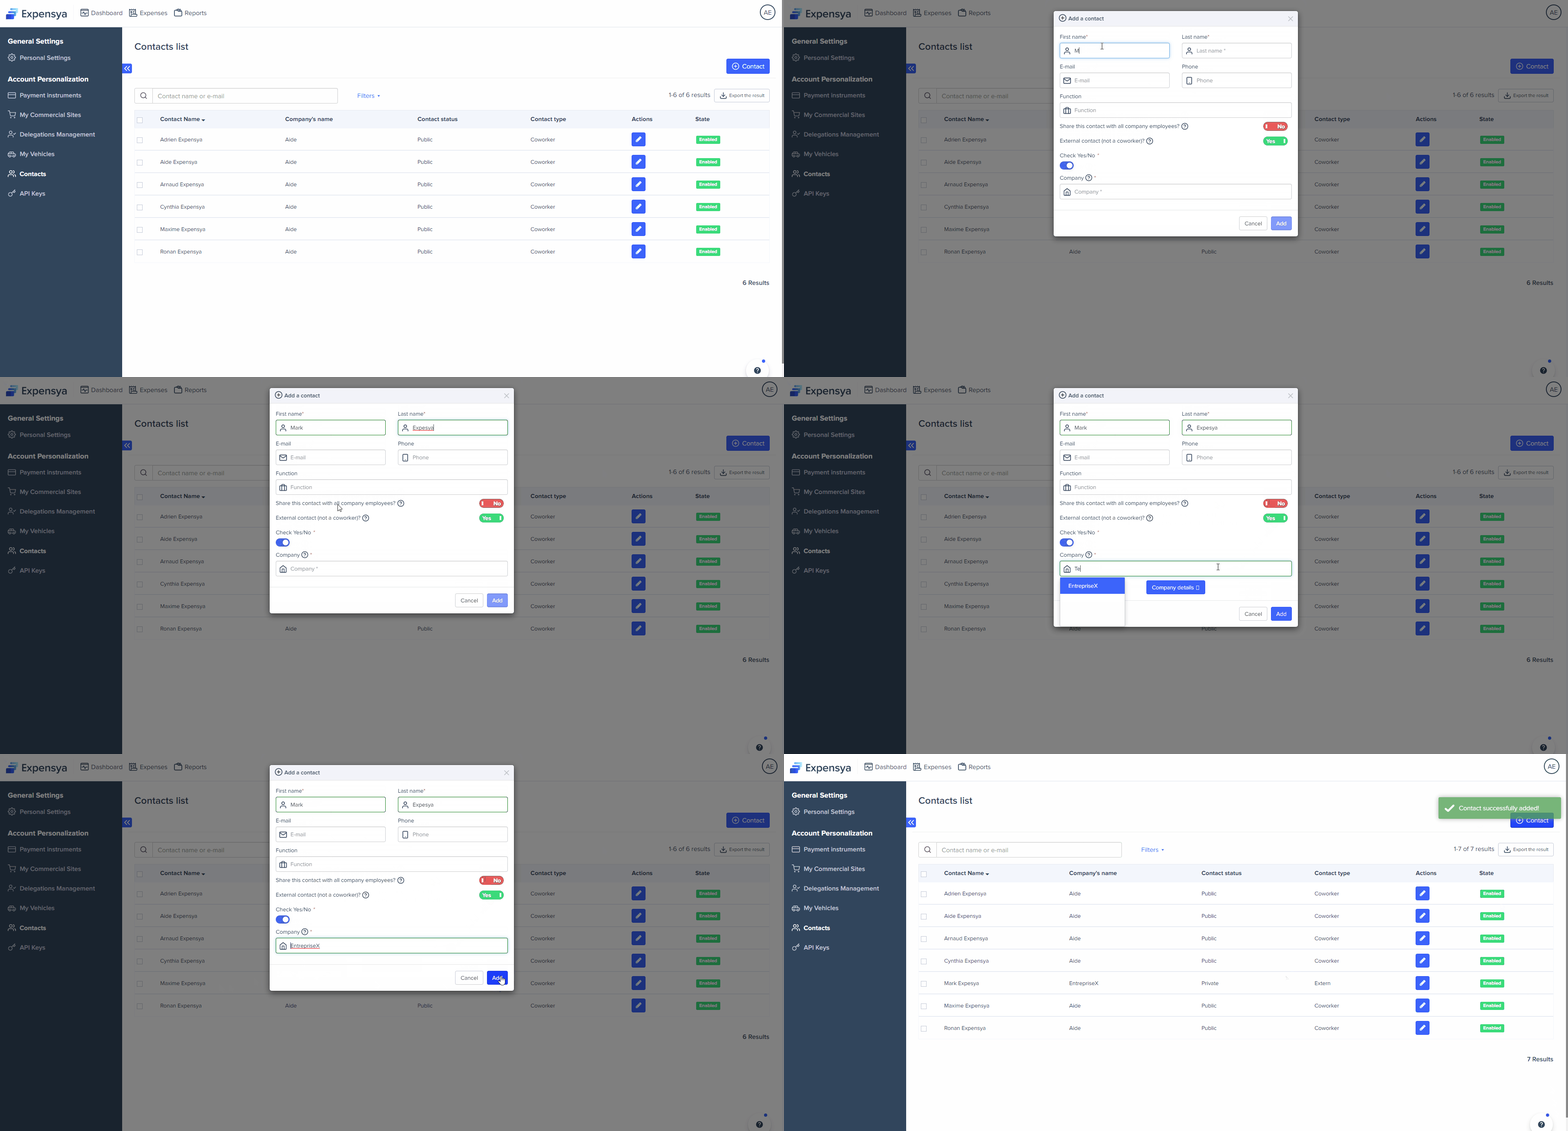
To add an external contact, simply:
- Click on the initials of your name at the top right of the Expensya interface!
- Go to Settings, then, in the Contacts menu.
- Click on the + Contact button.
- Fill in the fields specific to the contact.
- Finalize the addition via the Add button.
- Editing contacts outside the tenant
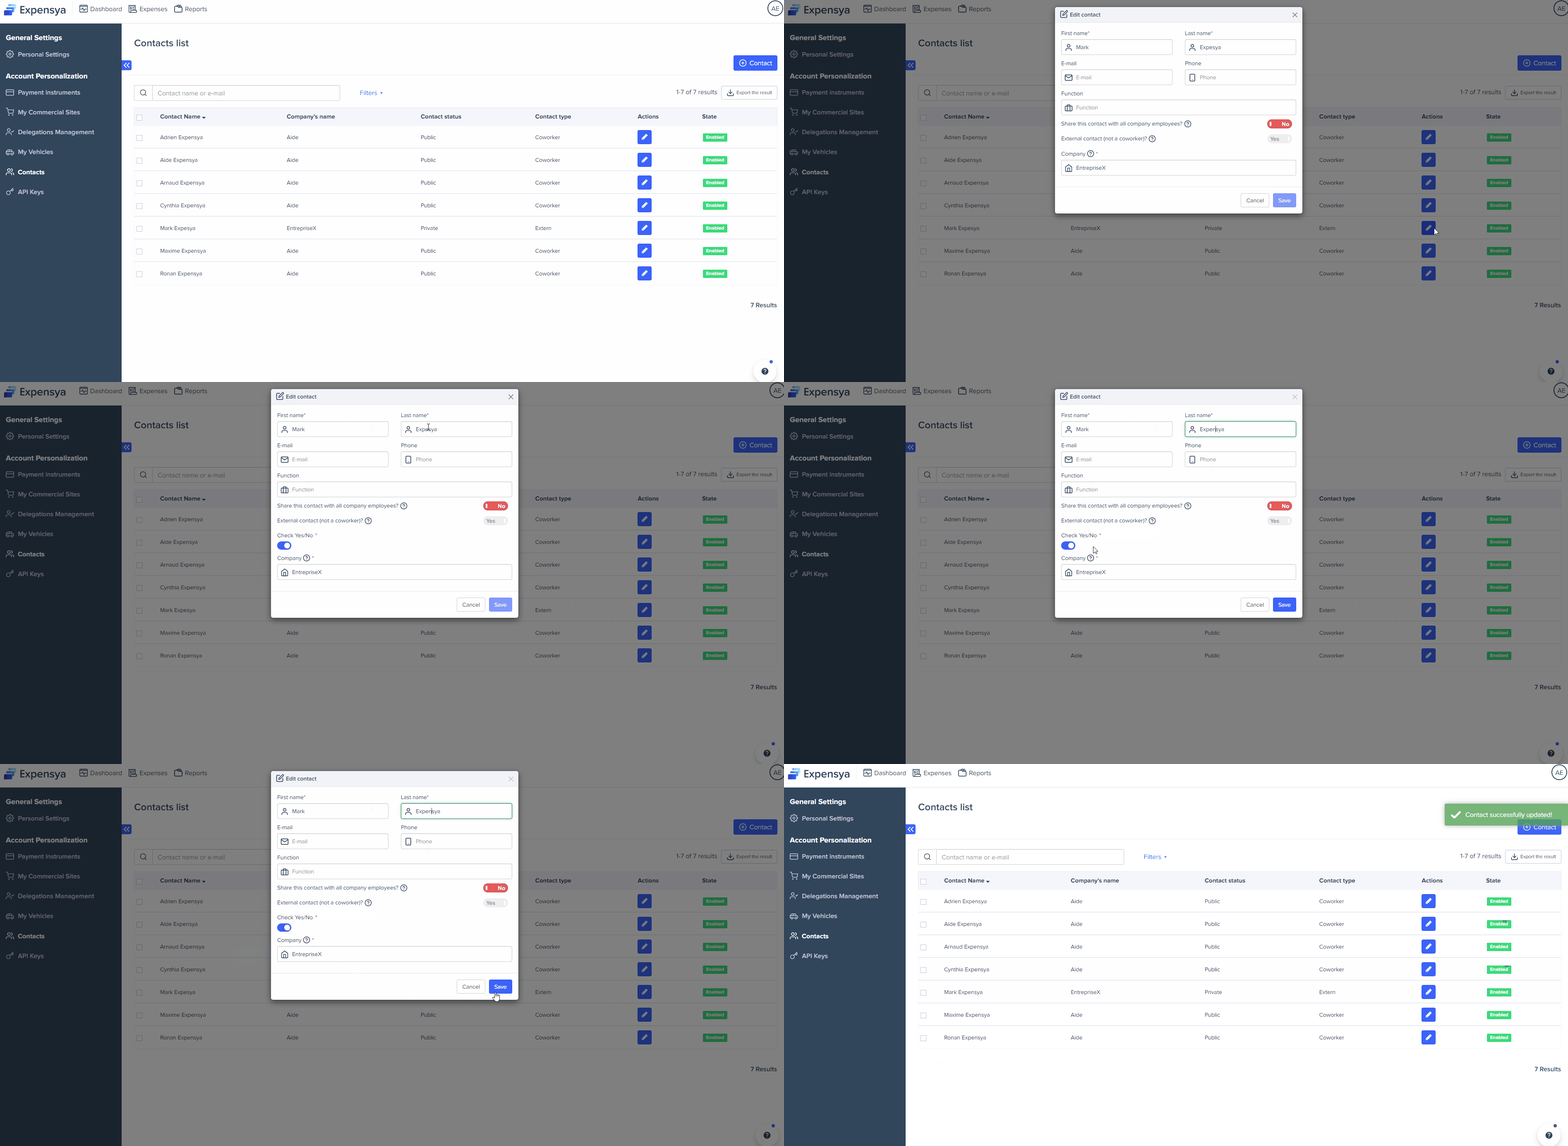
To modify an external contact, simply:
- Click on the icon at the top right of the Expensya interface.
- Go to Settings, then, in the Contacts menu.
- Click on the edit button.
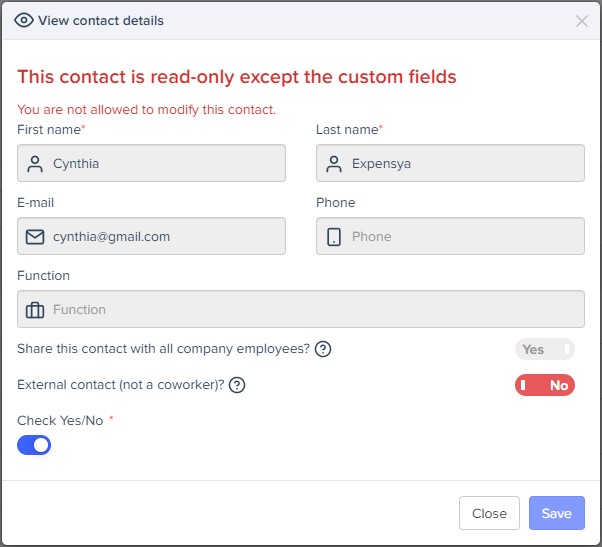
- Modify the data you want to change, then click on the Save button.
- Deactivate one or more contacts:
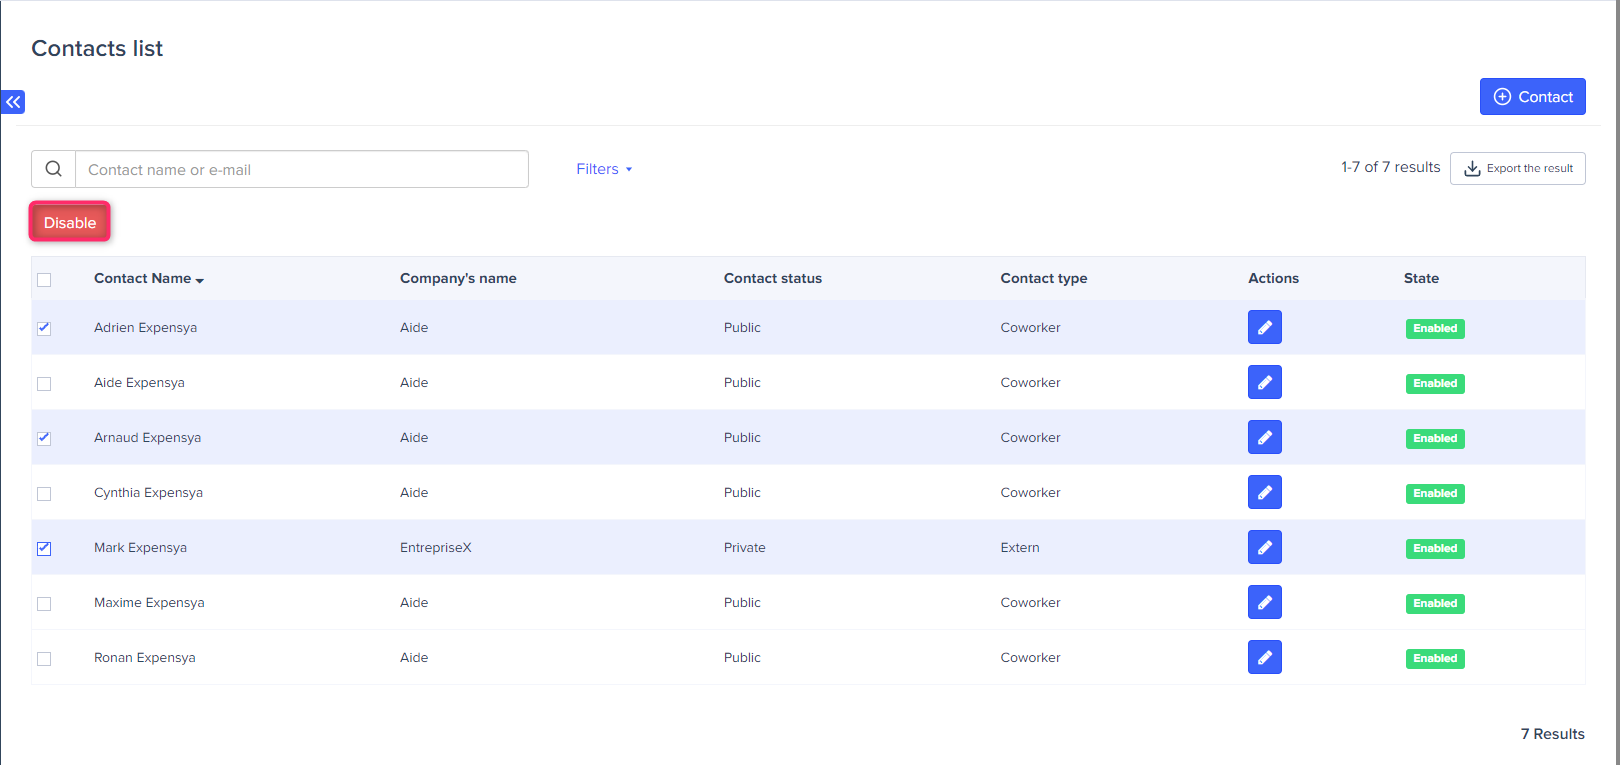
To deactivate contacts, simply:
- Go to the list of contacts from the personal account settings,
- Choose the relevant contact(s) and proceed to click the Deactivate button.
Contact management by the account administrator.
It is not possible to add contacts from the admin tab of the account.
The administrator can only make changes to contacts that are already available.
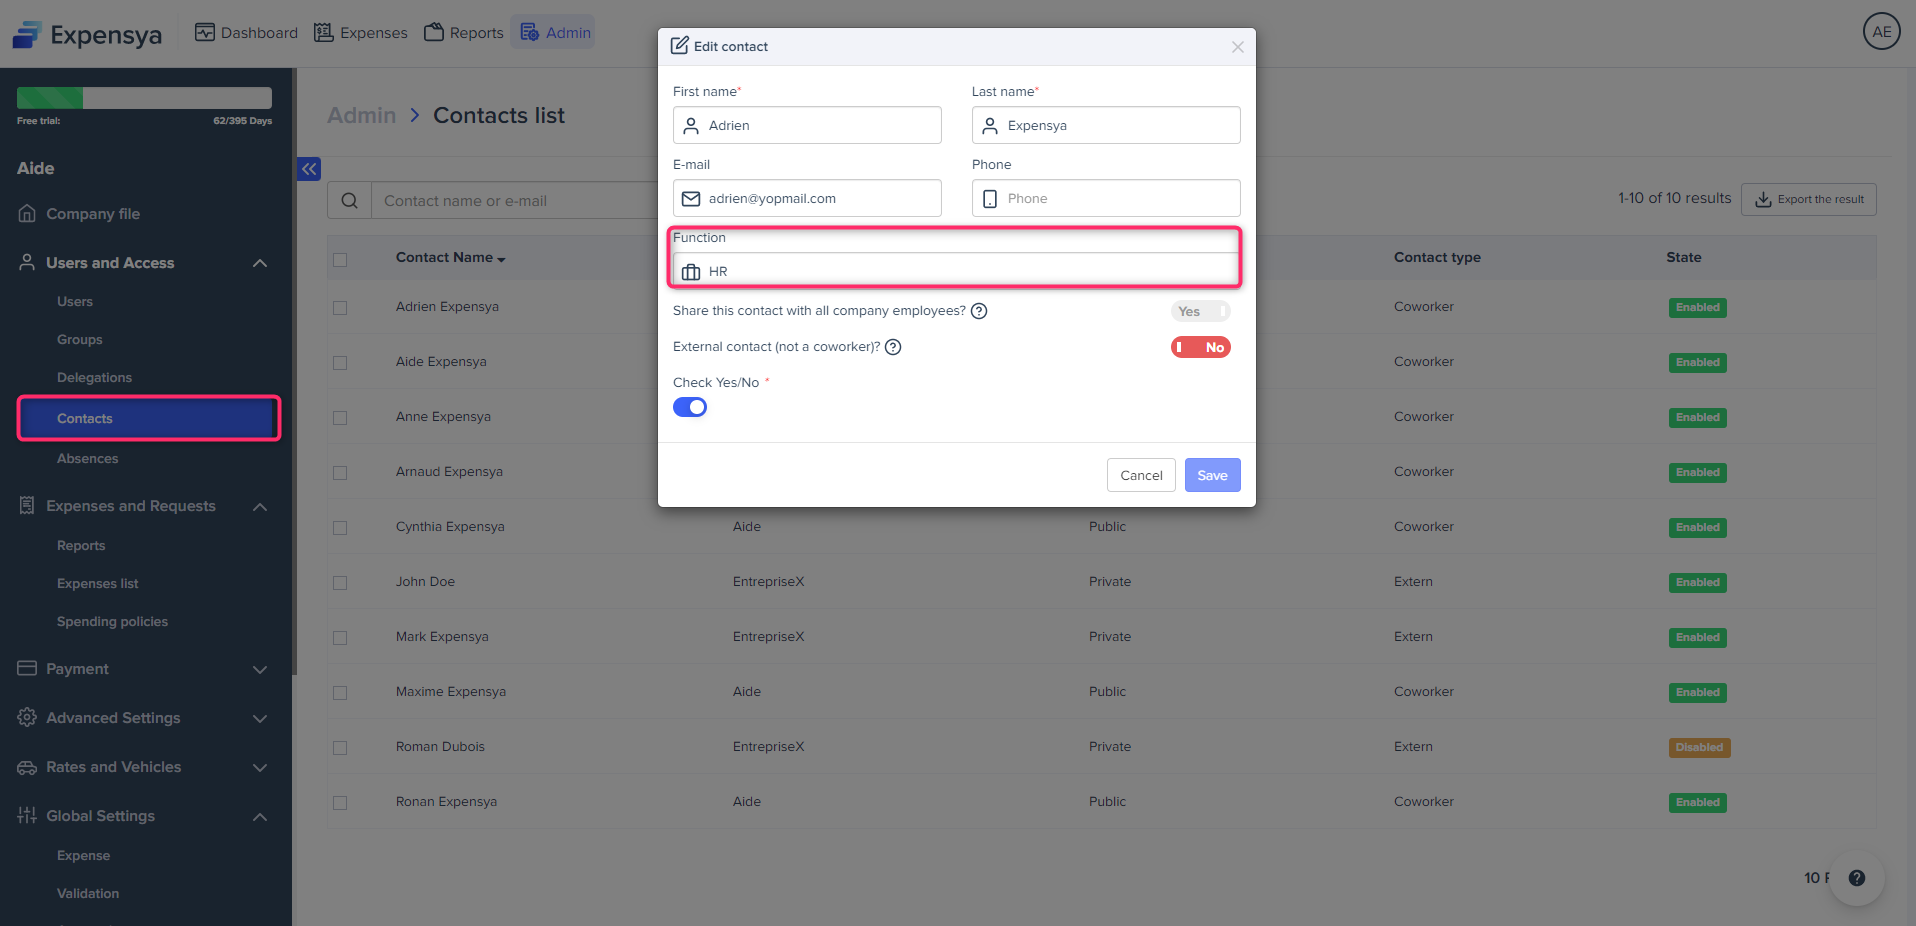
- Editing a contact as the administrator
To do this, simply:
- Go to the Admin tab, Users and access sub-menu and then to Contacts.
- Click on the contact to be modified.
- Make the necessary changes from the contact form!
- Save
- Deactivating a contact as the administrator
To deactivate contacts, simply:
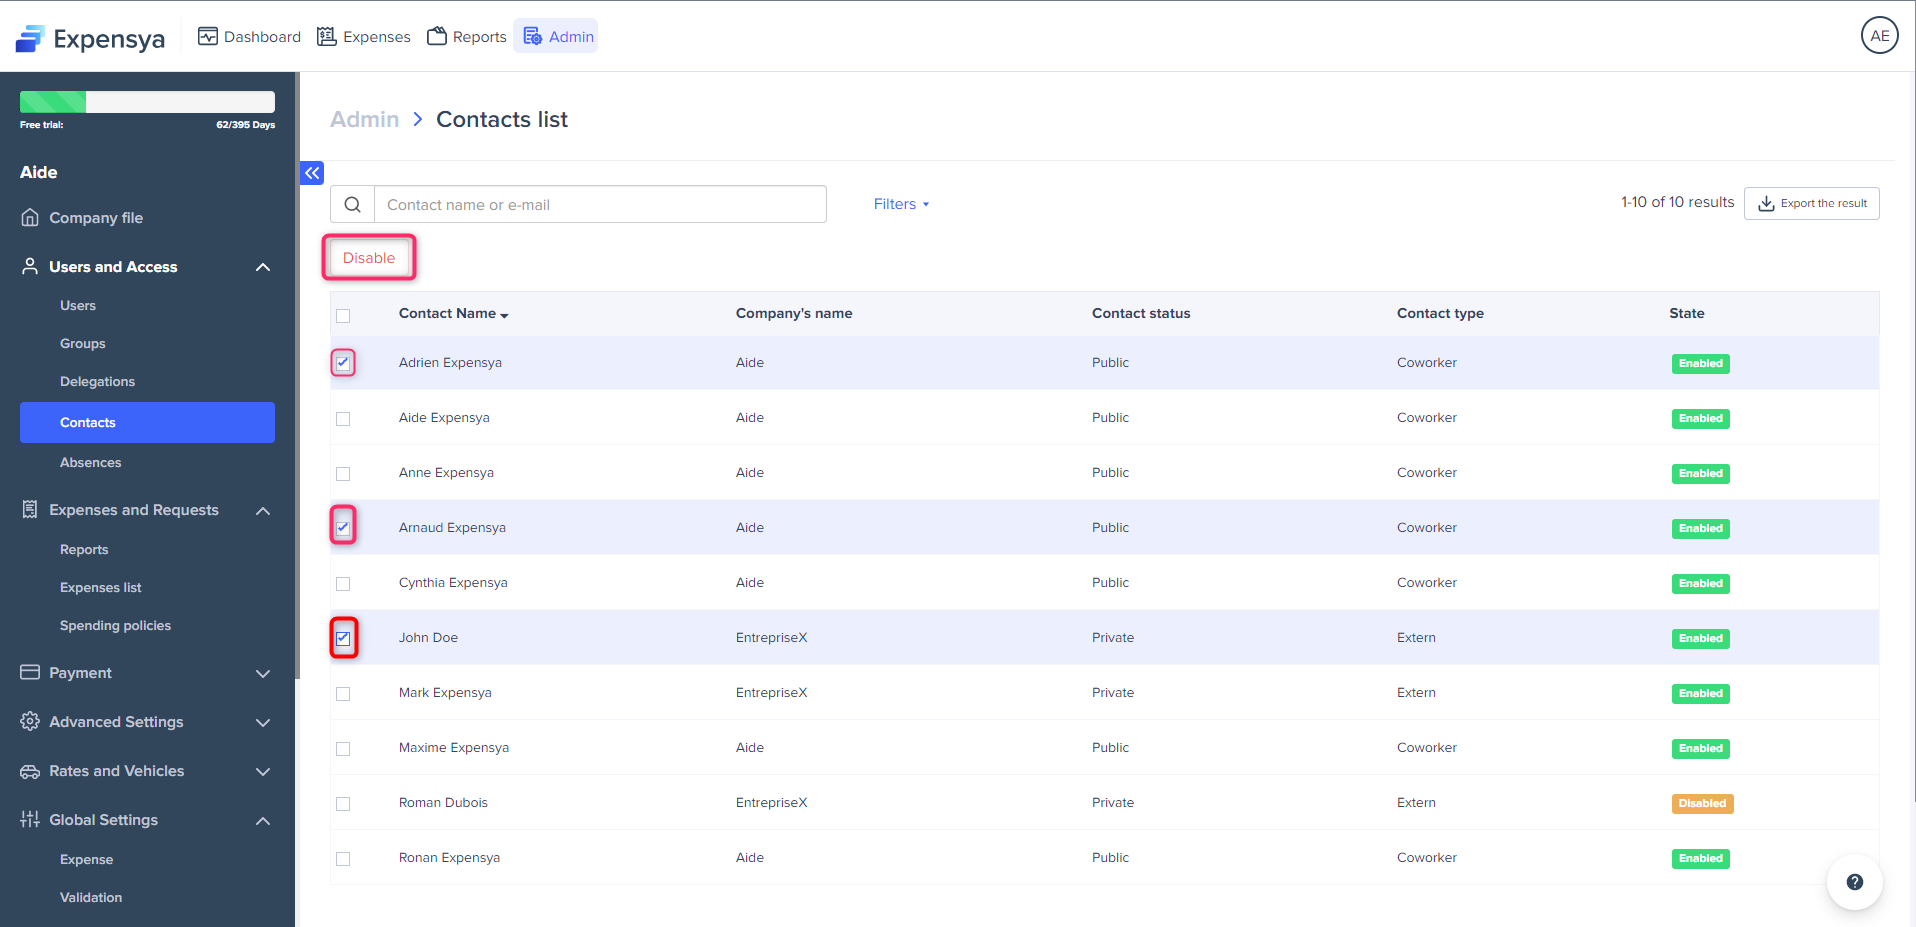
- Go to the list of contacts from the admin tab, under Users then Contacts.
- Select the contact(s) in question and click on the Deactivate button.
Add and configure custom fields on internal and external contact forms.
As an administrator, you have the ability to add additional fields to the internal and external contact forms.
To do this, simply:
- Go to the Admin tab under the Advanced settings menu then Custom fields,
- Click on the Add a custom field button,
- Select Internal Contact and/or External Contact in the Interface field,
- Choose the type of the custom field,
- Click on Next to proceed to the second step of the addition,
- Fill in the fields, then click on Save.

Custom fields - the basics
Custom field of type choice among list
The added custom field can be filled in by the administrator and/or the employee.
