Import of Personal Vehicles by the Administrator
 Updated
By default, users add their personal vehicles themselves through the personal settings of their accounts, as explained in the following article: Managing my vehicles for my mileage expenses
In some cases, the tenant's internal policy requires that personal vehicles be added by the account administrator, not by the vehicle owner.
To address this requirement and need, Expensya has introduced an option that allows the account administrator to add personal vehicles for their colleagues from the Account Administration tab.
How can the administrator add personal vehicles
To perform this import, the account administrator needs to:
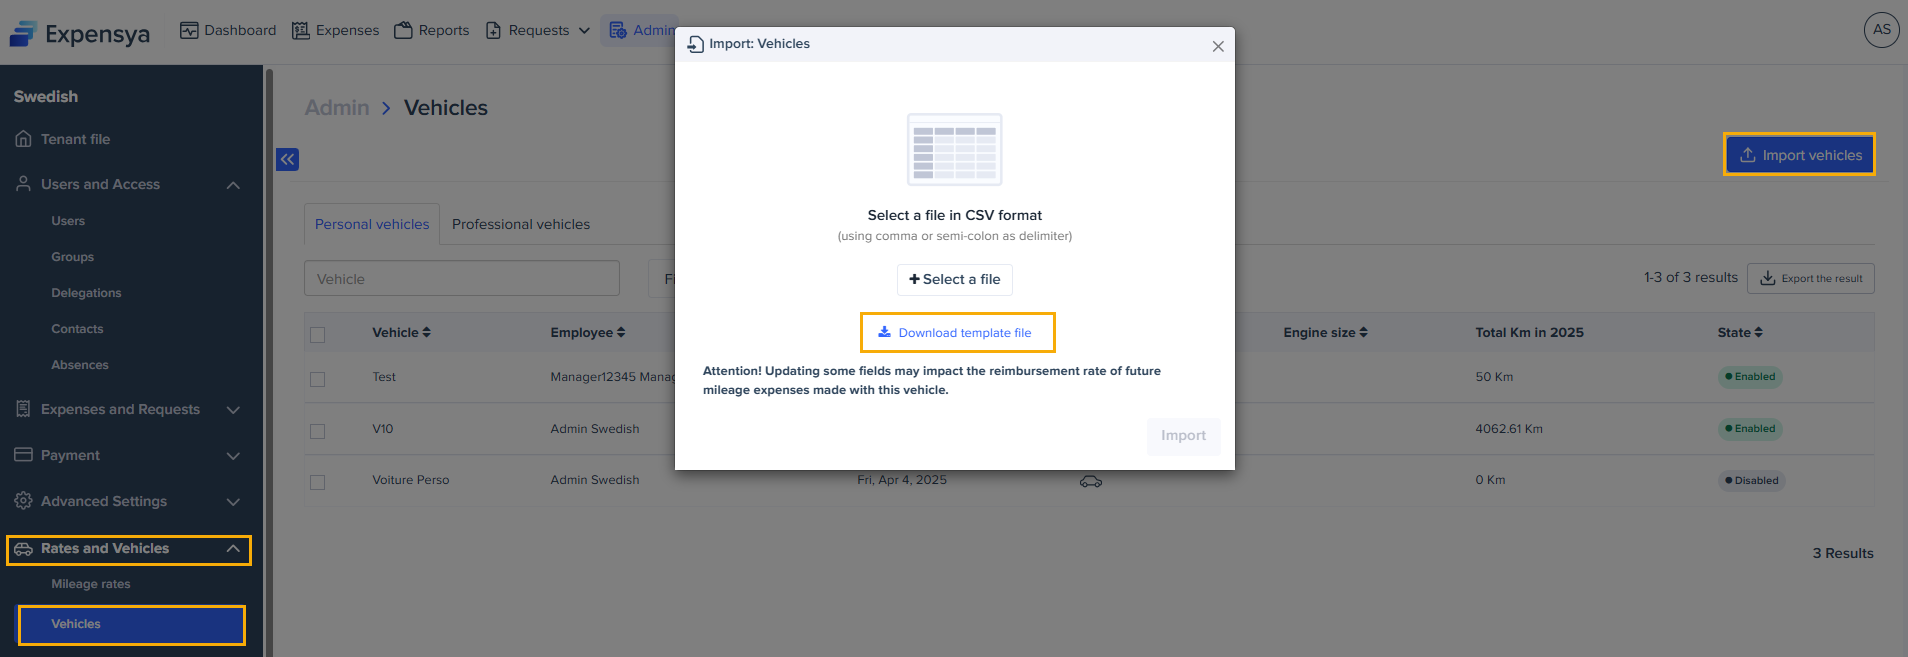
- Go to the Admin tab, then select the Rates and Vehicles menu, and then the Vehicles submenu.
- Click Import Vehicles, then Download the template file.
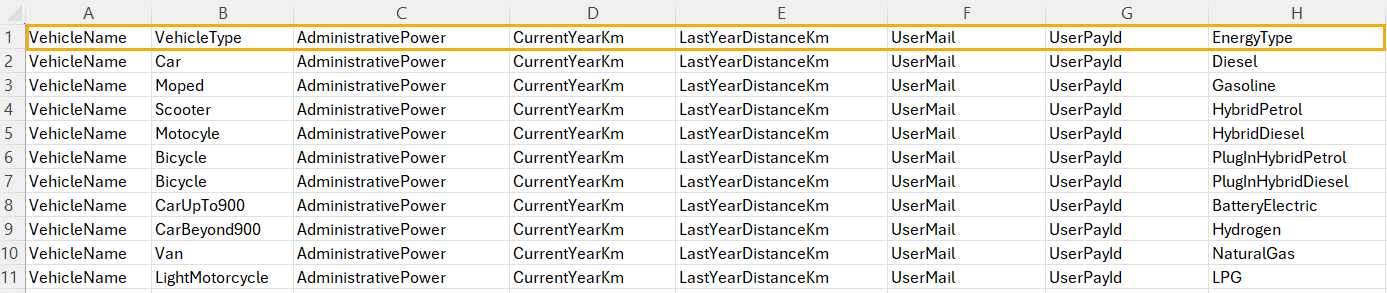
- The template file is in CSV format. The columns in this file are as follows:
- Vehicle Name - name assigned to the vehicle.
- Vehicle Type - type of the vehicle. Options include: Car, Moped, Scooter, Motorcycle, Bicycle, CarUpTo900, CarBeyond900, Van, LightMotorcycle, HeavyMotorcycle, EPATractor, Quadbike, ATV, Snowmobile, Motorboat, MotorboatUpTo50, MotorboatBeyond50, Other.
- Administrative Power - fiscal power of the vehicle
- Current Year Km - distance traveled during the current year
- Last Year Distance Km - distance traveled during the previous year
- User Mail - user's email
- User PayId - user's employee ID
- Energy Type - energy type of the vehicle. Options include: Diesel, Gasoline, HybridPetrol, HybridDiesel, PlugInHybridPetrol, PlugInHybridDiesel, BatteryElectric, Hydrogen, NaturalGas, LPG, Biofuel, Other. Note that the Energy Type column may be configured by the admin as mandatory, optional, or hidden. If hidden, the column will not appear in the CSV.
- After filling in the table, import the file. The list of vehicles will be added under the Personal vehicles tab.
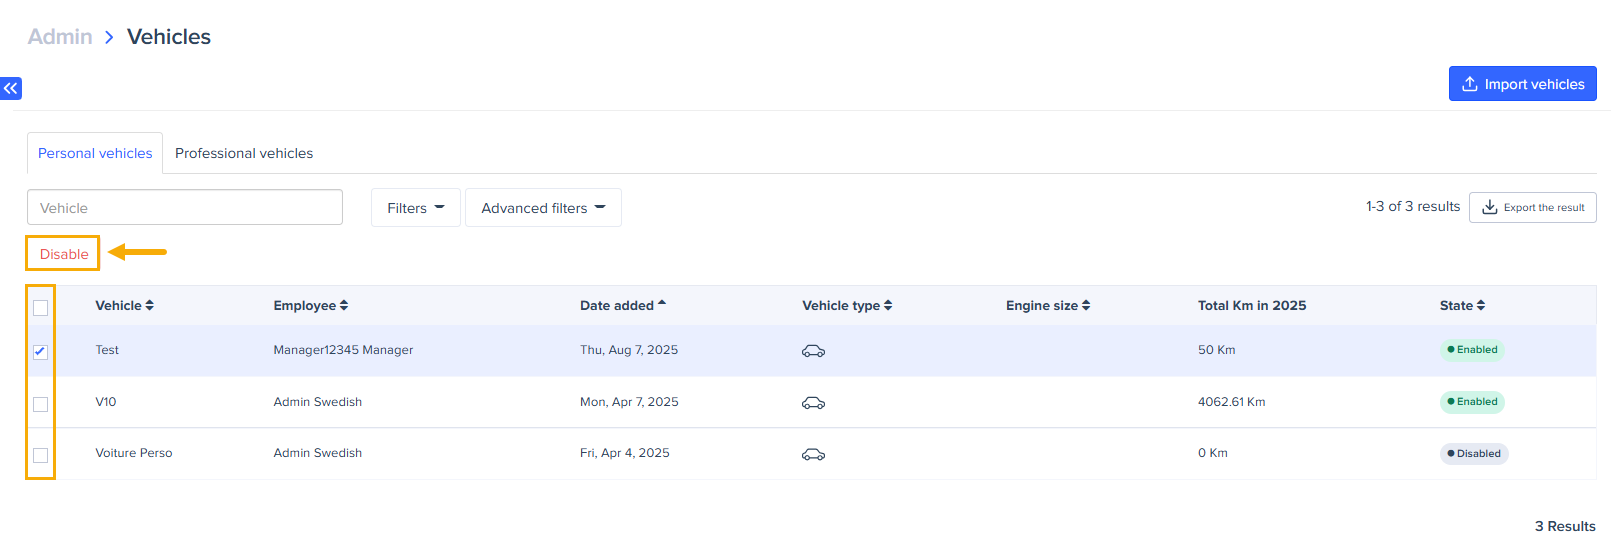
How can the administrator delete a vehicle
The administrator can disable a vehicle from the vehicle list, but cannot delete it.