Welcome to Expensya’s Admin Guide!
Introducing the Expensya Admin Guide: your essential tool for mastering financial management within your organization. This guide allows you to navigate Expensya efficiently and effectively, enhancing your role as an administrator.
The Role of an Admin:
The administrator is the one who can edit the different settings for the whole tenant’s account from the web version.
As an admin, you can:
- Set the tenants information and localization preferences.
- Manage the different users.
- Invite users and review usage.
- Create projects.
- Customize categories.
- Configure expenses’ rules and policies.
- Manage vehicles and mileage.
- Refund and archive expenses.
- Make reporting on expenses.
- Integrate Expensya with several tools.
- Manage the Expensya Card operations.
- Set up the workflow and approval process.
Through this start guide, we want to direct you through the diffrent functionalities within the scope of this role.
- Registration and Account Set up:
The first thing you need to do is register and set up you Expensya account. For this, start by visiting our website. Click on Free Trial and fill in the form to register on Expensya.
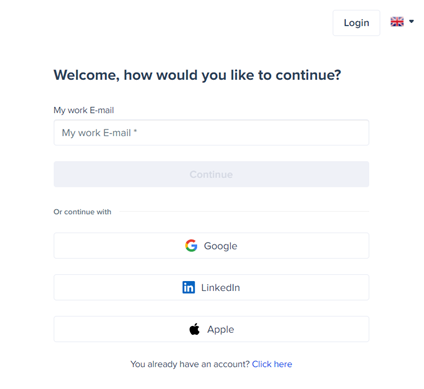
We offer you a 30-day free and non-binding trial to help you become familiar with our solution.
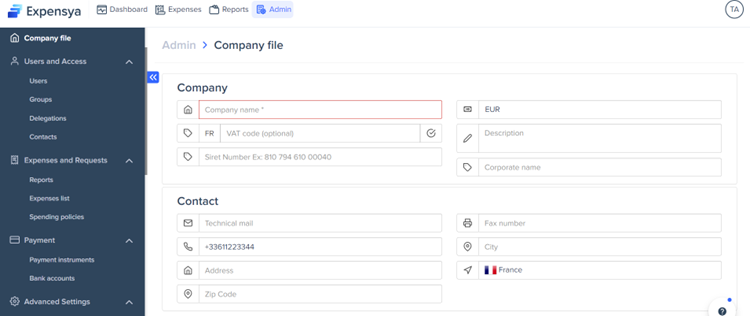
- Set the tenant information and localization preference:
As an administrator, you can easily change the tenant’s settings on Expensya from the website by selecting the Admin tab and choosing Tenant File on the sidebar menu.
- User Management:
Now that you have set up your account and added your tenant’s information, it is time to start the user management process.
You can easily invite employees in your organization to use Expensya from the administration tab on the web application. They will receive an email allowing them to access the platform.
The table below provides a concise overview of key features, accompanied by links to detailed articles, ensuring you're equipped with the knowledge to navigate through the different user management operations that Expensya allows you to perform.
Feature | Article |
Import and manage users in the admin panel | |
Manage roles in Expensya | |
Create groups | |
Grant delegated access | |
Import user vehicles |
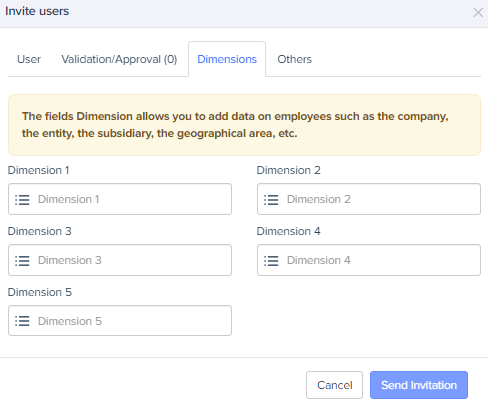
Moreover, as an admin, you have the possibility to add Dimensions:
In fact, the user group is a feature that brings together users with common positions into a single group. It is up to you as the administrator of the account to configure the dimensions in the form of each user and to, subsequently, create the new user groups.
Dimensions allow users to be classified according to axes, namely projects, departments, zones, and hierarchical structures, so adding them would be a great asset to your organization.
You can add dimensions by simply clicking on the Add User button in the Users and Access menu of the Admin tab and then go to the Dimensions submenu.
- Projects Creation:
A project is an extra field in the invoice’s form. Only the admin of the account can create and configure a project.
You can, therefore, assign a project to a group of employees. Employees affected to a project can have a different approver than the preselected one.
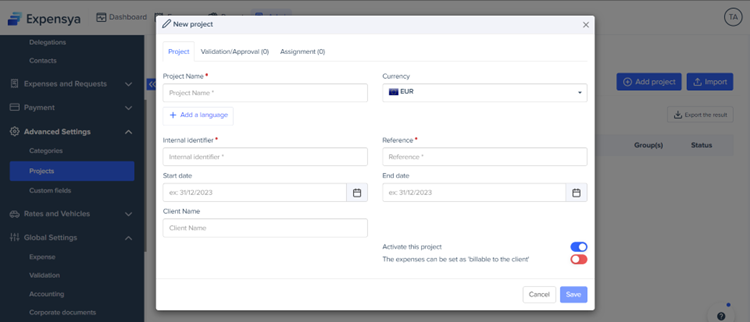
To add a project:
- Go to the Admin tab then the menu Advanced Settings under Projects submenu.
- Click on Add project or Import (to import a CSV file containing the list of your projects).
- Fill in the following fields (project name, internal identifier, reference, start and end dates) and save.
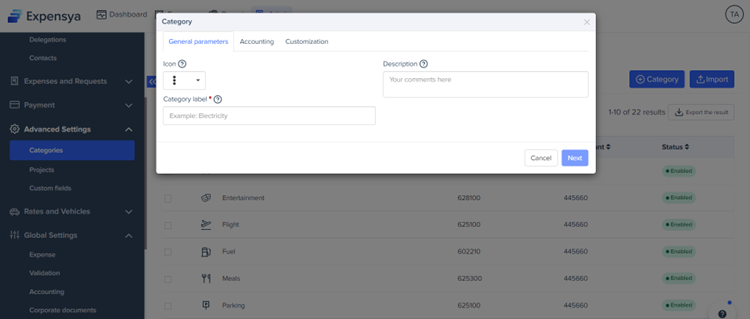
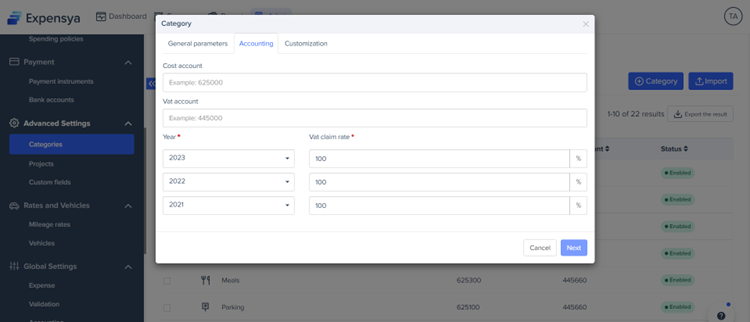
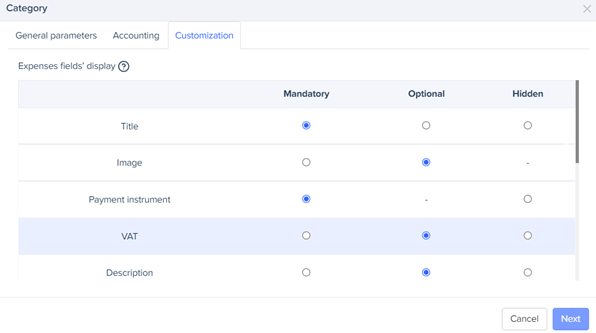
- Categories Customization:
Expenses categories are used to define the nature of the bill.
When configuring a category, you can set the cost and the VAT account. You can also set the VAT claim rate for the current year as well as the two previous ones.
As an admin, you can customize the expense field’s display related to the category: whether a field is mandatory, optional or hidden.
After creating or modifying the category, you can configure its fast scan (define the predefined categories of the category in question).
The predefined categories are categories of the same nature that we group together. For example: For Transport category, the same categories will be (bus, taxi, metro, train). And when our fast scan detects one of these categories, it will associate the expense to Transport category.
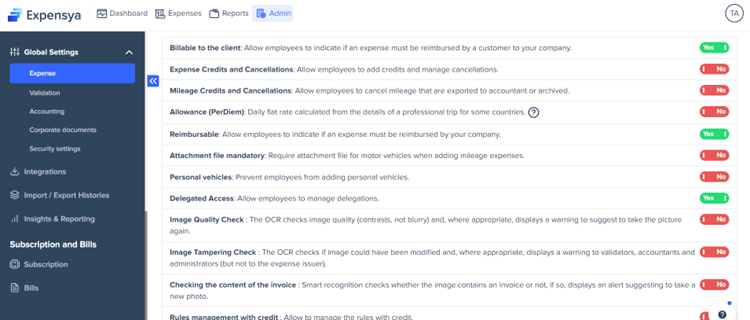
- Expense Policy and Rules Configuration:
The administrator can set spending policies according to several settings (date, category, maximum value…).
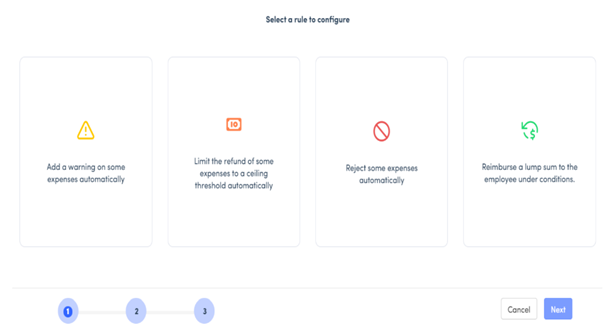
They have the choice between 4 different spending rules:
- The warning rule: if any of the rule's conditions is true, the employee will have a pre-configured warning message.
- The reimbursement by ceiling rule: the employee cannot exceed a maximum value; he will be reimbursed with a preselected amount.
- The blocking rule: if any of the rules’ conditions is true, the employee cannot save the invoice.
- The refund by fixed price: the employee will be reimbursed a lump sum regardless of the value of the Invoice.
To add an expense rule:
- Go to the Admin tab, the submenu Expenses and Requests then Spending Policies.
- Click on the Add a new rule for expenses button and choose one of the 4 spending rules.
- Configure the rule then save.
- Vehicules and Mileage Management:
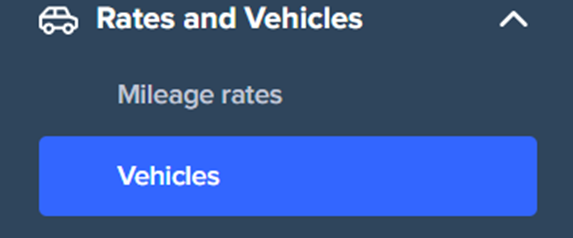
The admin can define the mileage rate on which the calculation of mileage expenses of the employees will be set at the tenant. You can, therefore, choose the URSAFF rate or choose to set up a personalized rate or even a fixed rate for reimbursement of mileage expenses.
As an admin, you can see all vehicles added by the employees.
To see all the vehicles, click on Rates and vehicles on the Admin tab then on Vehicles.
Given that the employees vehicles are personal, you can only have an overview of the list of the vehicles and thus cannot change their settings.
- Expenses Refund and Archiving:
Legal archiving means you no longer need to worry about losing your receipts!
Expensya provides this functionality for several companies.
For instance, we allow our clients to subscribe to a legal archiving option with so-called probative value. This archiving with probative value solution allows Expensya clients to store supporting documents in a digital format as opposed to the more traditional paper format.
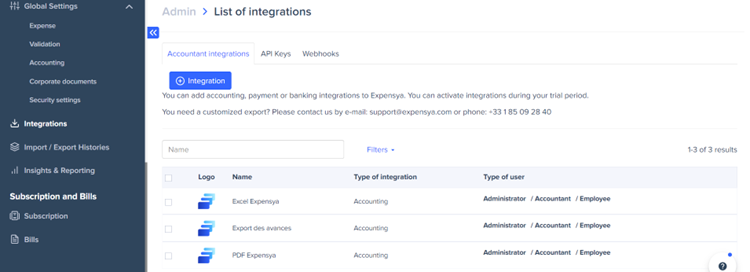
- Expensya Integration:
At the integrations tab you can visualise the different export and import formats available, as well as the associated roles.
To add a new integration:
- Go to Administration tab then to the Integrations submenu.
- Click on Add a new integration.
- Expensya Cards:
Expensya administrators can have one or more roles related to the management of Expensya payment accounts and cards.
Roles allow you to manage the following privileges:
- Manage cards: add and modify Expensya cards. Once the role is activated, the administrator will be able to access the Expensya Cards tab in the Payment Methods sub-menu under the Payment menu.
- View Accounts: view account details and transactions. Once the role is activated, the administrator will be able to access the Expensya Card Account tab in the Bank Accounts sub-menu under the Payment menu.
- Initiate transfers: initiate SEPA transfers from the Expensya cards payment account. If you are the legal representative or an administrator who has the role Manage cards, then you have the possibility to activate or deactivate roles to administrators.
- Approval process & workflow set up:
As an admin, you can easily configure the approval process for expenses and budgets through the admin tab. All you have to do is go to General Settings and choose Expense or Approval according to your needs.
- Customization and preference:
We have dedicated an entire section in our help center to make you more acquainted with the customization of the different admin features.
- Tax Rates:
As an admin, you can configure the recovery rates per year for taxes like the VAT through the expense category customization interface.
The Value Added Tax (VAT), primarily known as "Tax on Value Added," is a consumption tax paid by the consumer, collected by the company, and remitted to the state. Its recovery rates per year can be configured by following these steps:
- Go to the Administration tab and then select Advanced Settings.
- Access the Categories submenu.
- Click on the category you want to modify.
- Go to the Accounting tab and configure the VAT recovery rates by year.
It is also possible to hide the VAT field on the expense form when VAT is not recoverable or when an expense is incurred abroad. This configuration can be accessed through the expense category customization interface.
For more information, please visit our help center. Our teams are always at your disposal!