Split expenses
You can split an expense to allocate amounts across categories, projects (cost centers), or custom fields. The split option allows you to review suggested allocations, make adjustments, and ensure the expense aligns with company policy and reimbursement rules.
Split an expense on the web
To split an expense on the web, follow these steps:
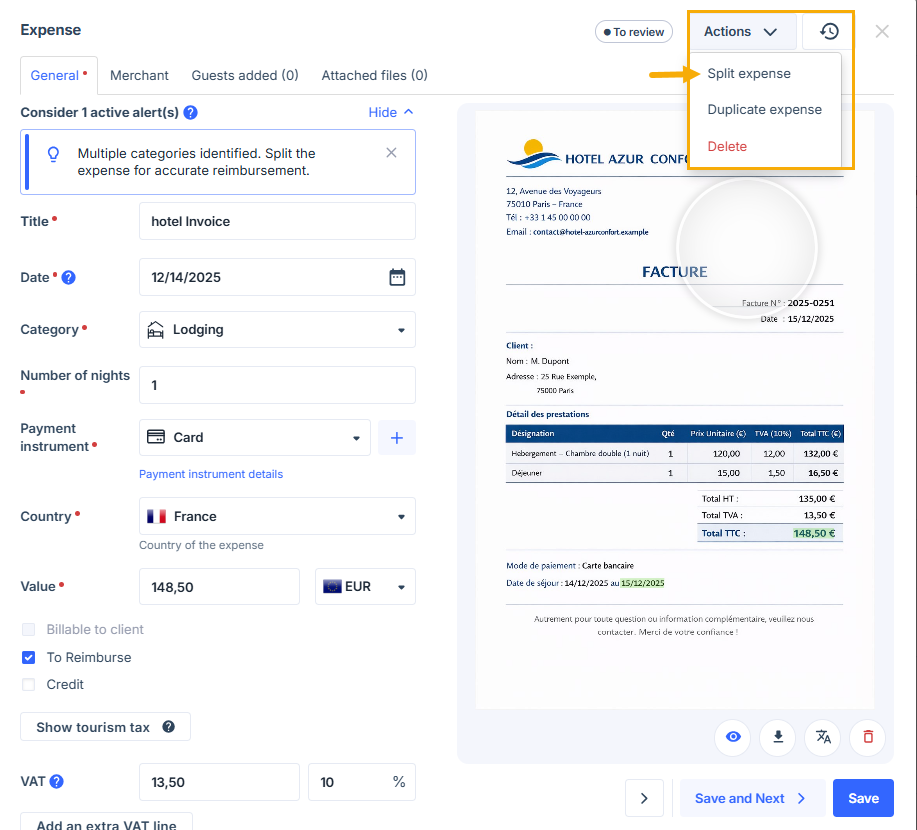
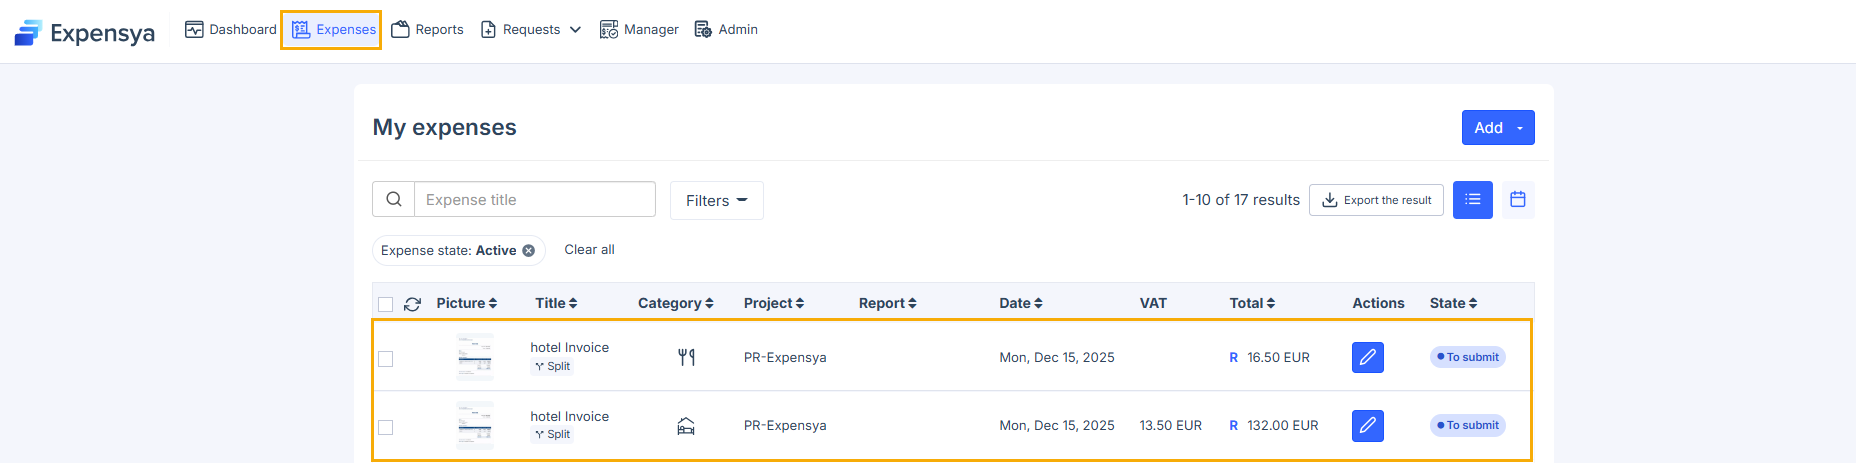
- Open the expense you want to split.
- Click the Actions drop-down menu, then select Split expense.
- After you click Split expense:
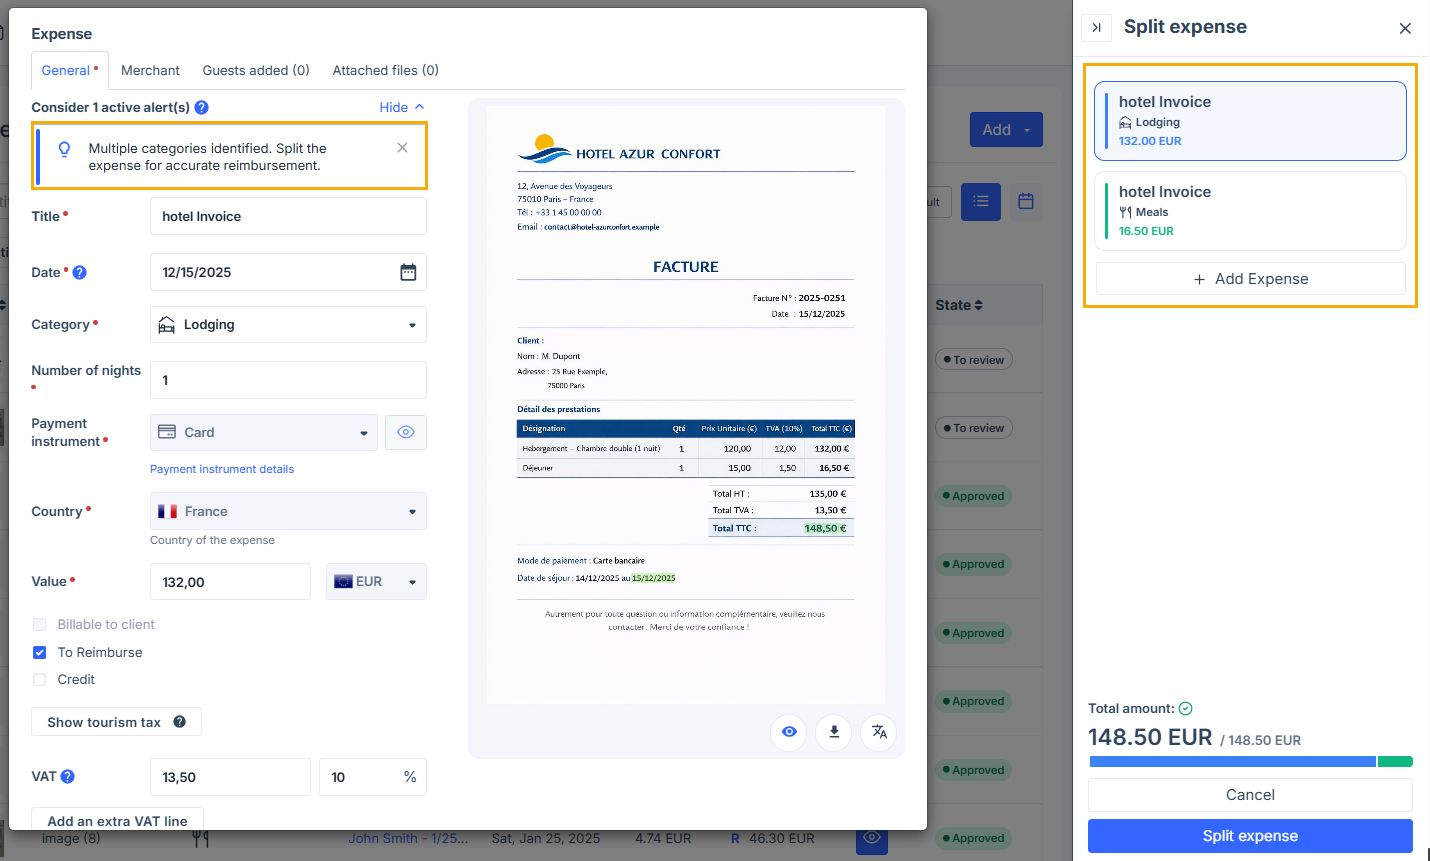
- If the system identifies multiple categories, split suggestions appear automatically. Each suggestion includes the detected category and the amount allocated to it, as shown on the receipt. You can click any suggested split to edit it, or click Add Expense to create a new split.
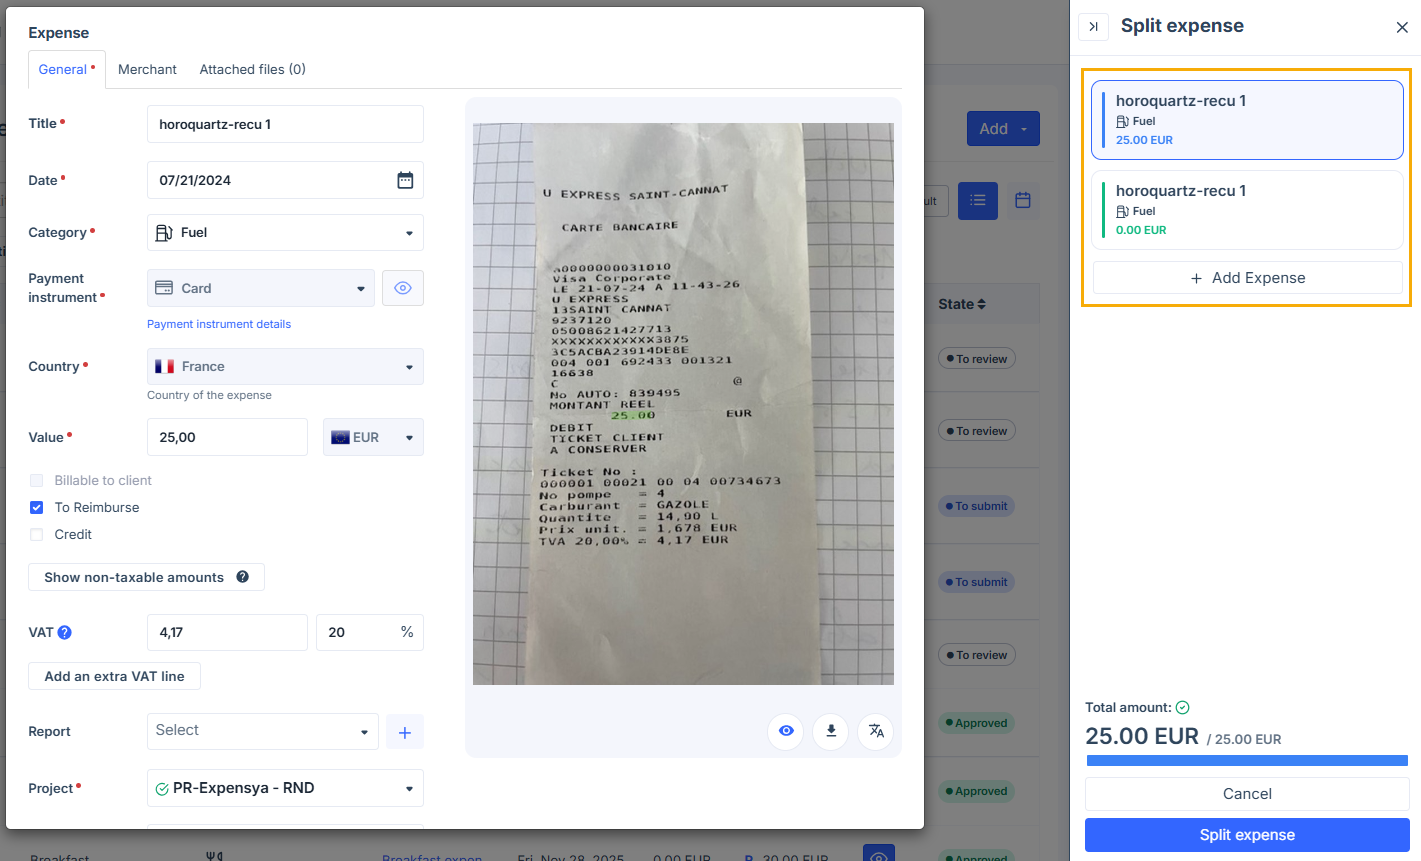
- If the system identifies only one category, it will two split options by default. One option includes the total amount, and the second option includes an amount of 0. You can edit the options to allocate amounts across different projects (cost centers) or custom field values, or click Add Expense to create a new split.
In both cases, you can create up to 5 split expenses, as long as their total matches the original expense amount. Each split follows company rules and country-specific policies. Note that a split expense cannot be split again.
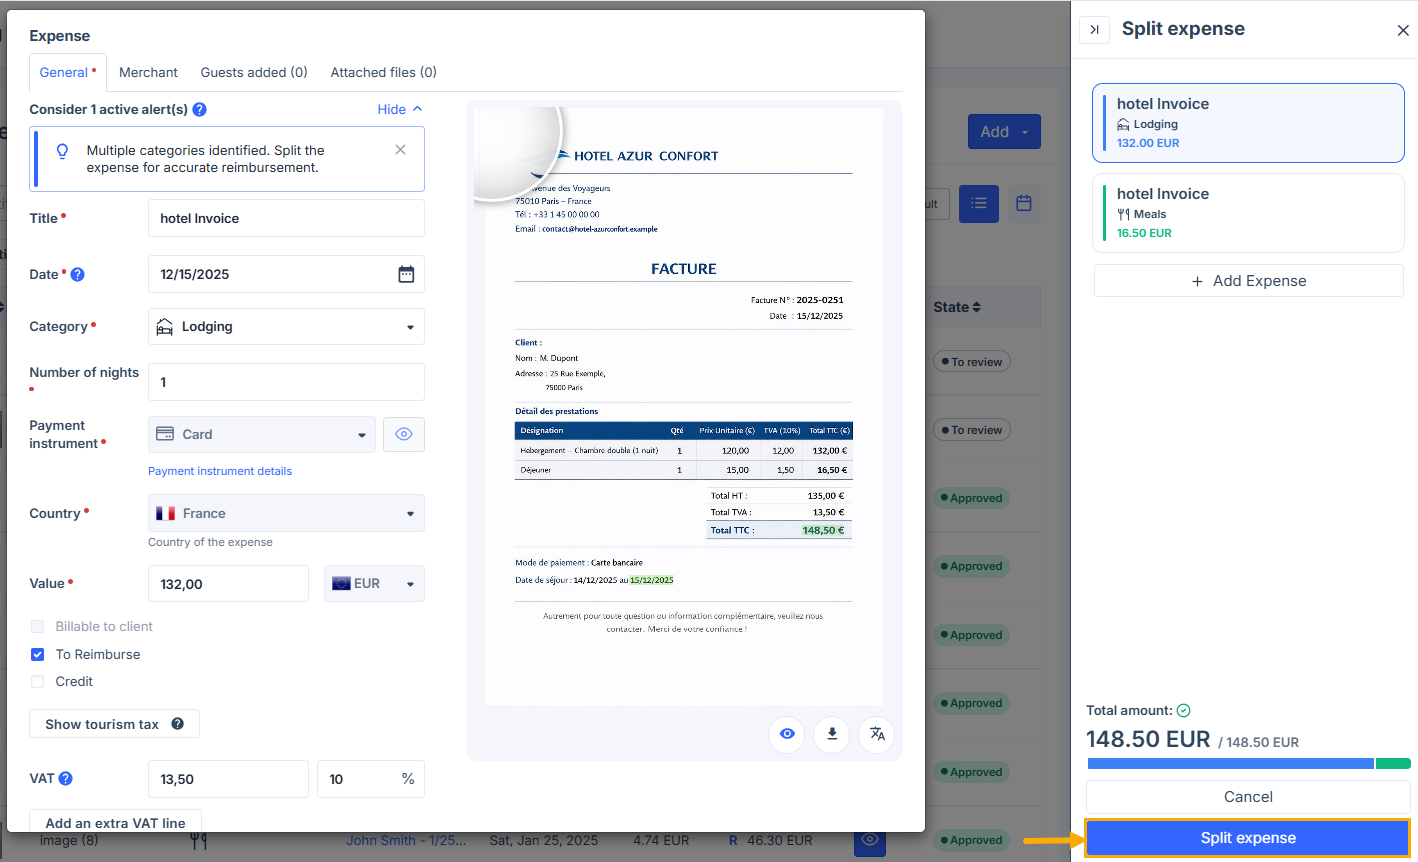
- Click Split expense to confirm. The Split expense button will remain inactive until the total of all split options equals the original expense amount.
- After the split is complete, each option becomes a separate expense. You can then open any split expense to review or edit its details before submitting it for approval.
Split an expense on the mobile app
To split an expense on the mobile app, follow these steps:
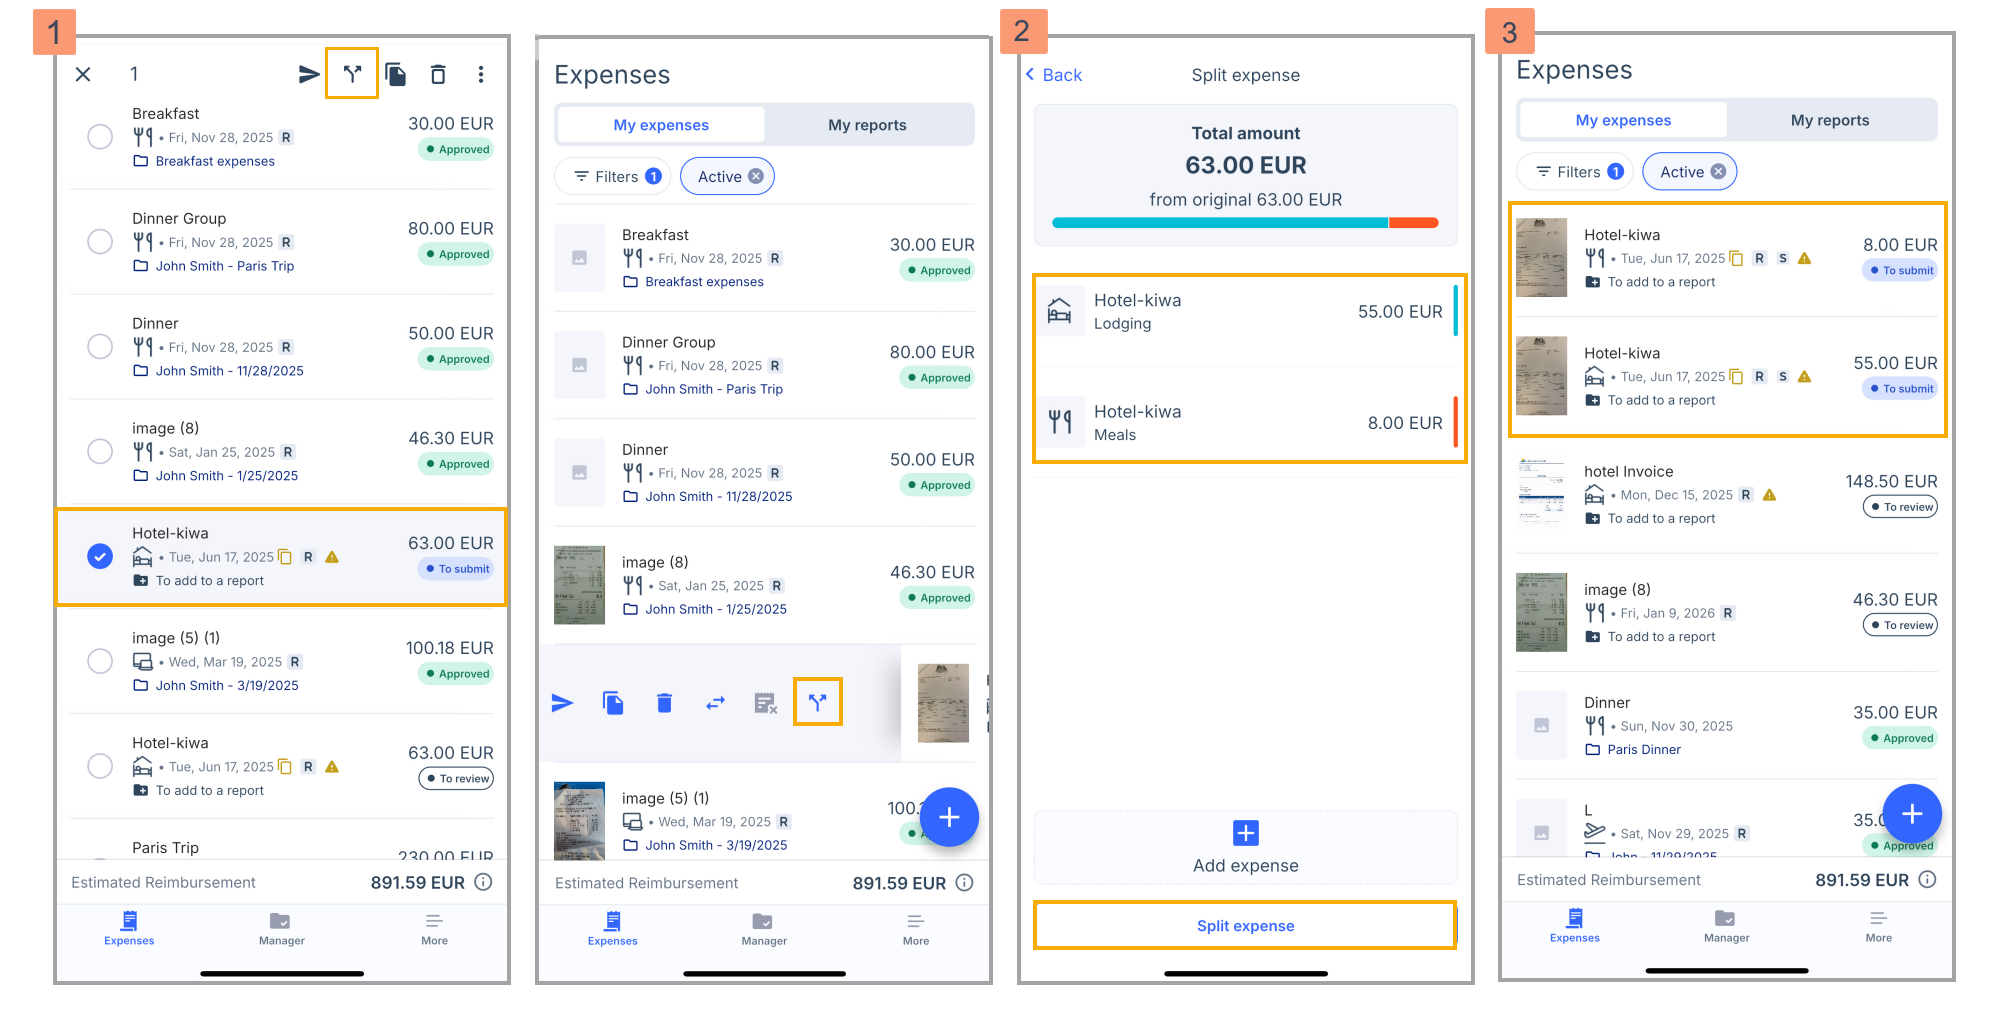
- Find the expense you want to split. After that, press and hold the expense, then tap the split icon. You can also swipe the expense from left to right and tap the split icon.
- The system displays split options. Like on the web, suggested splits depend on whether one or more categories are detected. You can edit any split or tap Add expense to create a new one. Tap Split expense to confirm.
- After splitting, each option appears as a separate expense. You can then open any split expense to review or edit its details before submitting it for approval.
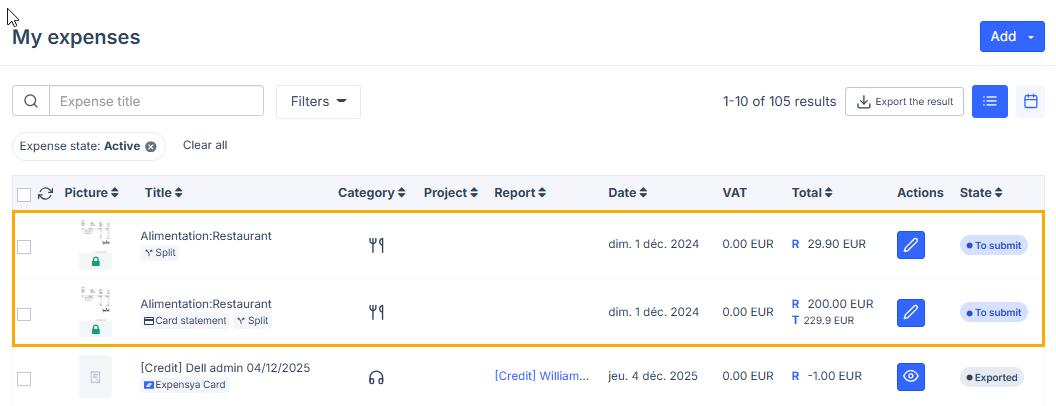
Split transaction-linked expenses
You can split an expense that is linked to a transaction only if the transaction is validated. The split process and behavior are the same as for non-transaction expenses.
Keep the following rules in mind:
- The original transaction remains linked to the main expense, which is the first split part.
- You can delete a split expense only if the main expense has not been submitted yet.
- The duplicate option is not available for expenses linked to a transaction or for expenses created from a split.
Administrators and accountants can split expenses at allowed statuses without rejecting reports.